Ever wondered why some embroidered flowers look flat while others practically leap off the fabric? The difference lies in understanding which stitches work best, how to layer your thread for depth, and when to add those finishing details that make a flower feel alive. Whether you’re decorating a tote bag for an upcoming spring event or creating a thoughtful handmade gift, embroidering flowers is a rewarding skill that combines simple stitching with real artistic control. This guide walks you through the exact process, from marking your first pattern to finishing your final French knot.
Quick Questions and Answers
Question: What tools do I need to embroider flowers step by step? Most beginner flower embroidery projects use embroidery floss, a needle, an embroidery hoop, and fabric, plus a removable fabric marker or transfer paper for the pattern. Some tutorials recommend stabilizer behind the fabric, especially for clothing, and a second needle or separate thread color if you’re weaving a flower center.
Question: How do you start embroidering a flower for beginners? Begin by hooping the fabric so it stays taut, then transfer a simple flower shape such as a circle with a marked center. Many beginner guides start with a basic structure like straight stitches, spokes, or petals before adding the center and outer details.
Question: Which stitch is easiest for flower embroidery? Straight stitch and lazy daisy stitch are among the simplest beginner flower stitches because they create basic petals with minimal shaping. Tutorials also use French knots for centers and woven circles for fuller flowers, but those usually build on the same simple starting layout.
What You Need
| Item | Purpose | Notes |
|---|---|---|
| Embroidery floss (6 strands) | Main stitching thread | Separate strands for different effects; 3 strands for delicate work, 6 for filling |
| Embroidery needle | Piercing and threading | Size 7–9 works for most floss weights |
| Embroidery hoop (4–8 inches) | Keeps fabric taut during stitching | Wooden or plastic; tighten so fabric is drum-tight but not warped |
| Fabric (linen, cotton, or blend) | Base for your design | Smooth, medium-weight fabric works best for beginners |
| Water-soluble fabric marker | Pattern transfer | Disappears when wet; allows for clean marking without residue |
| Stabilizer (optional but recommended) | Prevents puckering on clothing | Place behind fabric when embroidering garments |
| Light box or sunny window | Design transfer aid | Helps trace patterns onto fabric cleanly |
The hoop is your foundation. A drum-tight hoop prevents shifting while you stitch, but overtightening can warp the weave and distort your finished piece. Aim for a tension where the fabric doesn’t move but the threads still lie flat.
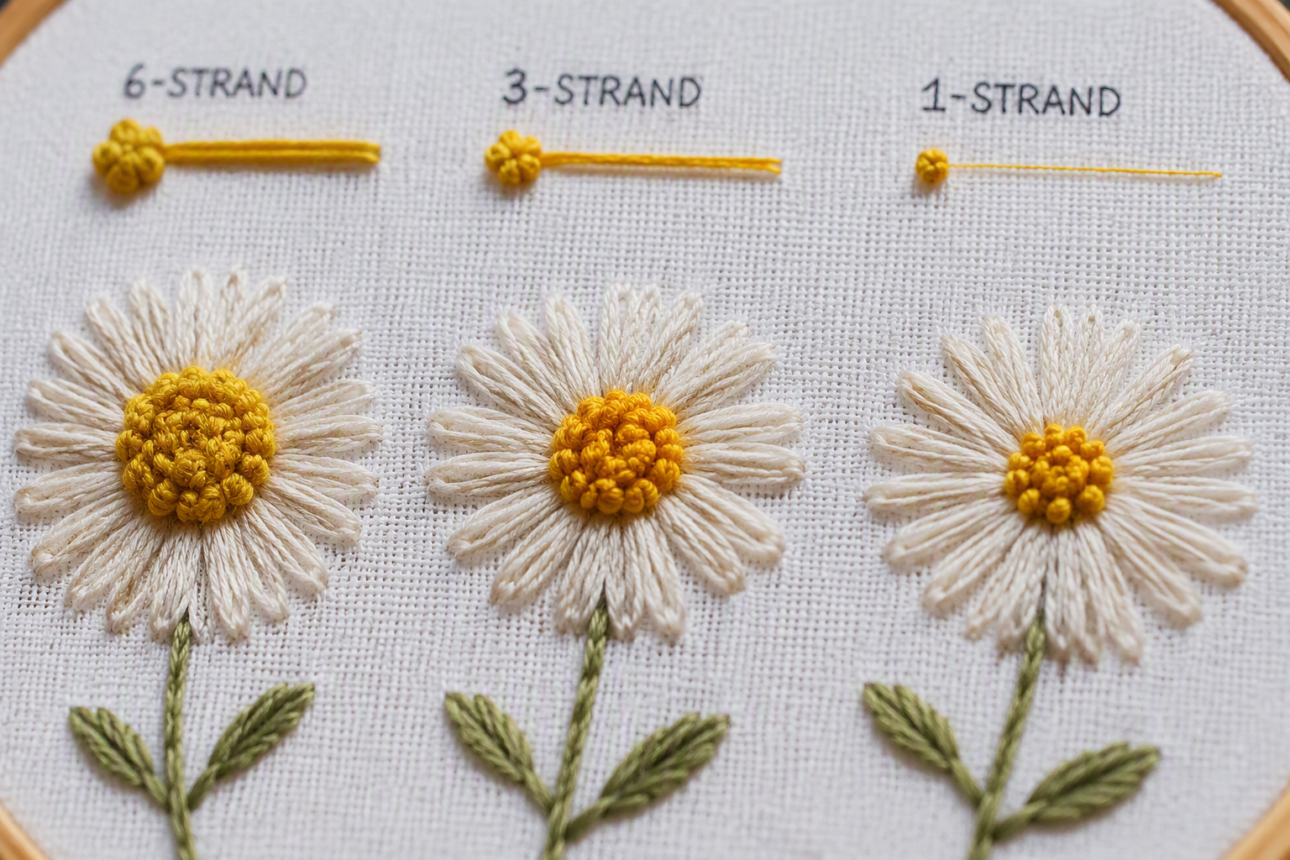
Embroidery floss comes bundled as 6 strands twisted together. You’ll separate these strands depending on your needs. Three strands create delicate, fine lines perfect for stems. Six strands fill larger areas like leaves with a dense, smooth finish. Single strands are excellent for highlighting and adding shadows to petals.
Your needle matters more than most beginners realize. A needle too thick for your thread will leave visible holes. A needle too thin will fray the floss. Size 7–9 embroidery needles work for most standard 6-strand floss.
Step 1: Transfer Your Pattern
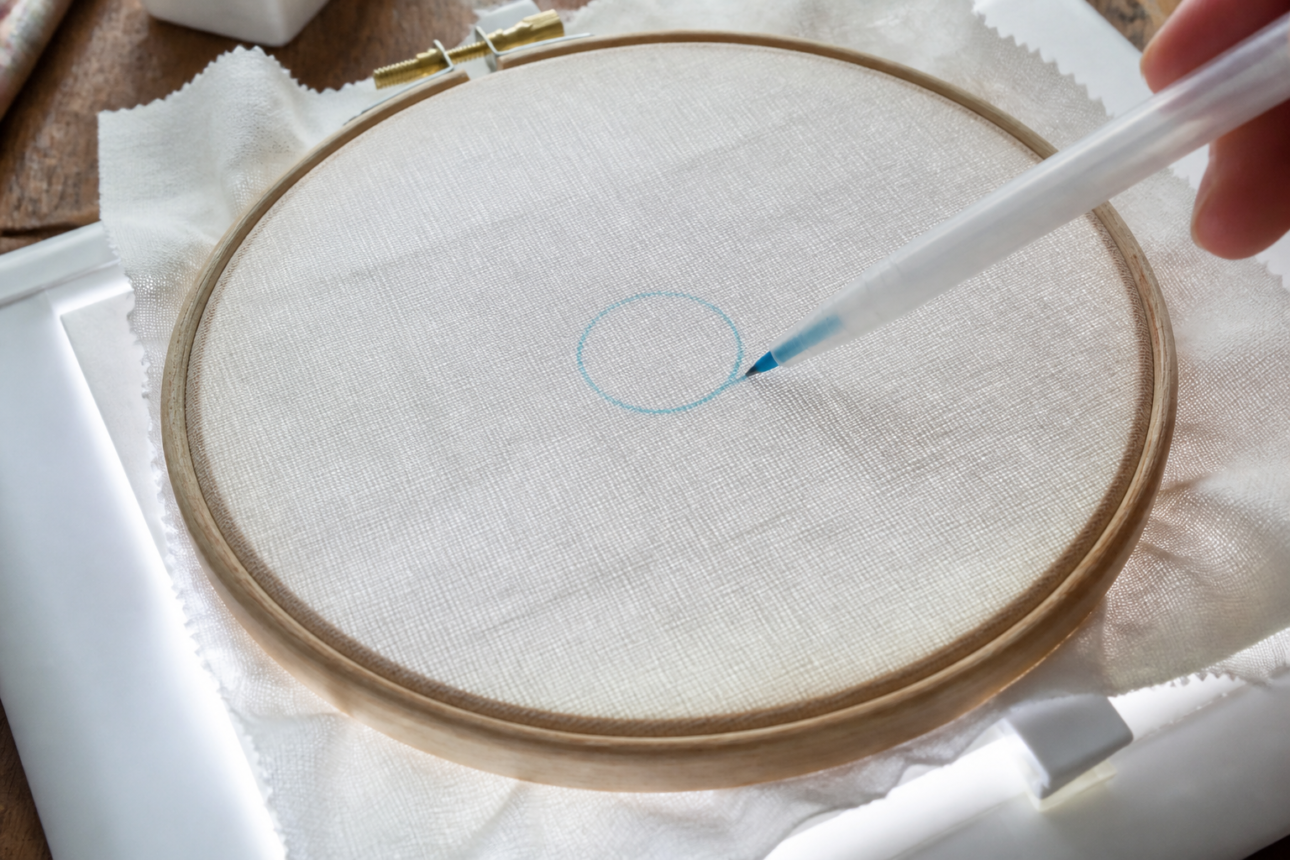
The pattern transfer sets up your entire project. A sloppy transfer leads to crooked petals and misaligned centers. Clean lines give you something precise to follow.
Start by sketching your flower design directly onto paper first. Keep it simple for your first attempt—a circle about one inch wide works perfectly. Mark the center point with a small dot.
If you’re not confident drawing freehand, print a pattern from a reference image or download a beginner flower template. Place your printed pattern under the fabric and use a light box or hold it up to a sunny window. The light shines through, and you can trace the outline directly onto your fabric with a water-soluble marker.
Water-soluble markers are your friend here. Unlike regular pens, they disappear completely when you wash your finished piece. Draw lightly—you’re creating a guide, not a permanent mark. Press just hard enough that you can see the line from the front.
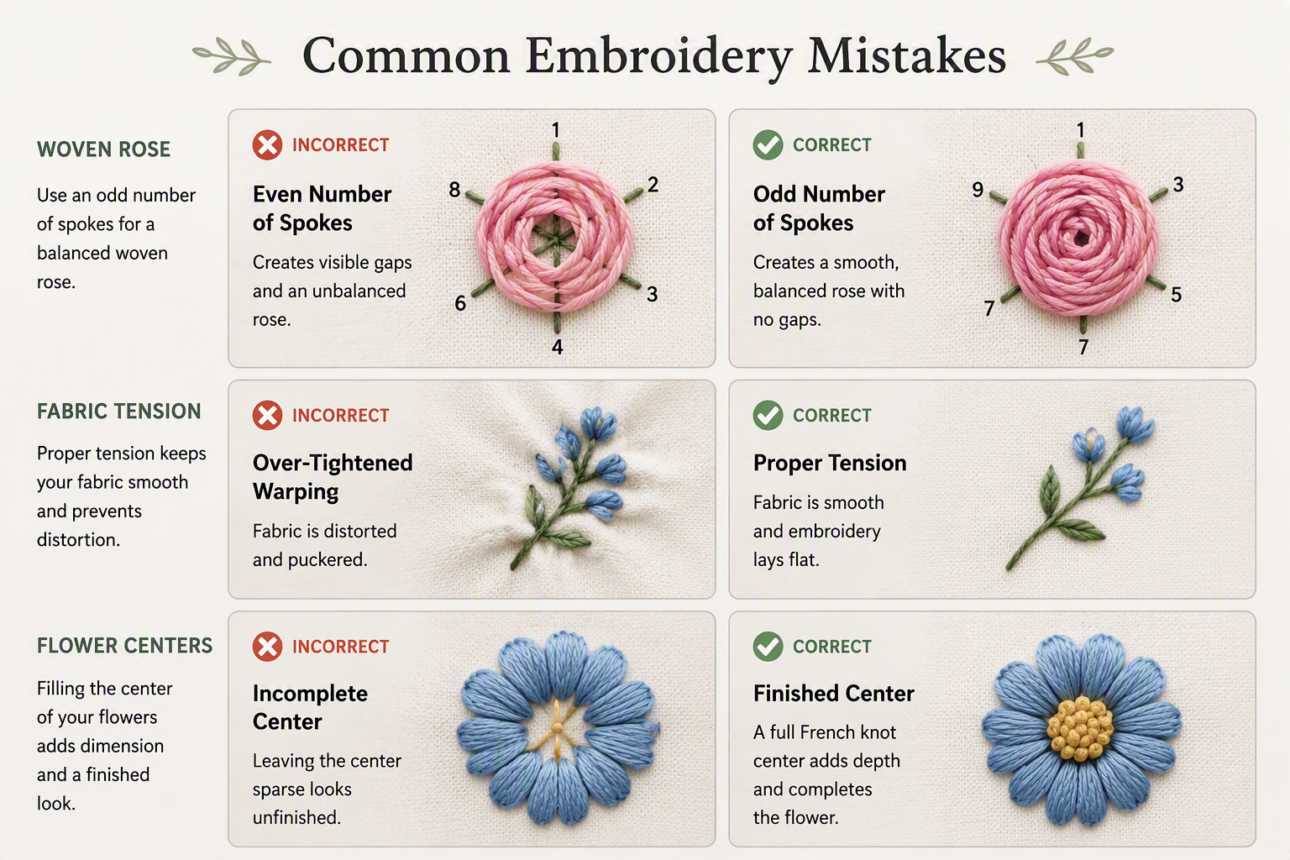
For a woven flower, draw a circle about one inch wide. Then, starting from the center dot, draw an odd number of spokes radiating outward like wheel spokes. Five or seven spokes work best. Never use an even number; the weaving pattern won’t work correctly with even spokes.
Once your pattern is marked, place the fabric in the embroidery hoop. Position the hoop so your flower design sits in the center. Tighten the outer ring until the fabric is taut but not stretched to the point of distortion. The fabric should feel like a drum skin—firm but not ready to tear.
Step 2: Stitch the Stem and Leaves
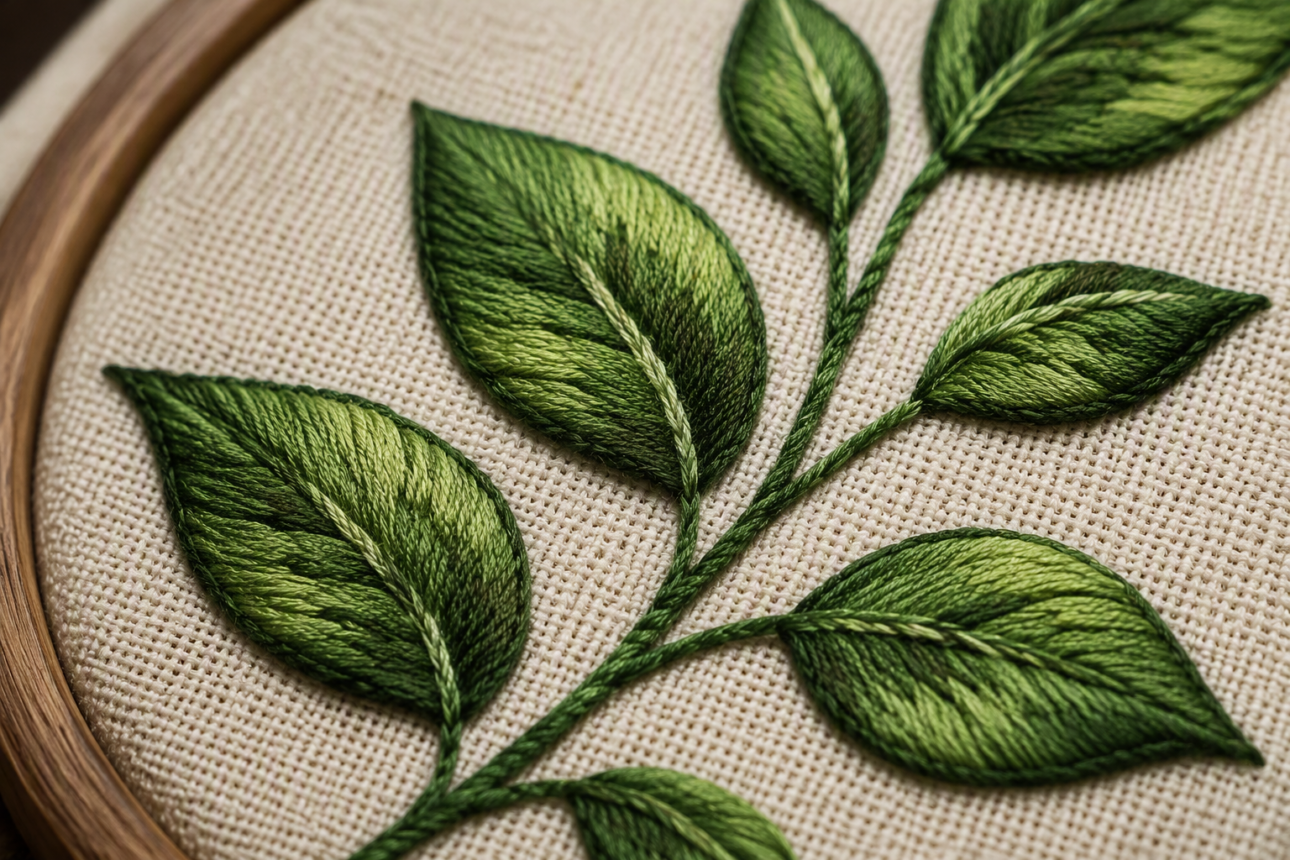
Working from the background forward is the pro move. Stems and leaves establish the foundation. Once they’re done, petals and centers feel more intentional rather than floating randomly.
Use a split back stitch for the stem. This stitch creates a clean, defined line perfect for stems. Thread your needle with three strands of medium green floss. The split back stitch works like this: bring your needle up through the fabric, down a short distance ahead, then back up through the middle of your previous stitch, splitting the floss. Repeat this motion along your stem line. The stitch creates a slight relief and holds its shape beautifully.
For leaves, switch to satin stitch with six strands of green floss. Satin stitch is simple but powerful—it’s basically just parallel lines of thread laid closely together. Mark the leaf shape with your water-soluble pen first. Then fill the entire leaf by laying stitches side by side, following the direction of the leaf from base to tip. Keep your tension consistent so the stitches lie flat without puckering.
Once your base leaf is complete, add depth with single-strand highlights and shadows. Use a lighter green single strand to stitch a few lines on one edge of the leaf, suggesting light. Use a darker green single strand on the opposite edge. This layering transforms a flat shape into something with real dimension.
The key to realistic leaves is directional stitching. Stitches should follow the leaf’s natural growth direction—from the center vein outward at a slight angle. This mimics how a real leaf lies.
Step 3: Create the Petal Base
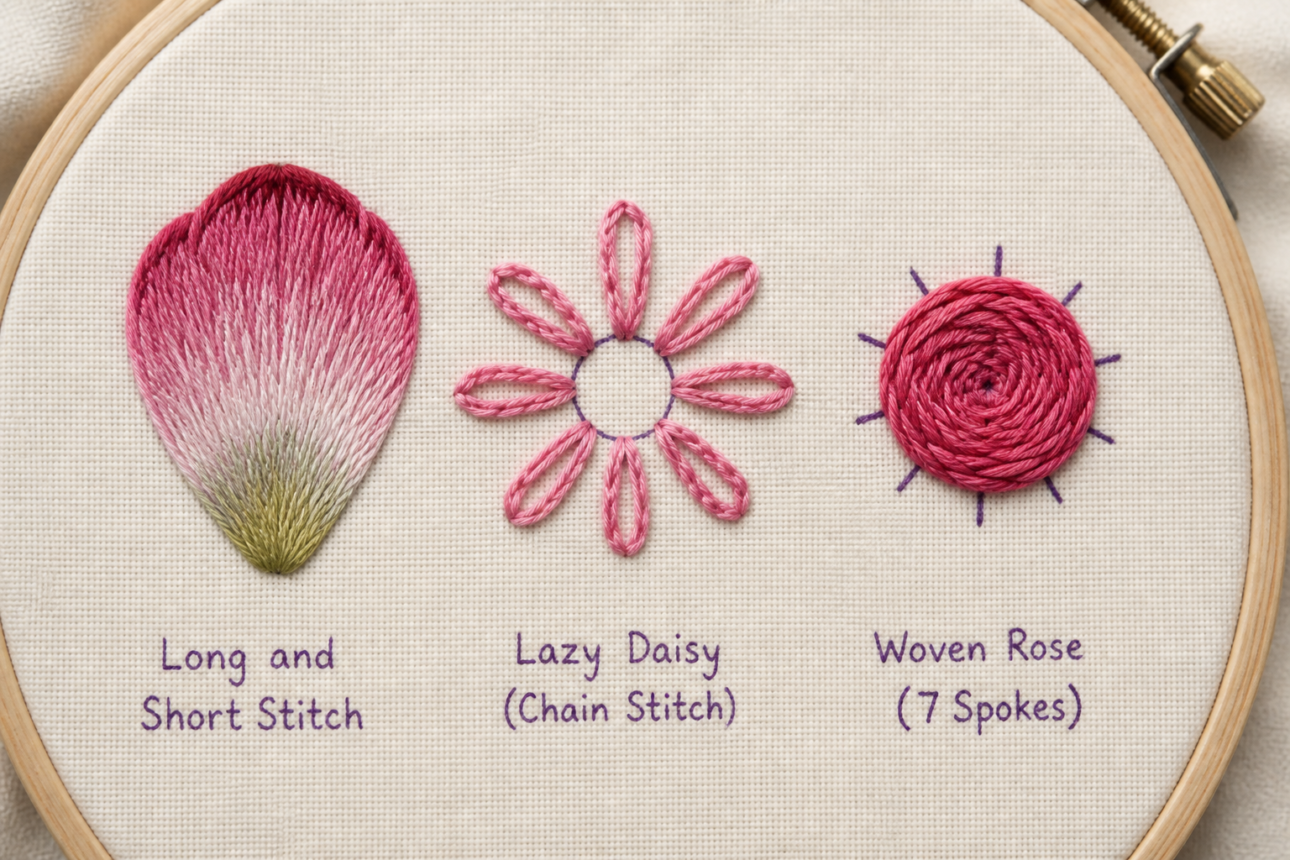
Petals are where flowers come alive. Your choice here determines whether the flower looks flat or dimensional.
For beginner petals, start with long-and-short stitch. This stitch is exactly what it sounds like: you alternate between longer stitches and shorter stitches, layering them to create a gradient effect. It takes a bit more practice than straight stitch, but it’s worth it.
Mark your petal shapes inside your circle. You want four to six petals depending on your flower type. Use a light pencil line or water-soluble marker to define each petal’s boundaries.
Choose a base color for your petals—say, soft pink. Thread your needle with four strands of this color. Start at the outer edge of the first petal and work inward toward the circle center. Lay your first row of stitches along the petal’s length, alternating between longer stitches (about half an inch) and shorter stitches (about a quarter inch). When you reach the center, switch to a slightly darker shade of pink and stitch a second row, overlapping your first row slightly. This overlap creates the gradient.
If long-and-short stitch feels too complex, use lazy daisy stitch instead. This is genuinely beginner-friendly. Mark a circle, then place three or more chain stitches inside that circle. Each chain stitch becomes a petal. Bring your needle up through the fabric, then down right next to it, creating a loop. Come up just outside that loop to anchor it. Space your petals evenly around the circle, and you’ve got a flower.
Another solid option is simple straight stitch petals. Use five or seven straight stitches radiating from the center point outward like spokes. Each stitch becomes a petal. Keep them evenly spaced and roughly the same length. This creates a simple but charming flower.
Step 4: Build Woven Flowers
Woven flowers are more advanced but striking. They look complicated but follow a logical pattern once you understand the structure.
You already drew your circle and odd-numbered spokes in Step 1. Now you’re going to weave thread through those spokes to create petals.
Thread a new needle (or rethread your existing one) with a contrasting color—perhaps a coral or magenta. Starting from the center, bring your needle up through the fabric at the circle’s center. Now you’re going to weave over and under the spokes in a clockwise motion.
Come up through the fabric at the center, then thread your needle over the first spoke, under the second spoke, over the third spoke, and so on. When you’ve gone around once, you’re back at the starting spoke, but this time you’ll be in the space you skipped before. Thread under where you went over before, and over where you went under.
Keep weaving in this pattern, spiraling outward from the center. The spokes act as a loom. Your thread winds around them, creating petal-like sections between each spoke. When you reach the outer edge of the circle, tie off your thread on the back.
This is why odd numbers of spokes matter. With an even number, your weaving pattern breaks down—you’d always be threading over the same spokes. With odd numbers, the pattern naturally alternates, creating an even distribution.
For a woven rose specifically, you can use three, five, or seven single stitches arranged in a circle before weaving the needle up and down through them. The principle is identical.
Step 5: Add Texture With French Knots
French knots are the secret weapon for realistic flower centers. They add dimension and texture that makes a flat embroidery feel alive.
Thread your needle with three strands of yellow or a contrasting center color. Bring your needle up through the center of your flower, right at the spot where all your petals meet.
Here’s the French knot technique: Wrap the thread around the needle shaft one to three times, depending on how chunky you want the knot. Hold the wrapped thread taut with your non-needle hand. Push the needle back down through the fabric right next to (but not in the exact same hole as) where you came up. As the needle goes down, the wrapped thread forms a knot on the surface.
Practice this a few times on scrap fabric first. The tension is everything. Too loose and the knot disappears. Too tight and you’ll struggle to pull the needle through. Aim for a medium tension where the knot sits raised but stable.
Fill your flower center with multiple French knots, spacing them so they cluster without overlapping too much. Three to seven knots usually creates a full, realistic center. Vary the number of wraps slightly—some with one wrap, others with two or three—so the knots aren’t all identical.
If French knots frustrate you, use a bullion knot instead. A bullion knot is similar but you wrap the thread more times (around five to eight times) before piercing back down. The result is a slightly longer, more textured element.
Step 6: Layer for Depth and Shadow
This is the move that separates beginner work from polished pieces. Layering single strands over your base petals creates shadow and light, making flowers look three-dimensional.
Once your petal base is complete, thread a single strand of a darker version of your petal color. Stitch carefully along one edge of each petal, following the petal’s outline. This darker line suggests shadow.
Then use a single strand of a lighter color—almost white, or a very pale version of your petal color—and stitch along the opposite edge. This lighter line suggests light hitting that edge.
The contrast between light and shadow is subtle but powerful. It’s the difference between a flat painted flower and one that seems to curve and fold in space. You’re not painting shading; you’re using thread direction and color to suggest it.
Don’t overdo this step on your first attempt. Two or three strategic shadow lines per petal are enough. Too many lines create visual clutter instead of depth.
This layering technique works on stems, leaves, and petals. Anywhere you want dimension, add a darker line on one side and a lighter line on the other.
Tips
Thread tension is non-negotiable. Stitches that are too tight will pucker the fabric and distort your design. Stitches that are too loose will look sloppy and slide around. Aim for consistent, gentle tension where the thread lies flat and smooth.
Separate your floss deliberately. Twisted floss creates a rough texture. Separated strands lie flatter and catch light better. Most embroiderers separate their floss completely, then recombine just the number of strands they need.
Hoop placement matters. Move your hoop as you work so you’re always stitching in the center of the hoop, never at the edges. Fabric at the hoop’s edges is harder to control.
Practice on inexpensive fabric first. Muslin or quilting cotton costs little and accepts stitches beautifully. Your first flower won’t be perfect—that’s fine. Your third one will be noticeably better.
Invest in quality embroidery floss. Cheap floss shreds, tangles, and looks dull. Brands like DMC and Anchor have been around for decades for a reason.
Knot the back of your work, don’t knot the front. Knots on the front create lumps under your stitches. Bring your needle up through the fabric several stitches away from where you’re starting, then run your thread under those stitches on the back before coming back up to your starting point. This anchors your thread without creating a visible knot.
Remove the hoop as soon as you finish. Leaving fabric in the hoop long-term creates a permanent crease that’s hard to remove.
FAQ
Q: How do you embroider a simple flower center?
A common method is the French knot, which several tutorials use for flower centers or stamen detail. Bring the needle up, wrap the thread around the needle several times, and then insert the needle back near the original point to anchor the knot. Start with one or two wraps if you’re learning, then increase to three wraps once you’ve got the motion down. Cluster multiple knots together for a fuller center.
Q: Can I embroider flowers without a pattern?
Yes, some tutorials show freehand flower drawing directly on the fabric if you already understand the shape. Most beginner guides recommend tracing or transferring a pattern first because it helps keep the circle, center, petals, and spacing consistent. If you do want to draw freehand, sketch lightly in pencil on paper first, then transfer that sketch to your fabric using a light source.
Q: Why should the number of flower spokes be odd?
In woven flower methods, an odd number of spokes helps the flower look balanced and is specifically recommended in multiple tutorials. Five or seven spokes are best, and the number should be uneven for the weaving pattern to work correctly. An even number of spokes breaks the over-and-under pattern and results in a tangled, incomplete weave.
Q: How long does it take to embroider a small flower?
The duration depends on stitch type, flower size, and thread count. A simple beginner flower with straight stitches or lazy daisies takes maybe 30 minutes to an hour. A layered flower with shading, French knots, and multiple strand changes could take two to three hours. Your first attempt will take longer than your fifth.
Q: What mistakes do beginners make when embroidering flowers?
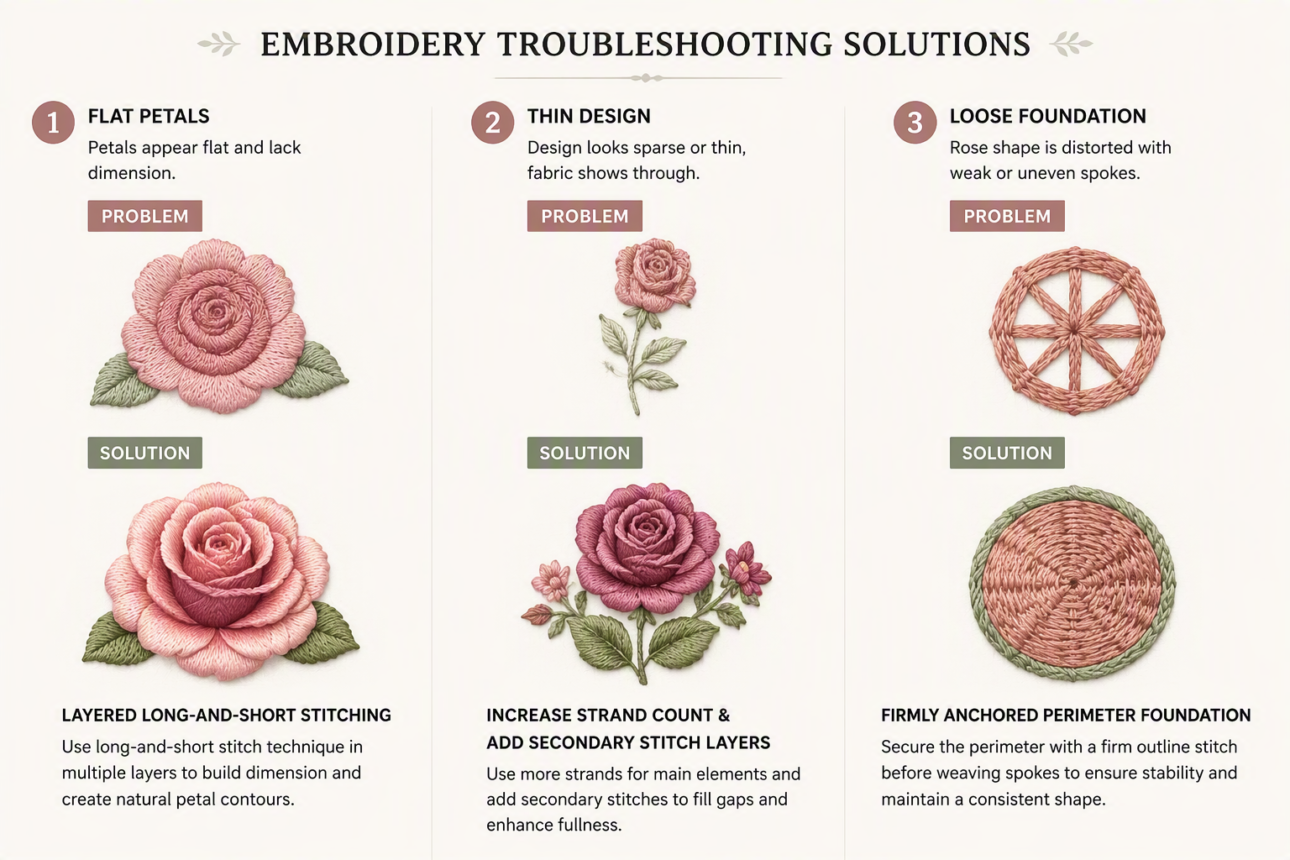
Common mistakes include pulling the fabric too tightly in the hoop (which warps it permanently), using too few or too many spokes in woven flowers (which breaks the pattern), and leaving the center underfilled so the flower looks sparse. Tutorials also warn that a flower can look flatter or less realistic if you don’t vary stitch direction or add light and shadow layers.
Q: How do I make embroidered flowers look more realistic?
Use longer and shorter stitches in the direction of the petals, then add lighter and darker thread layers over the base shape. Add a textured center such as French knots and vary thread strands to create depth and contrast. Directional stitching is key—stitches should follow the natural growth direction of petals and leaves, not just fill space randomly.
Q: Is embroidery on clothing different from embroidery on fabric?
The basic stitches are similar, but clothing usually needs extra preparation so the fabric doesn’t pucker or shift. One clothing tutorial recommends stabilizer behind the design and careful hooping before transferring the pattern and stitching the petals and center. The stabilizer keeps the garment fabric from bunching while you stitch, and you can remove it once you’re done.
My Experience With How to Embroider Flowers Step by Step
I started embroidering flowers because I wanted to personalize a denim jacket, and I was convinced it would be impossible. Turns out, it’s not. My first flower looked like something a toddler might have sketched, honestly—petals were uneven, the center was lumpy, and I’d accidentally pulled the fabric so tight it warped when I removed the hoop.
But here’s what changed everything: understanding that embroidered flowers aren’t about perfect technique. They’re about sequences. Once I stopped trying to make my first petal perfect and instead focused on the system—transfer pattern, stitch stem, add petals, layer shadows—everything got easier. My second flower was notably better. My fifth was actually impressive.
The real insight is that single-strand layering separates bedroom-wall embroidery from stuff people actually notice. It’s not complicated; it’s just one more step. One darker line on the petal’s left edge, one lighter line on the right edge, and suddenly the flower has shape. No one talks about it much, but it’s the difference between flat and dimensional.
What’s your biggest hesitation about starting—the pattern transfer, the stitch techniques, or something else?
Conclusion
Embroidering flowers is a learnable skill that rewards practice more than natural talent. You’ve got the tools, the stitch patterns, and the exact sequence. The hardest part is starting.
Your first flower won’t be gallery-worthy. Accept that now and you’ll actually enjoy the process instead of judging yourself at every stitch. By your third or fourth flower, you’ll notice real improvement. Petals will sit flatter. Centers will look fuller. Shadows will suggest depth.
The gateway skill is understanding that flowers aren’t single stitches—they’re sequences. Stem first, leaves second, petal base third, shadows fourth. Follow that order and your flowers will have a foundation instead of feeling random.
Start with a simple shape: a circle, five straight-stitch petals, and a cluster of French knots in the center. Do that twice. Then experiment with lazy daisy. Then try woven flowers. Each technique builds on skills you’ve already practiced.
Keep your hoop drum-tight but not warped. Separate your floss. Match your needle to your thread weight. Layer your shadows. These fundamentals matter more than finding the perfect stitch.
You’re ready. Grab some fabric, mark a circle, and stitch your first petal.
References
- YouTube. (n.d.). How to Embroider Flowers on Your Clothing. https://www.youtube.com/watch?v=ij5s2UERr-0
- Instructables. (n.d.). How to Hand Embroider Flowers. https://www.instructables.com/How-to-Hand-Embroider-Flowers/
- Pumora. (n.d.). How to embroider flowers – 16 simple stitches. https://pumora.com/how-to-embroider-flowers/
- Treasurie. (n.d.). How to Embroider Flowers – 15 Easy Stitches. https://blog.treasurie.com/embroidery-flowers/
- WikiHow. (n.d.). How to Embroider Flowers: 8 Simple Beginner Stitches. https://www.wikihow.com/Embroider-Flowers
- LoveCrafts. (n.d.). How to embroider flowers: 5 simple ways!. https://www.lovecrafts.com/en-us/c/article/how-to-embroider-flowers
- Domestika. (n.d.). Embroidery Tutorial: How to Embroider a Flower. https://www.domestika.org/en/blog/10806-embroidery-tutorial-how-to-embroider-a-flower
- YouTube. (n.d.). Easy & Elegant Flower Embroidery: A Step by Step Tutorial. https://www.youtube.com/watch?v=ReMZ9JO8c98

Sarah Anderson . J
I’m the mom behind Wise Mom Blogger, where everyday creativity meets real-life motherhood. I share easy DIY crafts, cozy knitting and crochet projects, beginner-friendly sewing ideas, and family-tested recipes—plus quick baking hacks that make homemade feel doable on busy days.