Want to master a crochet project you can finish in minutes and use for everything from hat appliqués to fall garlands? A basic crochet leaf is exactly that—quick, satisfying, and genuinely useful once you understand the core technique. Whether you’re planning seasonal décor or need handmade embellishments for gifts, learning to crochet leaves opens up real possibilities. This guide walks you through material selection, the exact steps to build a symmetrical leaf, and solutions for the hiccups that trip up beginners. By the end, you’ll have a finished leaf you can make again and again, scaling the size to fit whatever project calls for it.
Quick Questions and Answers
Question: How do you crochet an easy leaf for beginners?
Most beginner leaf patterns start with a short foundation chain, then work stitches down one side of the chain and back up the other side to form the leaf shape. The simplest versions use basic stitches such as single crochet, half double crochet, and double crochet, then finish by fastening off and weaving in the ends. Several free patterns describe this as a quick one-motif project.
Question: What yarn and hook are best for crochet leaf patterns?
Cotton yarn is often recommended because it holds shape well, but many patterns say you can use almost any yarn. Common hook sizes in the sources range from 2 mm to 4.5 mm, with worsted-weight leaves often using about a 3.25 mm to 5 mm hook depending on the desired size. Smaller hooks and finer yarn make dainty leaves, while bulkier yarn makes larger leaves.
Question: Why does my crochet leaf curl or look uneven?
Curling or uneven shaping usually comes from inconsistent tension or from placing stitches in the wrong chain spaces. The leaf forms by working both sides of the foundation chain symmetrically, so missed stitches or extra stitches can distort the outline. Recounting the foundation chain and matching the second side to the first side usually fixes the problem.
Key Takeaways
A single leaf takes 5 to 10 minutes once you’ve practiced the basic stitch sequence.
Cotton yarn provides the crispest stitch definition and holds leaf shape better than synthetic blends.
Hook size and yarn weight determine your finished leaf size—swap materials to scale up or down without changing the pattern.
Working both sides of the foundation chain symmetrically prevents lopsided shapes and curling.
The yarn tail can serve double duty: weaving in the end and attaching the leaf to other projects.
What You Need
Item
Purpose
Notes
Yarn (DK or worsted weight)
Foundation for your leaf structure
Cotton works best for shape retention; any weight works for different sizes
Crochet hook (3.25–4.5 mm)
Creates the stitches
Match hook size to yarn weight for proper tension
Tapestry needle
Weaves in yarn ends and attaches leaves
Blunt tip prevents splitting yarn
Scissors
Cuts yarn cleanly
Any sharp scissors work fine
Scrap yarn (optional)
Practice material before using good yarn
Helps you dial in tension before the real thing
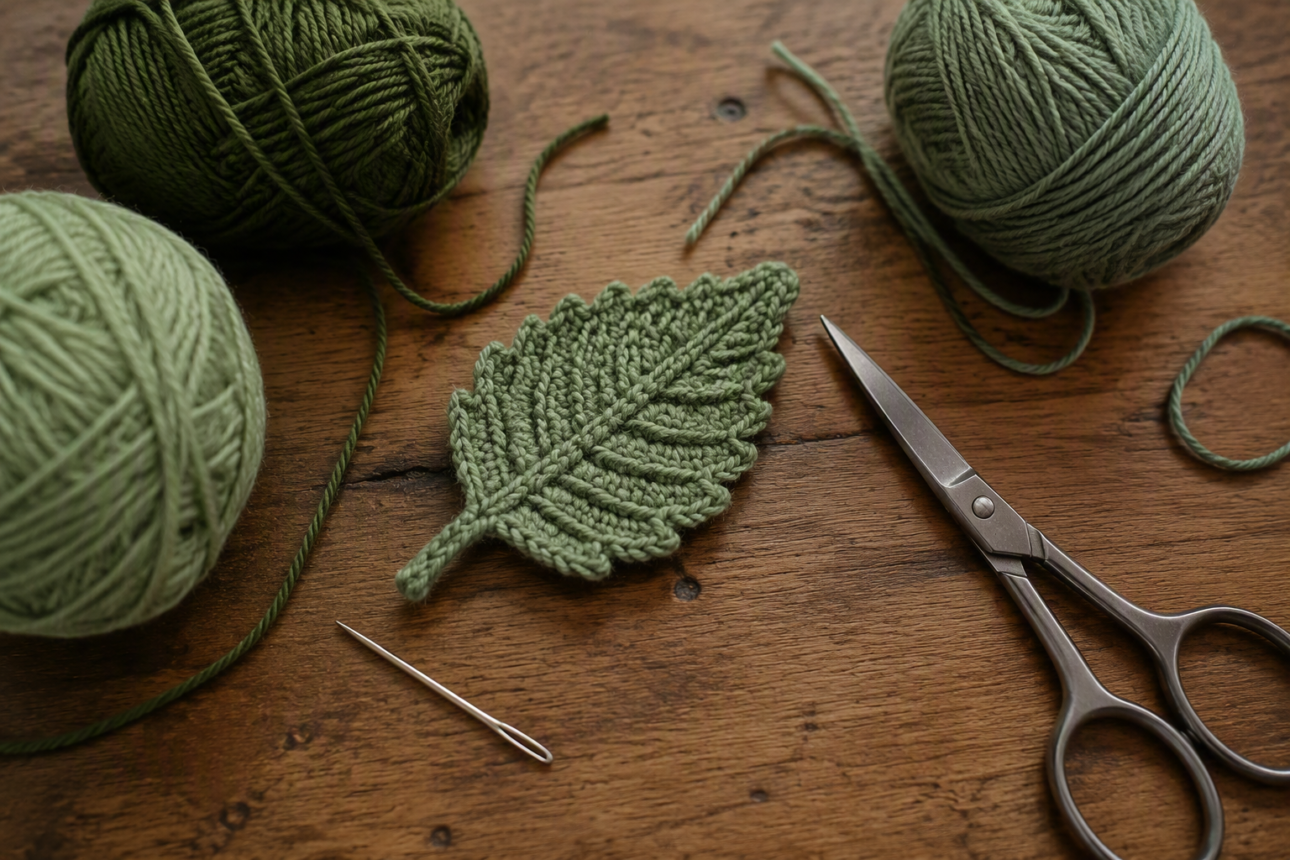
Here’s exactly what you’ll gather before you start. Yarn and hook are the obvious pair—the hook size depends on your yarn weight, so check the yarn label for the recommended hook range. For beginners, DK or worsted-weight yarn is forgiving and easy to see your stitches in. Cotton yarn is the top choice because it holds shape and creates clean, defined edges; acrylic and wool blends work too, but they tend to soften and lose definition compared to cotton. A tapestry needle matters more than it sounds—it’s how you weave in those short yarn tails at the end, and a blunt needle keeps you from accidentally splitting the yarn you just worked with.
Most patterns call for just one yard of yarn or less per leaf, so scrap yarn from other projects works perfectly. Scissors should be sharp enough to cut yarn cleanly without fraying. If you’re totally new to crochet tension, pick up a skein of cheap acrylic to practice on first—this takes the pressure off and lets you mess up without wasting good yarn.
Choosing Your Leaf Size
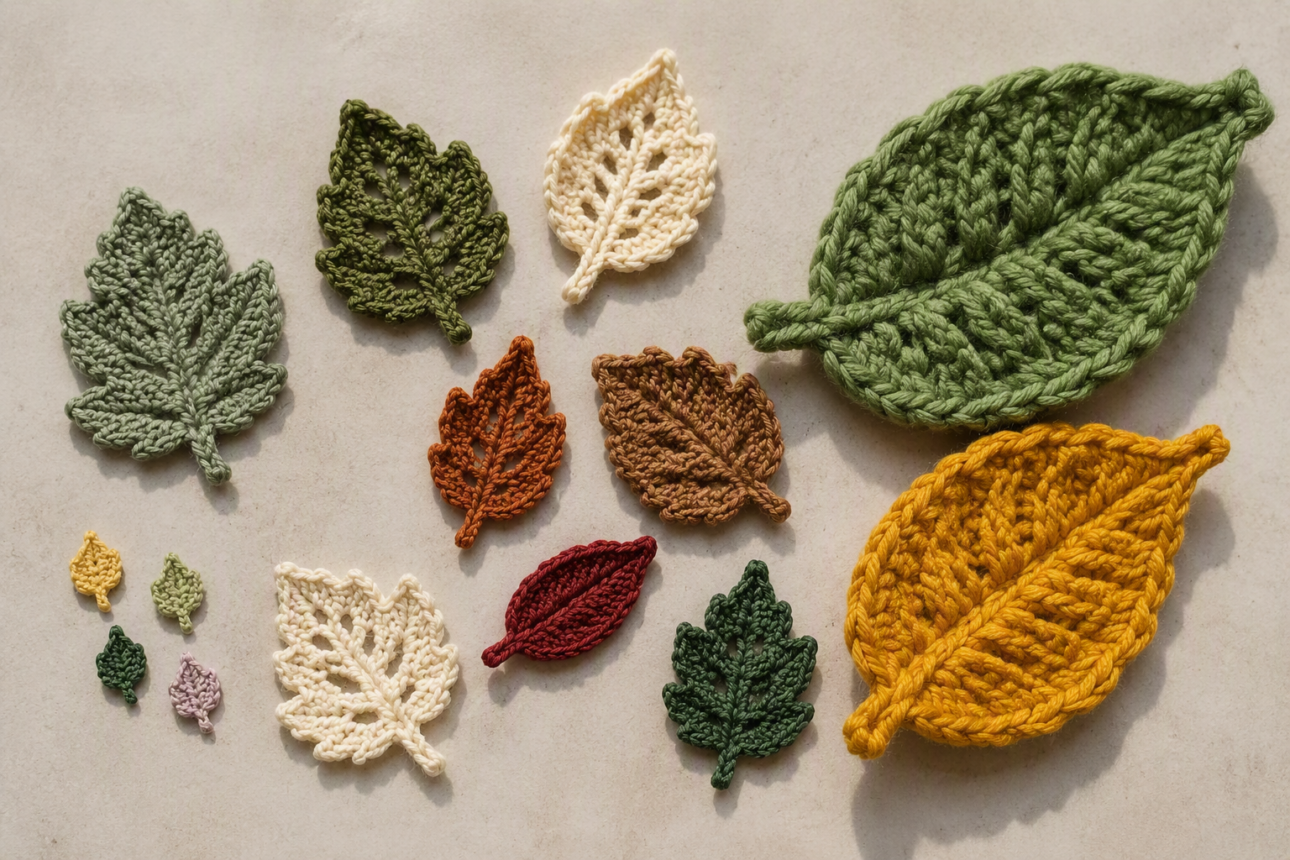
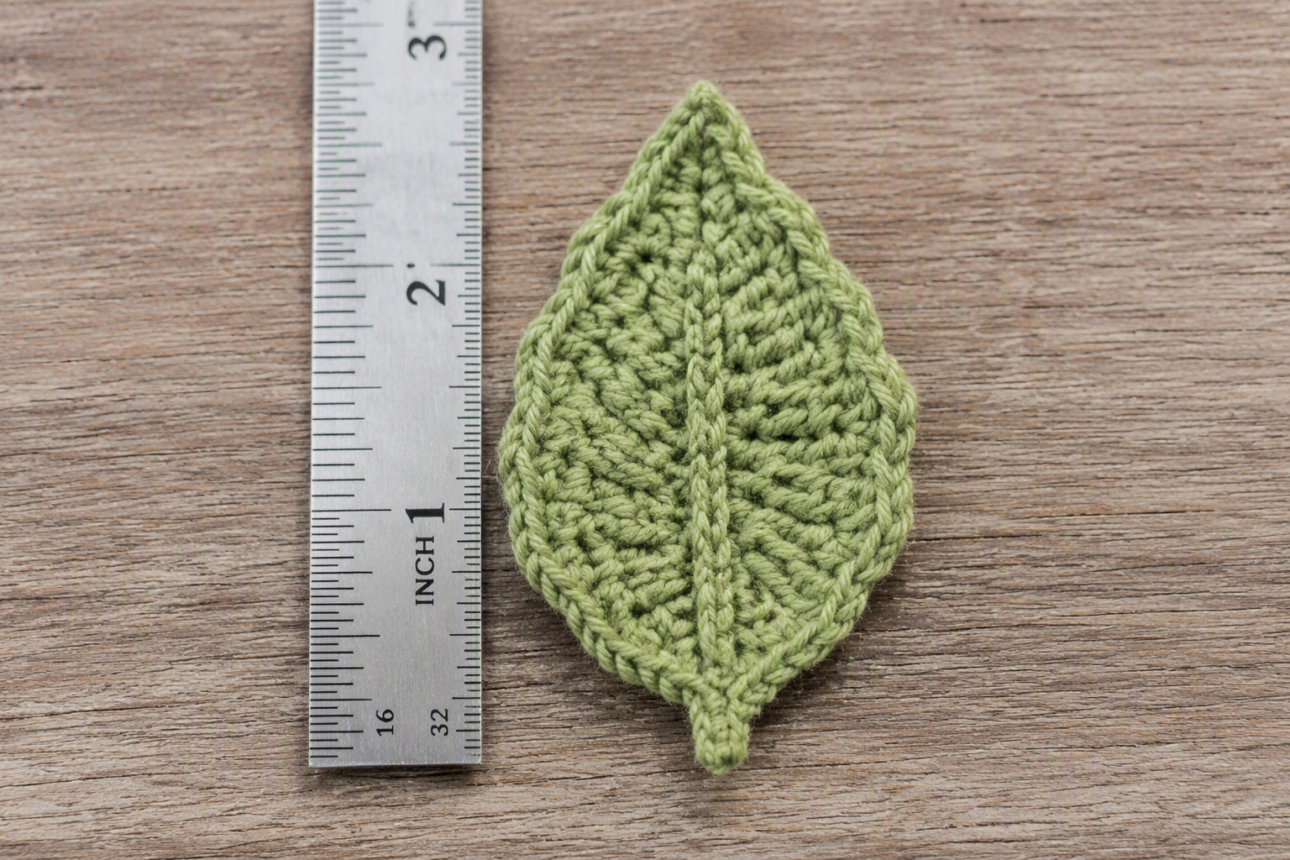
The finished size of your leaf is entirely under your control by mixing yarn weight and hook size. According to Annie Design Crochet, using 4-ply yarn with a 3 mm hook produces a leaf about 1.5 inches across—perfect for tiny appliqués on baby booties or embellishments on small amigurumi. Step up to DK-weight yarn with a 4 mm hook and you get a standard 2-inch leaf that works for most projects. Worsted-weight yarn paired with a 4.5 mm hook gives you a generous 2.5-inch leaf suitable for larger garments or visible spot on a wreath.
If you want to go bigger, bulk up the materials. Using super bulky yarn and a 10 mm hook produces oversized leaves ideal for home décor projects or coasters. The pattern itself doesn’t change—only the materials shift. This flexibility is one of the big advantages of learning the basic structure: once you get it, you can adapt it instantly.
Cotton thread in fine weights (4-ply or fingering) creates the daintiest leaves with the sharpest details. If you want something softer to the touch, DK or worsted cotton blends give you that plus a bit more drape. Acrylic yarn is budget-friendly and comes in wild colors, but it won’t hold crisp edges quite like cotton does. The leaf will still look fine, just a touch less structured.
Step 1: Gather Your Materials and Create a Slip Knot
Start by laying out everything you need so nothing surprises you mid-stitch. Cut a length of yarn about an arm’s span long—you can always cut more later, but running out mid-leaf is annoying. Make a slip knot by looping the yarn around your hook. Hold the loop with your fingers, pull the working yarn through, and tighten gently. This is your starting point, and it shouldn’t be so tight that it cuts off circulation, but snug enough that it won’t slip off your hook while you work.
The slip knot is where beginners sometimes overcomplicate things. It’s just a loop. Pull it snug enough to feel secure, not strangled. If you pull too tight, your foundation chain will be stiff and hard to work into. Too loose and stitches fall off. Aim for “held firmly but not struggling.”
Step 2: Chain Your Foundation
Now chain the base of your leaf. Most patterns call for a foundation chain between 6 and 11 stitches—Sweet Softies uses 8, while other tutorials go up to 11. For your first attempt, start with 8 chains. This gives you enough length for a shapely leaf without being too long to manage.
To chain, yarn over and pull the working yarn through the loop on your hook. That’s one chain. Repeat 7 more times so you have 8 chains total sitting on your hook. Count your chains as you go—this is where many people mess up, then wonder why their leaf comes out wonky. A quick recount costs nothing but prevents frustration later.
Here’s a pro tip: don’t chain too tight. Tight chains make it painful to work into them on the return pass. Keep your tension even and relaxed. If you find your chains creeping up your hook and getting crusty, loosen your grip slightly.
Step 3: Work Down the First Side of the Foundation Chain
This is where the leaf shape actually begins. Starting in the second chain from your hook, you’ll work a mix of stitches down one side of your foundation chain. The exact stitch mix varies slightly between patterns, but the idea is the same: you’re building the left half of the leaf by working into the top loops of your chain stitches.
Most beginner patterns use single crochet (sc), half double crochet (hdc), and double crochet (dc) stitches. Start with a single crochet in the second chain from the hook. Move to the next chain and work a half double crochet. Continue with double crochets for the middle chains, building the leaf’s curve. As you move down the chain toward the tip, this creates a gradual increase in stitch height that gives the leaf its natural taper.
Working into the chain can feel awkward at first—you’re inserting your hook into a small loop that doesn’t want to cooperate. Take your time. If a chain stitch resists, wiggle your hook gently or use your finger to open the loop slightly. Forcing it risks tearing the yarn.
Step 4: Create the Leaf Tip
When you reach the last chain stitch, this is your leaf tip—the pointy or rounded end depending on what you want. Instead of just one stitch, work 3 to 6 stitches into that final chain to fan out the stitches slightly. This rounds out the tip and prevents it from looking pinched. Many patterns work 3 double crochets into the last chain, which creates a soft, organic point.
The number of stitches here is flexible. If you want a rounder, fuller leaf tip, use more stitches. If you prefer a sharper point, use fewer. Both look fine—it’s personal preference.
Step 5: Work Back Up the Other Side of the Foundation Chain
Now reverse direction and work back up the opposite side of your foundation chain. This is where the leaf becomes symmetrical. Starting in the same final chain where you just worked multiple stitches, work your way back toward the starting end, mirroring the stitch pattern you used on the first side.
If you worked sc, hdc, dc on the way down, mirror that on the way back up. This creates balance. The stitches don’t have to be in exactly the same spots—crochet has some wiggle room—but aim for the same stitch types in roughly the same order. If your leaf comes out wonky, uneven stitch counts on each side is usually the culprit.
One common mistake here is forgetting that you’re working into the unworked loops of the chain stitches—the ones you didn’t insert your hook into on the first pass. These are still sitting there waiting for you. Find them, insert your hook, and work your stitches. If you can’t find them, your first pass was too aggressive, and you need to practice chain stitch insertion.
Step 6: Join, Fasten Off, and Weave in the End
When you’ve worked all the way back to where you started, join everything together with a slip stitch. Insert your hook into the base of your first stitch (where you started working), yarn over, and pull through both loops on your hook. This closes the leaf into a complete shape.
Fasten off by cutting the yarn, leaving a 6-inch tail, and pulling that tail through your last loop to lock it in place. Use your tapestry needle to weave this tail through several nearby stitches so it doesn’t unravel. Weave in and out of stitches for at least an inch to ensure it’s secure. If you’re planning to attach this leaf to another project, leave a longer tail—up to 12 inches—and use it as your attachment thread instead of hiding it.
Once the tail is secured, your leaf is complete. According to Sweet Softies’ pattern, at this point you’re genuinely done. Hold it up, admire it, and move on to making more or attaching it to something.
Tips for Success
Cotton yarn really does make the difference. It resists curling, holds crisp edges, and just looks cleaner than synthetic fibers. If cotton is pricey or hard to find, cotton blends do the job too.
Consistent tension is your secret weapon. Loose tension makes leaves floppy. Too-tight tension makes them curl. Aim for medium—firm enough that stitches don’t fall apart, loose enough that the leaf lays flat. This takes practice, so don’t beat yourself up if your first leaf is a little tense. You’ll dial it in.
Recount your foundation chain before you start working stitches into it. A miscounted chain throws off symmetry and makes the whole leaf lopsided. Spend 5 seconds recounting now rather than 5 minutes troubleshooting later.
If your leaf is curling inward when you’re done, try again with a slightly larger hook. A hook one size up can relax tension just enough to flatten things out. If it’s curling outward, tighter tension on the return pass might help.
Practice on cheap acrylic first if you’re nervous. There’s no shame in learning the mechanics before using good yarn. Once the stitch sequence feels natural, switch to cotton and see the real magic happen.
You can speed up your leaf-making significantly once muscle memory kicks in. After 5 or 10 leaves, your hands will know what to do without thinking, and you’ll finish them in under 5 minutes each. That’s when these become genuinely quick project fillers.
Troubleshooting Common Mistakes
The leaf is curling into a tube. This almost always means tension is too tight. Try working a bit looser, especially on the return pass up the foundation chain. A larger hook can also help. If you’re gripping the yarn like it owes you money, relax your hand. Crochet works better when you’re not fighting it.
The shape looks lopsided, fatter on one side. You’re probably missing stitches or adding extras on one pass. Recount the exact stitch sequence you worked going down. On the way back up, match that count exactly. If you worked sc, hdc, dc, dc, hdc, sc going down, do the same going up. Symmetry is everything.
The foundation chain has a giant hole in the middle. The slip knot is too loose. Practice tightening it more—not strangling tight, just noticeably snug. Also, pull your foundation chain stitches more firmly as you go. A loose chain creates an obvious gap in the center of your finished leaf.
Stitches keep falling off the hook. Your slip knot isn’t holding. Tighten it. Also, if you’re setting the hook down between stitches, the working yarn might be slipping. Keep tension on the yarn even when you pause.
The leaf is stiff and dense, almost like cardboard. You’re either using a hook that’s too small or pulling stitches way too tight. Drop down a size or two in yarn weight, or grab a hook one size larger. Also, relax your grip. Crochet should feel smooth, not labored.
The tail won’t stay woven in and keeps poking out. Weave it through more stitches—aim for an inch or more of back-and-forth motion. After weaving, go back through a few stitches one more time for extra security. If it’s still slippery, weave it through a slightly tighter area of the leaf where stitches won’t budge.
FAQ
Q: Can I make a crochet leaf bigger without changing the pattern?
Yes. Larger yarn and a larger hook will make a bigger leaf even when the stitch idea stays the same. One source gives examples from 1.5 inches to 2.5 inches just by changing yarn weight and hook size. In practice, the leaf may also become softer or less defined if the yarn is too bulky for the motif.
Q: How long does it take to crochet a simple leaf?
The exact time depends on the pattern, yarn, and skill level, but these are very small projects and several tutorials present them as quick beginner makes. Some are described as taking only minutes, especially when the leaf uses a short chain and basic stitches. A first-time maker may need longer simply to check stitch placement and count carefully.
Q: What is the easiest crochet leaf stitch pattern?
The easiest versions use a short chain foundation and simple stitches such as sc, hdc, and dc, then repeat similar stitches on the opposite side of the chain. Sweet Softies and Annie Design Crochet both present compact, beginner-friendly versions with clear ending steps. These are easier than more decorative leaf-vine patterns that add picots or multiple leaf clusters.
Q: What supplies do I need for a DIY crochet leaf?
At minimum, you need yarn, a crochet hook, and something to cut the yarn with. Many tutorials also use a yarn needle or tapestry needle for weaving in ends, and some mention scissors explicitly as part of the materials list. If you want to attach the leaf to another project, having a needle is especially useful.
Q: What are common mistakes in crochet leaf tutorials?
Common beginner mistakes include miscounting the starting chain, forgetting to work back along the opposite side of the chain, and failing to keep stitch counts symmetrical. Another frequent issue is finishing without leaving enough tail to weave in securely. These problems usually show up as lopsided leaves, loose centers, or leaves that do not lie flat.
Q: Can crochet leaf patterns be used for vines or garlands?
Yes. One source specifically shows a crochet vine with repeated leaves, and another says the finished leaf can be attached to anything you fancy. Once you understand the basic motif, you can join multiple leaves to a cord, branch, or garland. That makes the pattern useful for seasonal decor, accessories, and appliqué.
My Experience With How to Crochet a Leaf Pattern for Beginners
I’ve made hundreds of these leaves at this point, and they’re genuinely one of those projects where the learning curve is steep but short. Your first leaf will probably look slightly wonky—mine did, and it still sat on my desk because I was proud of the thing. By leaf number five, your hands start remembering where the stitches go without constant mental checklist-checking, and by leaf number fifteen, you’re making them while watching TV without thinking.
The real game-changer for me was switching to cotton yarn early on. I wasted time trying to make acrylic leaves look crisp before someone pointed out that cotton just works better. It’s not magic—it’s just that cotton has body and definition, while acrylic softens. Once I stopped fighting the material, the leaves actually looked professional.
Tension is the thing nobody really talks about enough. You can have perfect stitch counts and the right materials, but if you’re gripping the yarn like it’s trying to escape, your leaves curl. Conversely, if you’re too loose, they flop. The sweet spot is somewhere in the middle, and you find it by making mistakes and adjusting. That’s not a failure—that’s the only way to actually learn.
The other insight that stuck with me: the tail matters. Instead of trimming it short, I leave it long and use it to attach leaves to bigger projects. It saves time and thread, and it’s genuinely more secure than trying to sew on a finished leaf with separate yarn. Small shift, big payoff.
What kinds of projects do you think you’ll use your leaves for first—hats, garlands, something else entirely?
Easy Crochet Leaf Tutorial for Beginners | Crochet Fall Leaf. (n.d.). YouTube. https://www.youtube.com/watch?v=50pU-CJ0QvY
Look At What I Made. (n.d.). This Little Leaf Crochet Pattern. https://lookatwhatimade.net/crafts/yarn/crochet/free-crochet-patterns/little-leaf-crochet-pattern/
Crochet a Leaf in Minutes 🍃 Step-by-Step Tutorial. (n.d.). YouTube. https://www.youtube.com/watch?v=Owjbl-MkPvk
I’m the mom behind Wise Mom Blogger, where everyday creativity meets real-life motherhood. I share easy DIY crafts, cozy knitting and crochet projects, beginner-friendly sewing ideas, and family-tested recipes—plus quick baking hacks that make homemade feel doable on busy days.