Have you ever wanted to turn a written description into a visual work of art, or needed to save text-based designs as actual image files? Converting text to images comes in two flavors: using AI generators to create artwork from prompts, or converting document text into standard image formats like PNG and JPEG. The first approach lets you generate stunning visuals in seconds through tools like Canva and Adobe Firefly. The second lets you preserve text designs without allowing edits. Both methods work well for different situations—whether you’re designing social media posts, creating concept art for a project, or just protecting your typed work. By the end of this guide, you’ll know which method suits your needs and how to execute it smoothly.
Quick Questions and Answers
Question: How do beginners convert text to images with AI?
Beginners usually open a text-to-image tool, write a detailed prompt, and click Generate. Canva, Adobe Firefly, and other tools all follow this basic pattern, though some also let you start from an existing design or upload a reference image.
Question: What tools do I need to turn text into an image?
You need either an online AI image generator, a mobile app, or desktop software depending on your goal. Adobe Firefly and Canva work in a browser, PicsArt works on mobile, and Stable Diffusion can be set up locally if you want more control.
Question: Can I convert text to an image without design experience?
Yes. The workflows in Canva and Adobe Firefly are designed for beginners, and both mainly require typing a description and clicking Generate. If you want text layered onto a photo instead of AI art, Word-based methods can also be done with basic insert and wrap tools.
Key Takeaways
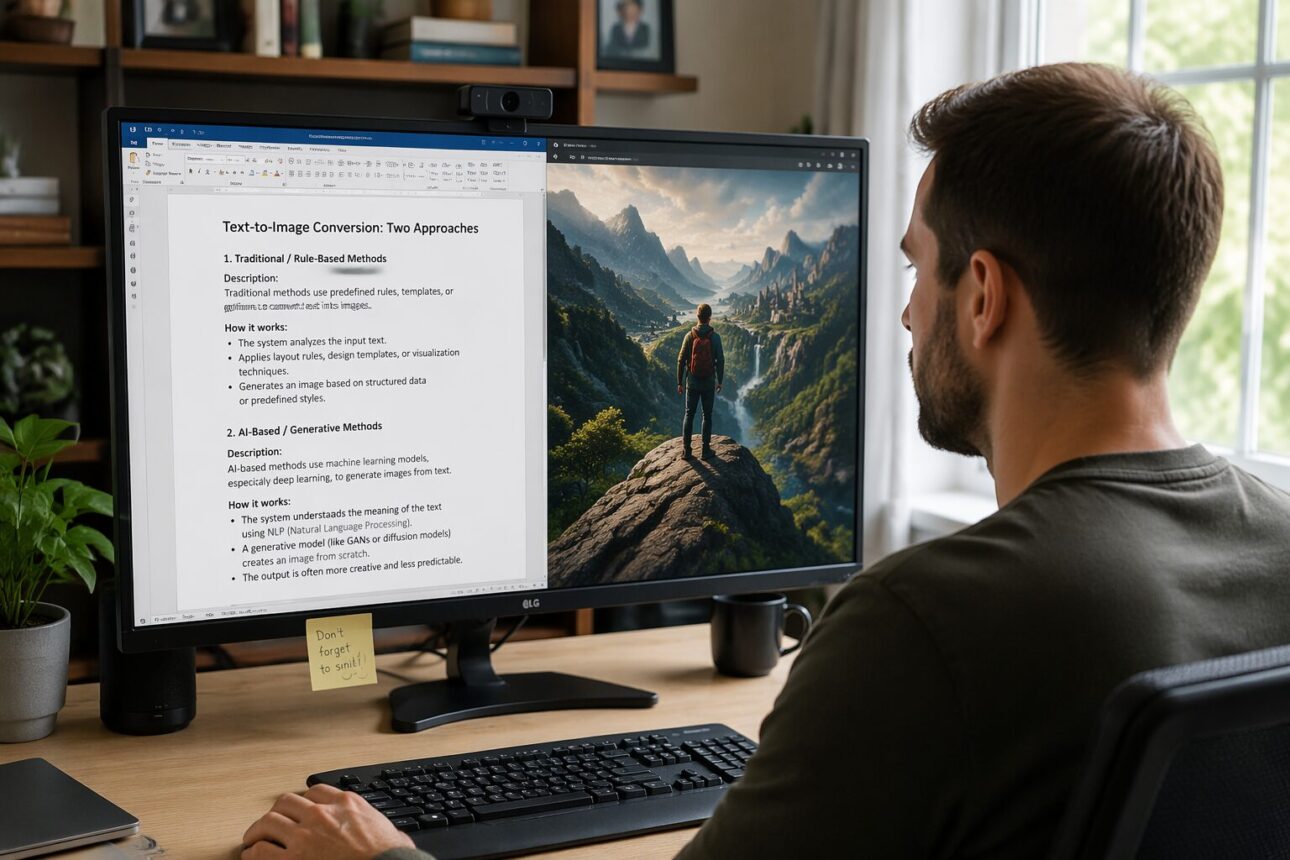
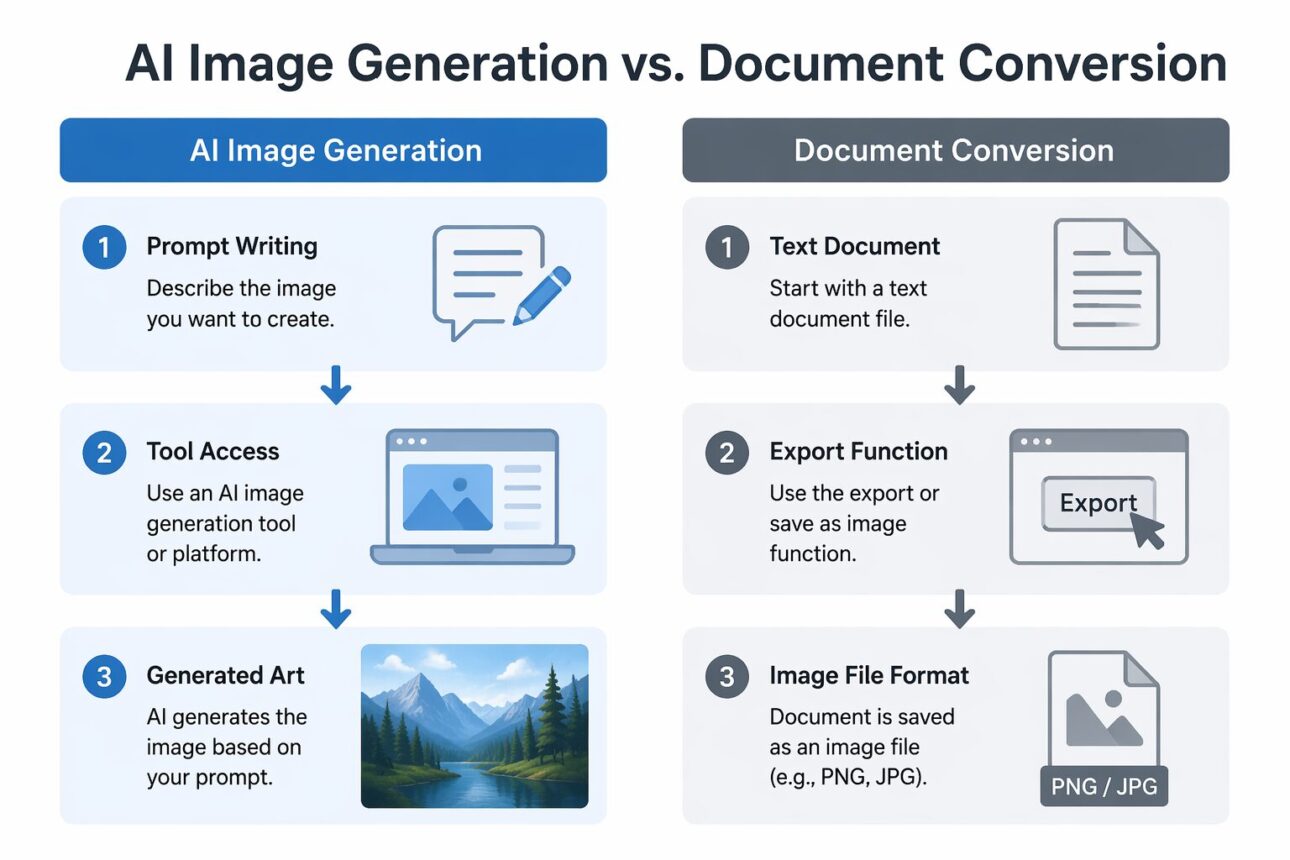
AI image generation creates artwork from written prompts; document conversion saves text as image files.
Browser-based tools like Canva and Adobe Firefly are fastest for beginners.
Writing a specific prompt with at least five words produces better results.
Aspect ratio matters: use 1:1 for Instagram, 16:9 for presentations, 9:16 for mobile Stories.
Most creators generate 3 to 5 versions before settling on a final image.
Microsoft Word offers a simple method for converting text into static image files.
What You Need
Item
Purpose
Notes
Adobe Firefly (free account)
Browser-based AI image generation
Produces 4 images in seconds; log in with Adobe ID
Canva (free account)
AI-powered design and text-to-image
Access Text to Image app from editor or homepage
PicsArt (free app)
Mobile text-to-image generation
Works on iOS and Android; easy style selection
Stable Diffusion (local setup)
Desktop AI generation with full control
Requires Git, Python, and webui-user.bat launcher
Microsoft Word
Document-to-image conversion
Use for saving text layouts as PNG or JPEG files
Reference images (optional)
Guide AI output toward your style
Upload to refine generated results
Step 1: Choose Your Method Based on Your Goal
Before you pick a tool, clarify what you actually want. Are you trying to create an AI image from a written description? Or do you need to save a text document as an image file so it can’t be edited?
If you want AI-generated art from words, stick with Canva, Adobe Firefly, or PicsArt. These tools turn your prompt into visual designs. If you want to protect a text layout or share it as a graphic, use Microsoft Word. The distinction matters because the tools are built for different jobs, and using the wrong one wastes time.
Step 2: Set Up Your Tool and Create an Account
Start with Adobe Firefly if you want the highest quality and fastest results. Visit Adobe Firefly’s text-to-image tool and log in with an Adobe ID, or create a free account if you don’t have one. The free tier gives you monthly credits to generate images.
Canva is your alternative if you prefer a design-focused interface. Open Canva, sign in (or create a free account), and go to the Apps tab. Search for Text to Image and open it. You can work from a blank template or add the feature to an existing design, which gives you flexibility.
For mobile, download PicsArt from the App Store or Google Play. Open the app and navigate to the Text to Image feature. Mobile workflows are slightly simpler because the app handles settings for you.
If you’re comfortable with local installations, Stable Diffusion requires cloning a repository, installing dependencies via Git, and running a launcher script like `webui-user.bat` on Windows. Expect the first launch to take time while the environment initializes.
Step 3: Write a Detailed, Specific Prompt
Your prompt is everything. Vague prompts produce vague results. According to Adobe, you should start with five words or more and include specific details about lighting, angle, mood, subject, and style.
Instead of “a dog,” try “a golden retriever sitting on a beach at sunset, soft warm light, professional photography.” The second prompt tells the AI exactly what you’re after. Include descriptors like cinematic, oil painting, 3D render, or watercolor if you want a particular art style. Add modifiers like moody, vibrant, dramatic, or peaceful to set the emotional tone.
Negative prompts work in Stable Diffusion and some other tools. If you don’t want certain elements in your image, say so explicitly: “no text, no watermarks, no people.” This helps the AI avoid common mistakes.
Step 4: Configure Your Settings Before Generating
Aspect ratio is critical. According to Graficai, use 1:1 (square) for Instagram posts, 16:9 (landscape) for presentations and desktop displays, and 9:16 (portrait) for Stories and mobile content. Choosing the wrong ratio forces you to crop awkwardly after generation, wasting time and losing detail.
Resolution matters too. Aim for 2K for most web uses—social posts, blogs, email graphics. If you’re printing the image or displaying it on a large screen, bump it to 4K. Higher resolution takes slightly longer to generate but ensures quality when the image is enlarged.
In Adobe Firefly, these settings are straightforward. In Canva, aspect ratio is built into template selection. Stable Diffusion lets you set width and height in pixels. Take 30 seconds to get these right before hitting Generate.
Step 5: Generate Your Image and Review the Options
Click Generate and wait. Adobe Firefly produces four unique image options in seconds. Canva and other browser tools work similarly. Stable Diffusion takes longer on first launch because it’s running on your local machine.
Look at all four (or however many) options the tool produces. Read the research from Graficai—many creators generate 3 to 5 versions before choosing a final image. Don’t settle for the first output just because it appeared first. Compare the variations and pick the one that matches your vision most closely.
If none of them work, refine your prompt and generate again. Maybe the colors were off, or the composition felt crowded. Specific feedback yields specific improvements. Tweak one or two details in your prompt and regenerate rather than starting from scratch.
Step 6: Download, Refine, or Share Your Final Image
Once you’ve selected your image, download it. Adobe lets you download, copy to clipboard, or share directly. Canva lets you save the project or export the image. PicsArt downloads to your phone gallery automatically.
If the image is close but not perfect, use Adobe’s Generative Fill feature (available in Firefly and some other tools) to edit specific areas without regenerating everything. You can also adjust color, crop, or add text overlays in Canva or Word before finalizing.
For Word-based text-to-image conversion, the process differs slightly. Paste your text into a Word document, highlight the text you want to convert to an image, and use the Insert menu to paste it as an image object. Right-click the object, select Save as Picture, and export as PNG or JPEG.
How to Convert a Word Document to an Image File
If you need to turn a text document into a static image—say, to protect the content or share a designed text layout—Microsoft Word offers a built-in method.
Open your Word document and select the text you want to convert. Copy it, then paste it back into the document using Paste Special as an image. This creates an image object that sits within your document. Use the Wrap Text and Behind Text options to position the text over any background graphics.
Once formatted, right-click the text object and choose Save as Picture. Export it as PNG or JPEG depending on your needs. PNG preserves transparency; JPEG compresses better for smaller file sizes.
This method works well for protecting text layouts, creating graphics with styled fonts, or sharing designs that shouldn’t be edited. It’s simpler than AI generation but less flexible for creating original artwork.
Tips for Getting Better Results
Be specific with artistic direction. Instead of “sunset,” say “vivid orange and pink sunset with a silhouetted treeline, shot in the style of a Romantic landscape painting.” The more detail, the better the AI understands your intent.
Use a reference image. Many tools, including Adobe Firefly, let you upload a photo to guide the generation. Show the AI the style, color palette, or composition you’re after and it will factor that into the output.
Generate multiple times if the first round disappoints. Don’t view this as a failure—this is standard practice. Iteration is how you find the image that works.
Write negative prompts to exclude unwanted elements. Watermarks, low quality, blurry, distorted hands, and text are common AI mistakes. Tell the system what not to do and results improve significantly.
Keep resolution settings realistic for your use case. You don’t need 4K for a Twitter post, and it only slows down generation. Match the resolution to where the image will actually live.
Test on different tools if you’re stuck. Canva’s output has a certain style, Adobe’s another, and Stable Diffusion another. Sometimes switching platforms and trying the same prompt yields surprising differences.
FAQ
Q: Why does my text-to-image result look wrong?
The most common cause is an unclear prompt or settings that don’t match your intended use. Adobe recommends adding specific details like lighting, angle, or mood. Graficai advises refining the prompt and generating multiple versions until the output matches your idea.
Q: How long does text-to-image generation usually take?
Cloud tools can produce results in seconds. Adobe says Firefly generates four unique options in seconds. Local tools can take longer, especially on the first run, because the environment and model must be set up before generation begins.
Q: Which app is easiest for making images from text?
Canva and Adobe Firefly are among the easiest because they run in a browser and use a simple prompt-and-generate workflow. PicsArt is also beginner-friendly on mobile if you prefer making images on a phone.
Q: Do I need to write a long prompt for good images?
Not necessarily, but the prompt should be specific enough to describe the subject and style. Adobe recommends starting with five words or more and adding details such as lighting, angle, and mood.
Q: Will I get the same image every time I generate?
Not usually. Adobe says Firefly creates four unique image options each time, and Graficai recommends generating three to five versions before choosing a final result.
Q: How do I save a text-to-image picture after generating it?
Most tools let you download or share the result after generation. Adobe says you can download, copy, or share the image. Canva and PicsArt tutorials also show downloading the final file, and Word-based methods can use Save as picture.
Q: What is the difference between text-to-image and making text into a picture?
Text-to-image usually means using AI to create a new image from a written prompt, while making text into a picture often means placing typed text into an image format or layering it over a photo. The correct method depends on whether you want AI artwork or a text graphic.
My Experience With How to Convert Text to Images: A Step-by-Step Guide for Beginners
I’ve spent enough time with these tools to know where beginners stumble. Most people start with vague prompts—”a dog” or “a sunset”—and then complain the output looks generic. They don’t realize the AI is working with almost no information. The real aha moment comes when you write a prompt like “a corgi wearing sunglasses, sitting in a convertible, neon cyberpunk city in the background, dramatic cinematic lighting.” Suddenly the tool has something to work with.
I also learned the hard way that aspect ratio matters. I once generated a beautiful 16:9 image for Instagram, then had to crop it awkwardly into a square. Ten minutes lost. Now I set the ratio first, every time.
Adobe Firefly surprised me with how fast it works. Four finished options in genuinely a few seconds. Canva’s workflow is more intuitive if you’re already thinking in design terms. Stable Diffusion is overkill for most beginners, but if you’re serious about generative AI and want full control over settings and model checkpoints, the local setup pays off.
The one thing that separates okay results from great results is iteration. I never use the first image. I generate five or six versions, pick the best one, refine the prompt based on what I liked and didn’t like, and generate five more. That’s how you get exactly what you want instead of something close enough.
Conclusion
Converting text to images is a skill that takes minutes to learn but hours to master. Start with Canva or Adobe Firefly if you want speed and simplicity. Write specific prompts with concrete details about subject, style, lighting, and mood. Set your aspect ratio and resolution before generating. Generate multiple versions and refine based on what works. If you’re protecting text documents rather than creating AI art, use Microsoft Word’s Save as Picture method instead.
The tools have removed the barrier to entry completely. Anyone can walk through these steps today and produce something professional by tomorrow. What you do with that capability depends on how clear your creative vision is and how willing you are to iterate.
References
Tajamul, M. A. (2024). Beginners Guide to Stable Diffusion (Text To Image Generation). Medium. https://medium.com/@muhammadadeeltajamul/beginners-guide-to-stable-diffusion-text-to-image-generation-7f08b7d4e89f
Canva. (2026). How to generate images with text prompts using AI. Canva. https://www.canva.com/learn/how-to-convert-text-images-ai-magic/
Adobe. (2026). Free AI text to image generator for creating stunning visuals. Adobe. https://www.adobe.com/products/firefly/features/text-to-image.html
PicsArt. (2024). Convert Text to Image Using PicsArt AI Tool. YouTube. https://www.youtube.com/watch?v=eXqTd_stMmg
wikiHow. (n.d.). How to Make Pictures out of Text (with Pictures). wikiHow. https://www.wikihow.com/Make-Pictures-out-of-Text
Canva. (2024). How to use Canva Text to Image Tool (Free AI Image Generator). YouTube. https://www.youtube.com/watch?v=BE9RkHQGPRo
Image to Text. (2026). How to Convert Text to Image | 3 Methods Explained. Image to Text. https://imagetotext.me/blogs/how-to-convert-text-to-image
Graficai. (2026). How to Generate Images from Text — The Complete 2026 Guide. Graficai. https://graficai.co/ai-tools/how-to-generate-images-from-text
Sarah Anderson . J
I’m the mom behind Wise Mom Blogger, where everyday creativity meets real-life motherhood. I share easy DIY crafts, cozy knitting and crochet projects, beginner-friendly sewing ideas, and family-tested recipes—plus quick baking hacks that make homemade feel doable on busy days.