


Applying for a NELFUND student loan can feel overwhelming, but what if the process is far simpler than you expect? The Nigerian Education Loan Fund (NELFUND) offers interest-free loans to eligible Nigerian students in public tertiary institutions, covering tuition fees and living expenses without requiring a guarantor. The entire application happens online through the official NELFUND portal, and knowing the exact sequence and requirements means the difference between approval and rejection. This guide walks you through every step, from eligibility checks to document submission and beyond.
Quick Questions and Answers
Question: Why do I need NIN for NELFUND application? Answer: NELFUND applications require a National Identification Number for identity verification and to match your personal details against official records. The portal verifies your information through NIMC-linked data before you can continue with registration. This confirms you are a real Nigerian student and reduces fraud.
Question: Can I apply for NELFUND without a JAMB number? Answer: Current application steps include JAMB verification as part of the registration process. You are typically asked to enter your JAMB registration details or click “Verify with JAMB” before creating or completing your account. A JAMB number is expected for the standard application flow.
Question: Do I need a bank account before applying for NELFUND? Answer: Yes, the application process includes bank details during profile completion. The portal asks for your BVN and bank account number so NELFUND can verify your account and process payments if your loan is approved.
Key Takeaways
- Your institution must verify and upload your student data to the NELFUND portal before you can apply; this is non-negotiable.
- Required documents include NIN, BVN, JAMB admission letter, student ID, matric number, and proof of bank account.
- The loan covers tuition and upkeep (living expenses); you cannot apply for upkeep alone.
- No guarantor is required, simplifying the eligibility process for students.
- Application processing involves data verification by the NELFUND board against established regulatory standards.
What You Need
| Item | Purpose | Notes |
|---|---|---|
| National Identification Number (NIN) | Identity verification and federal database matching | Required; must be current and valid |
| Bank Verification Number (BVN) | Account verification for loan disbursement | Linked to your bank account; must match |
| JAMB Admission Letter | Proof of admission to a public tertiary institution | Original or certified copy; scan clearly |
| JAMB/Matric Number | Academic identification and enrollment confirmation | Must match your school’s records exactly |
| Student ID or School Letter | Official proof of current student status | Issued by your institution’s student affairs office |
| Valid Email Address | Account creation and portal communication | Use an email you check regularly |
| Bank Account Details | Receiving loan disbursements | Must be in your name; active account required |
| Proof of Family Income (Optional) | May be requested during verification | Pay slips, tax returns, or affidavit acceptable |
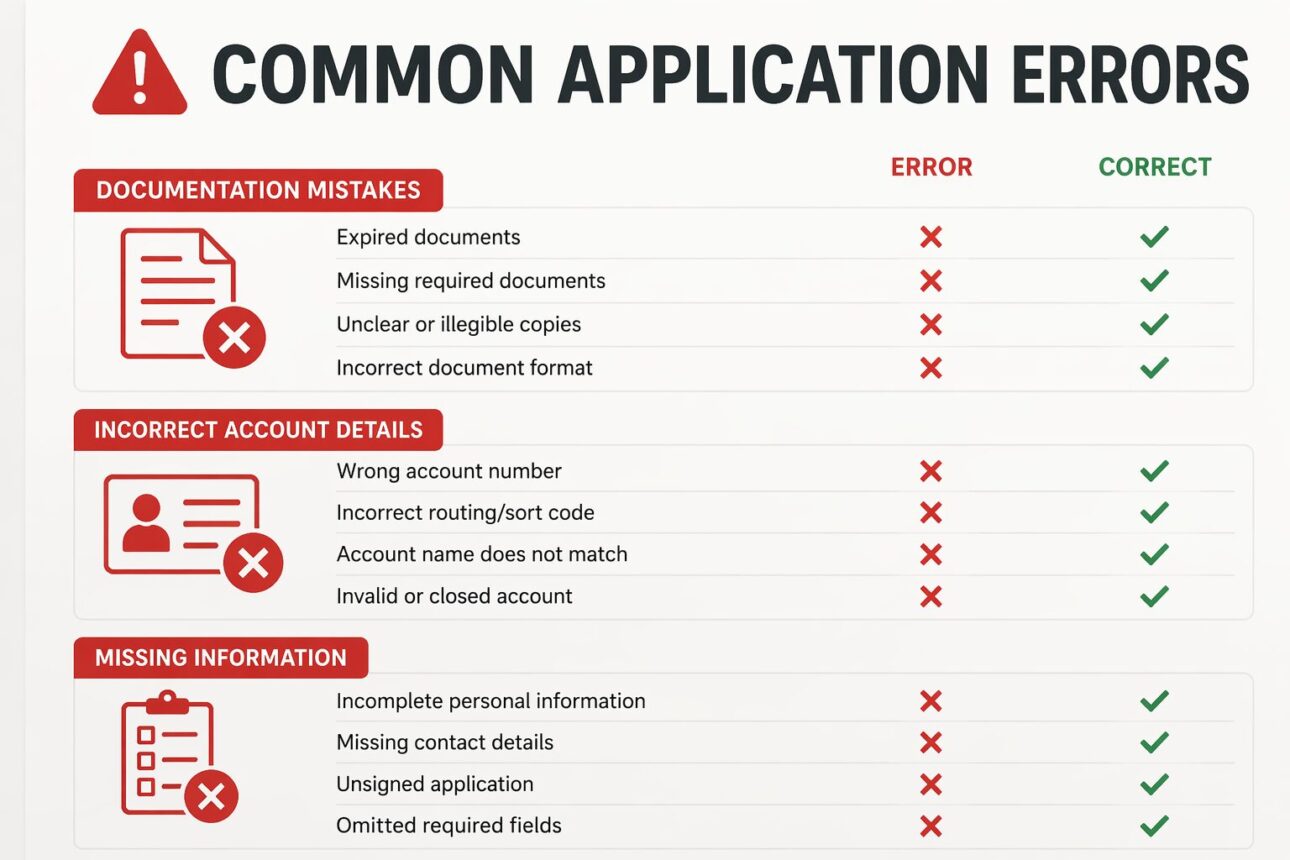
Before starting your application, gather all these items and have clear, legible digital copies ready. Poor-quality scans or mismatched information will cause delays or outright rejection during the verification phase. Make sure every name, date, and number matches across all documents—the NELFUND board cross-checks everything.
Step 1: Confirm Your Institution Is Onboarded

This is the most critical step, and many students skip it, only to hit a wall during application. Your school must have already completed the onboarding process with NELFUND and uploaded your student data to the official NELFUND student verification portal. Without this step, you cannot proceed.
Contact your institution’s student affairs office, admissions office, or financial aid department and ask directly: “Has our school completed onboarding with NELFUND?” If the answer is no, your application cannot move forward yet, no matter how ready you are. If yes, confirm they have your current student record uploaded with the correct spelling of your name, matric number, and enrollment status.
Step 2: Visit the Official NELFUND Portal and Create an Account
Go to https://nelf.gov.ng/ and look for the “Apply Now” or “Get Started” button on the homepage. Click it to begin registration. The portal will ask you to confirm your Nigerian citizenship first—this is a quick yes/no gate.
Once confirmed, you will be directed to create an account using your email address and a secure password. Choose an email you use daily; this is where NELFUND will send all status updates, verification requests, and eventually, disbursement notifications. A verification email will arrive in your inbox within minutes. Click the link in that email to confirm your address. You cannot proceed to the next step without verification.
Step 3: Fill in Your Personal and Academic Details
After email verification, log back into the portal and complete your profile. The form will ask for your full name (exactly as it appears on your NIN and BVN), date of birth, phone number, address, and NIN. Enter this information carefully—any mismatch with your federal records will cause rejection during data validation.
Next, the portal will ask for your academic details: your school name, matric number or JAMB registration number, program of study, and year of enrollment. If your school is not in the dropdown list, it means your institution has not completed onboarding yet—stop and contact your school immediately.
Verify that the information matches your JAMB admission letter and your school’s official records. Even a single digit wrong in your matric number can trigger a rejection.
Step 4: Enter Your Financial Information
Provide your Bank Verification Number (BVN) and your bank account number. The portal uses BVN to confirm that the account is real and linked to your name. If your BVN does not match your name on file, the system will flag it, and your application cannot proceed until you resolve it.
Choose the bank from the dropdown menu and enter your account number. This is where your loan disbursement will be sent if your application is approved. The account must be in your name—NELFUND will not disburse to a parent’s or guardian’s account.
Some students make the mistake of using a joint account or a family member’s account here. Don’t. The system verifies account ownership, and mismatches will be caught during verification, delaying your approval.
Step 5: Upload Required Documents
This step requires you to scan and upload clear copies of your supporting documents. The portal will have a dedicated section for each document type. Upload:
- Your JAMB admission letter (front and back if applicable)
- Your student ID or a formal letter of identification from your school
- Your NIN or national identity card (both sides, if separate)
- Your BVN (if you have a physical card)
- Proof of family income (optional but recommended if you qualify for a larger loan amount)
Scan documents at 300 DPI resolution or higher and save them as PDF or JPEG. Blurry, rotated, or partial scans are rejected immediately. If your document has text that is hard to read, re-scan it. The NELFUND verification team will not accept illegible uploads.
Step 6: Review Your Application and Select Your Loan Package
Before submission, the portal displays a summary of everything you have entered. Read through every section carefully. Check that names match exactly, dates are correct, and all account information is accurate. This is your last chance to catch errors before the data validation phase begins.
You will also be asked to specify your loan preference: tuition only or tuition plus upkeep (living expenses). If you select upkeep, you will be asked to justify the amount. Remember, the loan is strictly for educational and living expenses directly related to your studies—not for luxury items or non-academic costs.
After reviewing, click the submit button. The portal will display a confirmation message and generate a reference number. Screenshot this or take note of the number—you will need it to track your application status later.
Step 7: Track Your Application Status and Respond to Verification Requests
After submission, your application enters the verification phase. The NELFUND board cross-checks your submitted documents against federal records (NIN, BVN, JAMB records) and your institution’s database. This typically takes between 7 to 14 days, though delays can occur.
Log back into the portal and click “My Loans” or “Application Status” to see your current progress. The status will show stages like “Submitted,” “Under Review,” “Documents Verified,” or “School Verification Pending.” Each stage reflects where your application sits in the queue.
Watch your email closely. If NELFUND needs clarification on any document or finds a mismatch in your records, they will email you with specific instructions. Respond quickly—delays in providing additional information can push your timeline back significantly. Some students miss these emails because they didn’t verify their email address properly or they use a rarely-checked account.
Step 8: Await Institutional Verification and Final Approval
Your school’s student affairs office must also verify that you are genuinely enrolled and that the information you provided is accurate. This verification can take 2 to 4 weeks depending on how quickly your institution responds to NELFUND’s requests. There is nothing you can do to speed this up—it depends entirely on your school’s administrative timeline.
Once your school confirms your status and NELFUND completes its data validation, you will receive an approval or rejection notification via email and a portal update. If approved, the notification will outline your loan amount, disbursement method, and repayment terms under the Student Loans Act 2024.
Tips for a Smooth Application Process
Start gathering documents the moment you receive your JAMB admission letter. Don’t wait until you are ready to apply—have everything scanned and saved to a folder on your computer or cloud storage. Rushing through document preparation often results in blurry uploads or forgotten files.
Double-check your email address before entering it into the portal. Type it slowly and verify each character. A single typo here means you will miss important status updates or verification requests.
Set a calendar reminder to check your application status every 3 days. The portal does not send automatic status change notifications, so you must check manually. Staying on top of your progress means you can catch and respond to verification requests before deadlines pass.
Never apply during the last day of the application window. If there are technical issues or data validation errors, you will not have time to resolve them. Apply early in the window, which the NELFUND board announces on the portal homepage.
If you have updated your BVN, NIN, or school enrollment status recently, make sure those updates have propagated through the federal database before applying. Wait at least 2 weeks after any identity or enrollment update before submitting your application. Mismatches between your submitted data and the federal records are a common cause of rejection.
FAQ
Q: Are all Nigerian students eligible for NELFUND loans?
No, eligibility has specific requirements. You must be a Nigerian citizen, at least 18 years old, and enrolled in a public tertiary institution. Private universities and institutions that have not been onboarded with NELFUND are not eligible. Income level does not automatically disqualify you, but the board may assess financial need during verification.
Q: How do I register on the NELFUND portal?
Start by visiting the official NELFUND portal at https://nelf.gov.ng/. Click “Apply Now” or “Get Started,” confirm your Nigerian citizenship, and enter your school and matric details. Create an account using your email and password, then verify your email before logging in to complete your full profile with personal and financial information.
Q: Does NELFUND require school verification before approval?
Yes, institutional verification is mandatory. The portal asks for your school and matric number, and your institution must verify your enrollment details through the NELFUND Student Verification Portal. This step can take 2 to 4 weeks depending on how quickly your school responds to NELFUND’s verification request.
Q: Will I need to upload documents for NELFUND application?
Yes, document upload is required. You will need to submit a JAMB admission letter, student ID or school letter of identification, NIN or national identity card, BVN if available, and optionally proof of family income. All documents must be clear, legible, and scanned at 300 DPI or higher to avoid rejection.
Q: How long does NELFUND application take to process?
The online application itself can be completed in 30 to 45 minutes if you have all required details ready. After submission, processing time depends on federal database verification (7 to 14 days) and institutional verification (2 to 4 weeks). Disbursement typically occurs within 30 days of final approval, though this varies by institution.
Q: What happens after I submit my NELFUND application?
After submission, your application enters data verification where NELFUND cross-checks your documents against federal records and JAMB databases. Your institution then verifies your enrollment status. Throughout this time, you can track your application status on the portal by logging in and clicking “My Loans.” You will receive email notifications at key stages.
Q: Where can I check my NELFUND application status?
Log into the NELFUND portal using your email and password, then click “My Loans” or “Application Status” to see your current progress. The portal displays each stage your application is in, from “Submitted” through “Under Review” and “School Verification Pending” to final approval or rejection. No automatic notifications are sent, so check manually every few days.
My Experience With Nelfund Application Process Explained: Steps, Requirements, and Timeline
When I first encountered the NELFUND application, I assumed it would be straightforward—upload documents, wait, done. Turns out, the most common bottleneck isn’t the students; it’s the schools. I watched friends submit perfect applications, only to hit a wall because their institution hadn’t bothered to onboard yet. That taught me: always confirm institutional readiness first, before you spend an hour filling out a form.
The document verification piece is genuinely rigorous. NELFUND doesn’t just glance at your uploads—they cross-check everything against federal records. I saw one applicant rejected because her BVN didn’t match the name in her JAMB records (a spelling error from years back). The system caught it instantly.
Here’s the sharp insight: the loan is only as fast as your school’s administrative responsiveness. You can submit a flawless application, but if your institution takes six weeks to verify your enrollment, you wait six weeks. NELFUND’s timeline is predictable; your school’s isn’t.
What tripped people up most often wasn’t the requirements—it was ignoring the email updates asking for clarification. Students would miss a verification request because they didn’t check their inbox for two weeks, and then wonder why their application stalled. Treat every email from NELFUND as time-sensitive.
Have you already checked whether your institution has completed its onboarding with NELFUND, or is that your next step?
Conclusion
The NELFUND application process is structured, transparent, and entirely digital. Success depends on three things: your institution must be onboarded, your documents must be accurate and clear, and you must respond promptly to any verification requests. The timeline from submission to approval typically spans 4 to 8 weeks, with disbursement following within 30 days of approval.
Start by confirming that your school has completed onboarding. Gather and scan your documents carefully—poor quality uploads are one of the most common reasons for rejection. Enter all information exactly as it appears on your official records; even one digit wrong can trigger a flag during data validation.
Monitor your email and application status regularly. NELFUND will not chase you down if they need clarification—you have to notice their requests and respond quickly. If you face delays after submission, ask your institution’s student affairs office whether school verification is holding things up; they can often expedite internal processes.
The loan covers tuition and upkeep for eligible students in onboarded public institutions. No guarantor is needed, and the interest-free terms under the Student Loans Act 2024 are among the most favorable financing options available to Nigerian students. If you meet the eligibility criteria and your school is ready, applying now positions you to receive funds well before the academic year progresses.
If you are still searching for financial support options beyond NELFUND, explore other pathways like 12 Proven Scholarships for Beginners Everyone Should Know or competitive opportunities such as What is the Bill Gates Scholarship for 2027?. Combining multiple funding sources increases your chances of meeting your full educational costs.
References
- MonoEd Africa. (2026, January). NELFUND Student Loan 2026: The Complete Guide to Eligibility, Application, and Repayment. MonoEd Africa. https://monoed.africa/blog/nelfund-student-loan-complete-guide
- Naira Compare. (n.d.). NELFUND’s Student Loan Eligibility: Qualification Criteria and Application Process. Naira Compare. https://nairacompare.ng/blogs/nelfunds-student-loan-eligibility-qualification-criteria-and-application-process
- Nigerian Education Loan Fund. (n.d.). Home. Student Loan Initiative. https://nelf.gov.ng/
- Ulearngo. (2026, January). NELFUND Student Loan Application Guide 2026 Nigeria. Ulearngo. https://ulearngo.com/blog/ng/nelfund-student-loan-application-guide-2026
- NELFund Portal. (n.d.). NELFund Portal – Student Loan Portal Guide 2026. NELFund Portal. https://nelfundportal.com/
- Insight Northeast Nigeria. (2026, January). NELFUND Student Loan Nigeria 2026: How to Apply, Who Qualifies, and Repayment Terms. Insight Northeast Nigeria. https://insightnortheastng.net/nelfund-student-loan-nigeria-2026-how-to-apply-who-qualifies-and-repayment-terms/
- SchoolNGR. (n.d.). NELFUND: Who Can Apply, How It Works & Repayment Plan. SchoolNGR. https://www.schoolngr.com/news/nelfund-how-to-apply
- Nigerian Education Loan Fund. (2024). Guidelines for the Operations of the Nigerian Education Loan Fund Under the Students Loans Act 2024. NELF. https://nefl-public-assets.s3.eu-west-1.amazonaws.com/PUBLIC+GUIDELINES+FOR+APPLICANTS+FUND+UNDER+THE+STUDENTS+LOANS+ACT+2024.pdf

Sarah Anderson . J
I’m the mom behind Wise Mom Blogger, where everyday creativity meets real-life motherhood. I share easy DIY crafts, cozy knitting and crochet projects, beginner-friendly sewing ideas, and family-tested recipes—plus quick baking hacks that make homemade feel doable on busy days.