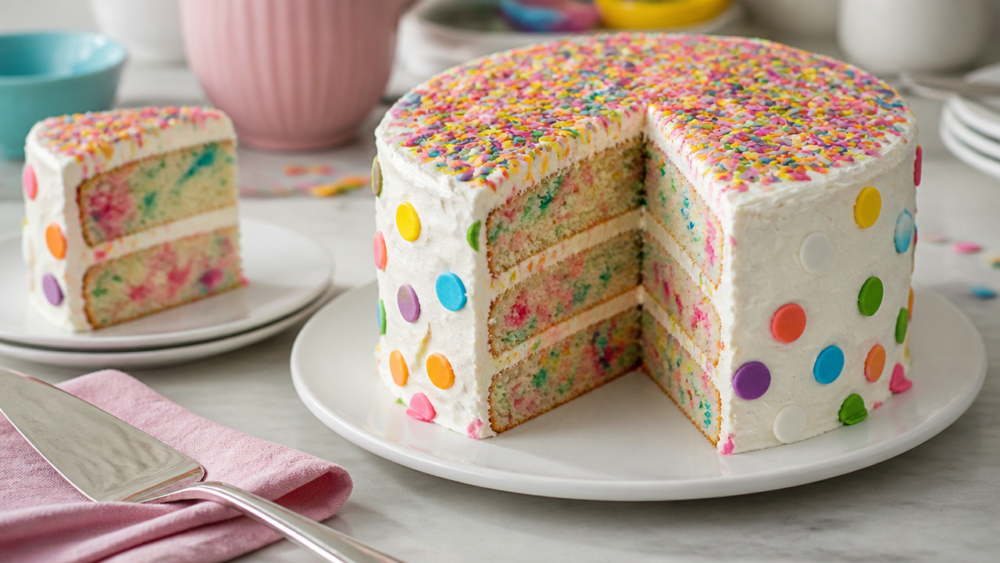
Want to know what makes a truly delicious funfetti dot cake stand apart from every other sprinkle-covered dessert trend floating around? It’s the combination of a soft, moist crumb baked individually in small cups, topped with silky buttercream, then dipped into a pool of colorful nonpareils for that signature dense sprinkle cap. Homemade funfetti dot cakes deliver bakery-quality texture when you nail the proportions of buttermilk, egg whites, and room-temperature ingredients. Whether you’re baking for a birthday, summer gathering, or just want to join the viral cake trend yourself, this guide walks you through making funfetti dot cakes that taste as good as they look. Ready to create something that’ll have everyone asking for seconds?
Quick Questions and Answers
Question: Why are dot cakes called funfetti dot cakes? Dot cakes are called Funfetti dot cakes because they use Funfetti cake mix, which contains rainbow sprinkles baked into the batter. The name combines the “dot” shape from individual servings in ramekins with the sprinkled Funfetti brand, creating a colorful, sprinkle-coated dessert trend popular on TikTok.
Question: Can I make funfetti dot cakes from scratch? Yes, you can make funfetti dot cakes from scratch by baking a homemade funfetti cake in a sheet pan, cooling and freezing it slightly, then cutting rounds with dessert cups. Follow the scratch recipe by mixing butter, sugar, oil, egg whites, vanilla, flour, buttermilk, and folding in rainbow sprinkles before baking at 350°F for 32–38 minutes.
Question: Do dot cakes need to be refrigerated? Dot cakes should be refrigerated until slightly firm after coating with sprinkles to help the frosting set and the nonpareils adhere properly. Chilling makes them easier to eat and prevents the frosting from smearing when you take a bite from the center.
What You Need
| Item | Purpose | Notes |
|---|---|---|
| All-purpose flour (sifted) | Base structure for the cake crumb | Use 2.5–3.5 cups; sifting ensures smoothness and prevents lumps |
| Baking powder | Leavening agent for rise | Typically 2–3 tsp; works with baking soda if included |
| Unsalted butter | Creaming base for air incorporation | Room temperature (65–70°F) is critical for proper emulsification |
| Sugar | Sweetness and structure | Granulated white sugar; creamed with butter to trap air bubbles |
| Egg whites | Moisture and lift without heaviness | 4–5 room-temperature egg whites create a lighter crumb than whole eggs |
| Buttermilk | Acidity and tender crumb | Room temperature; reacts with baking soda for extra lift if used |
| Sour cream | Moisture and tanginess | Optional but recommended; adds richness to the final texture |
| Vanilla extract | Flavoring | Pure vanilla recommended; almond extract can be substituted for variation |
| Rainbow jimmies | Sprinkles folded into batter | Use jimmies (rod-shaped), not nonpareils, to avoid color bleeding |
| Nonpareils | Dipping sprinkles for the cap | Tiny round beads that coat the frosting on top |
| Butter (for frosting) | Frosting base | Softened; usually 1/2 cup for a standard batch |
| Confectioners’ sugar | Frosting sweetness | 2–3 cups powdered sugar; sift to avoid lumps |
| Heavy cream or milk | Frosting consistency | 2–4 tablespoons to reach spreadable texture |
| Oven-safe ramekins or cups | Baking vessels | 4–8 oz ceramic ramekins or small dessert cups work best |
| Rubber spatula | Folding tool | Silicone recommended to avoid tearing delicate batter |
| Stand or hand mixer | Creaming and beating | Essential for incorporating air into butter and sugar |
Step 1: Prepare Your Ingredients and Workspace
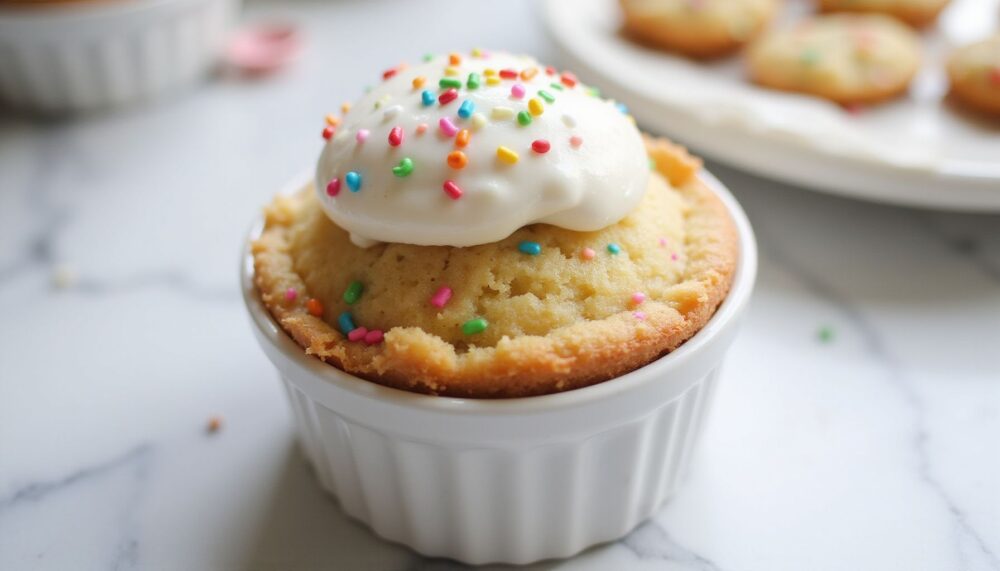
Get everything ready before you start mixing. Measure out all your dry ingredients—flour, baking powder, and salt—into a small bowl. Sift the flour first, then measure it to avoid packing it down. Bring your butter, eggs, buttermilk, and sour cream to room temperature; this usually takes 30–45 minutes on the counter. Cold ingredients won’t emulsify properly, which means your cake will be dense or gritty instead of light and moist. Set your oven to 350°F and position a rack in the middle. Place your small ramekins or dessert cups on a baking sheet lined with parchment paper—this makes them easier to move in and out of the oven without tipping.
Step 2: Cream Butter and Sugar Until Light and Fluffy
This step is where the magic starts. Add room-temperature butter to your mixer bowl along with granulated sugar—typically 1/2 to 3/4 cup butter and 1 1/2 to 1 2/3 cups sugar, depending on your batch size. Beat on medium speed for 3–5 minutes until the mixture turns pale, fluffy, and almost doubles in volume. You’re trapping thousands of tiny air bubbles in the butter, which will expand when heat hits them and create that signature soft crumb. Stop the mixer and scrape down the bowl with a rubber spatula halfway through to ensure even mixing.
Step 3: Combine Wet Ingredients Separately
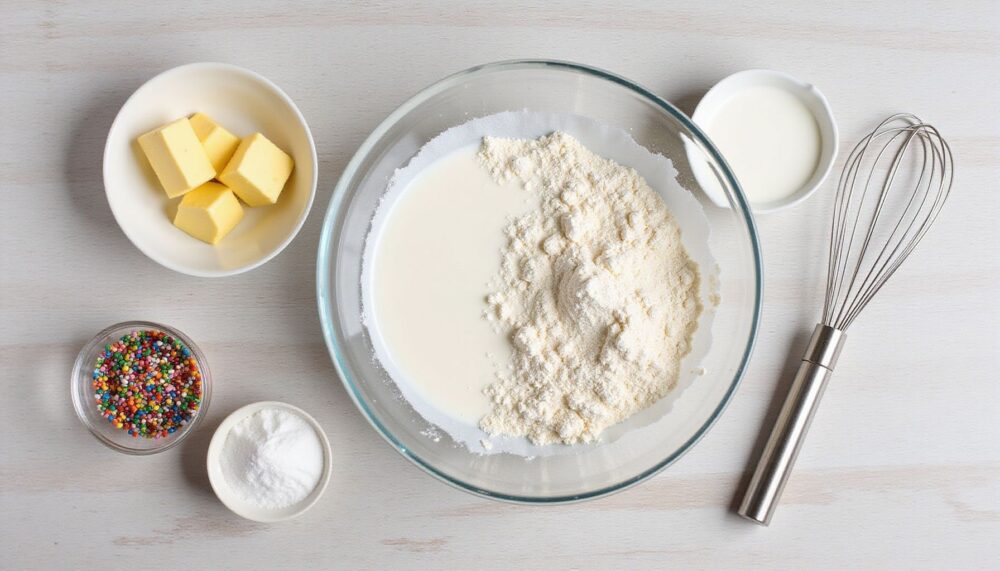
In another bowl, whisk together your egg whites, vanilla extract, room-temperature buttermilk, and sour cream (if using). Stir just until combined—you don’t need to beat this mixture. Having your wet ingredients ready and at the same temperature prevents the buttercream-like butter mixture from seizing up when you add them. The room-temperature liquid blends smoothly into the creamed butter, creating an even, stable batter.
Step 4: Alternate Wet and Dry Ingredients Carefully
Here’s where technique matters. Starting with the mixer on low speed, add about one-third of your dry flour mixture to the creamed butter. Mix until just combined. Then add half the wet mixture and blend briefly. Repeat with another third of the dry mixture, then the remaining wet mixture, and finish with the final third of the dry mixture. This alternating method prevents overmixing, which would develop gluten and make your cake tough instead of tender. Each time you mix, blend only until the ingredients just come together—don’t overbeat.
Step 5: Fold in Rainbow Jimmies Without Overdoing It
Pour the batter into a large bowl and use a rubber spatula to fold in your rainbow jimmies gently. This is crucial: use rod-shaped jimmies, not round nonpareils, because nonpareils will bleed their color into the batter and turn it muddy-looking. Fold slowly and deliberately, no more than 5–8 folds, until the sprinkles are distributed evenly. Over-folding damages the batter and breaks the sprinkle coating, which defeats the whole point.
Step 6: Fill Cups and Bake Until Golden
Divide the batter evenly among your prepared ramekins, filling each about two-thirds full—this gives the cake room to rise without overflowing. Place the baking sheet in the preheated 350°F oven. Bake for 32–38 minutes, depending on cup size. The cakes are done when a toothpick inserted into the center comes out clean or with just a few moist crumbs clinging to it. The tops should be golden brown and spring back slightly when you touch them gently. Remove from the oven and let cool in the cups for 5 minutes, then turn them out onto a wire rack to cool completely.
Step 7: Make Simple Vanilla Buttercream Frosting
While the cakes cool, prepare your frosting. Beat softened butter (1/2 cup) on medium speed until creamy and pale, about 2–3 minutes. Gradually add sifted confectioners’ sugar (about 2 cups) a little at a time, alternating with 2–4 tablespoons of heavy cream or whole milk. Beat until the frosting reaches a smooth, spreadable consistency. It should be thick enough to hold sprinkles but soft enough to pipe. Add more sugar if it’s too thin or more cream if it’s too stiff.
Step 8: Assemble and Dip Into Nonpareils
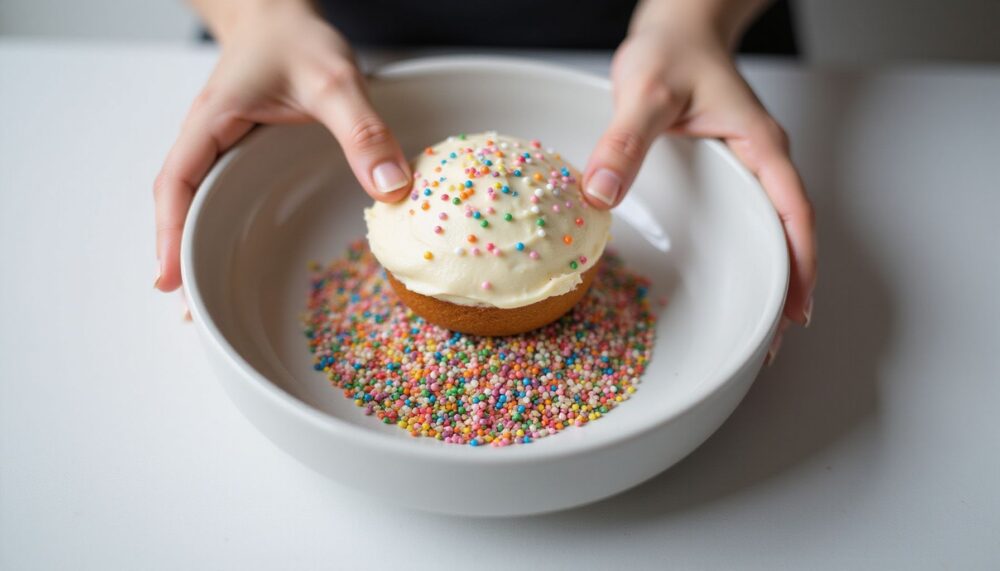
Once the cakes are completely cooled, pipe a generous swirl of buttercream frosting on top of each cake using a piping bag and round or star tip. Pour nonpareil sprinkles into a shallow bowl or small dish. Gently hold a frosted cake sideways and dip the frosted top directly into the sprinkles, twisting slightly to coat evenly with a thick, solid cap of sprinkles. The frosting should be cold enough (refrigerate if needed) to set the sprinkles firmly. Place each finished cake on a plate or in a small container.
Recipe Card
Homemade Funfetti Dot Cake
Individual-sized cake in a cup topped with frosting and a dense cap of colorful sprinkles. Soft, moist crumb with buttermilk and egg whites for bakery-quality texture.
Prep: 20 minutesCook: 35 minutesTotal: 55 minutes (plus cooling)Yield: 12 dot cakesCategory: DessertCuisine: American
Ingredients
- 2.75 cups all-purpose flour, sifted
- 2.5 tsp baking powder
- 0.5 tsp salt
- 0.75 cup unsalted butter, room temperature
- 1.67 cups granulated sugar
- 5 room-temperature egg whites
- 2.5 tsp vanilla extract
- 1.25 cup room-temperature buttermilk
- 0.33 cup sour cream, room temperature
- 0.5 cup rainbow jimmies sprinkles
- 0.5 cup unsalted butter (for frosting)
- 2 cups confectioners’ sugar, sifted
- 3 tbsp heavy cream or milk
- 0.75 cup nonpareil sprinkles (for dipping)
Instructions
- Preheat oven to 350°F. Line a baking sheet with parchment and arrange twelve 4–6 oz ramekins or dessert cups on it.
- Sift flour, baking powder, and salt into a small bowl and set aside.
- In a stand mixer, cream 0.75 cup room-temperature butter and 1.67 cups sugar on medium speed for 3–5 minutes until pale and fluffy.
- In another bowl, whisk together egg whites, vanilla, buttermilk, and sour cream.
- Alternately add dry and wet ingredients to the creamed mixture, starting and ending with dry ingredients. Mix on low speed until just combined after each addition.
- Fold in rainbow jimmies gently using a rubber spatula, no more than 8 folds.
- Divide batter evenly among ramekins, filling each two-thirds full.
- Bake for 32–38 minutes until golden and a toothpick comes out clean. Cool in cups for 5 minutes, then transfer to wire rack.
- For frosting: beat 0.5 cup softened butter until pale, then gradually add 2 cups sifted confectioners’ sugar alternately with 3 tbsp cream. Beat until smooth.
- Once cakes are completely cool, pipe buttercream on top of each cake.
- Pour nonpareils into a shallow dish. Dip the frosted top of each cake into the sprinkles, coating generously.
- Refrigerate for 30 minutes before serving.
Notes
- Keep all ingredients at room temperature to ensure proper emulsification and a moist crumb
- Use rod-shaped jimmies in the batter (not round nonpareils) to prevent color bleeding
- Sift flour and confectioners’ sugar to avoid lumps and ensure a smooth texture
- Cakes are best eaten within 24–48 hours; store in an airtight container in the refrigerator
Nutrition (Per Serving)
| Calories | 320 |
| Protein | 3 |
| Carbs | 48 |
| Fat | 14 |
Estimated values, provided for informational purposes only.
Tips for Perfect Funfetti Dot Cakes Every Time
Use an oven thermometer. Standard home ovens often run 10–15°F hotter or cooler than their dial suggests. Since these small cakes bake fast, even a small temperature swing can dry them out or leave the center underbaked. A cheap oven thermometer ($10–15) gives you confidence that your cakes will bake evenly.
Don’t skip the room-temperature ingredients step. This is not a shortcut you can skip. Cold butter won’t cream properly, cold eggs won’t emulsify, and cold buttermilk can cause the batter to curdle. Set everything out 30–45 minutes before you start.
Sift your flour twice. Once before measuring and once again with your baking powder and salt. This aerates the flour and ensures there are no lumps that could create dense pockets in your cake.
For the frosting, chill it slightly before piping if your kitchen is warm. Cold frosting is easier to control and will set the nonpareils faster when you dip.
Consider investing in a piping bag and tips. A simple round or star tip makes the frosting look intentional and helps you get an even thickness for the sprinkle cap to adhere to.
If you want to make these ahead, bake the unfrosted cakes, wrap them individually in plastic wrap, and store them in the freezer for up to 2 weeks. Thaw at room temperature for 1–2 hours before frosting and dipping.
Common Mistakes and How to Avoid Them
Cold ingredients seizing the batter. If your butter is cold when you add the wet mixture, it can break and create a curdled, greasy batter. Room temperature everything first—this is non-negotiable.
Over-mixing after you add flour. Every stir once flour hits the bowl develops more gluten, which makes the cake tough. Mix only until you don’t see dry flour streaks anymore, then stop.
Using the wrong sprinkles in the batter. Nonpareils (tiny round beads) bleed their dye into the batter during baking, turning it an ugly gray-brown. Jimmies (rod-shaped sprinkles) hold their color better and maintain the bright white crumb you want.
Baking in cups that are too large or too small. If your cups are too big, the cake bakes unevenly and may be dry on the edges before the center is done. If they’re too small, the batter overflows. Standard 4–6 oz ramekins work best.
Dipping the frosting directly without chilling. Warm frosting won’t hold the sprinkles; they’ll slide right off. Refrigerate the frosted cakes for 15–20 minutes before dipping to firm up the frosting.
FAQ
Q: Are funfetti dot cakes easy to make for beginners?
Funfetti dot cakes are easy for beginners because you can use boxed Funfetti mix, bake it in a sheet pan, and cut rounds with simple tools like ramekins or jars. The assembly involves layering cake and frosting in a cup, then dipping the top in sprinkles—no complex piping or decoration skills needed.
Q: How long do funfetti dot cakes last?
Funfetti dot cakes last about 3–5 days when stored in an airtight container in the refrigerator, as the buttercream frosting and cake layers can dry out or spoil if left too long. For best texture and freshness, serve within 2 days and keep chilled until ready to eat.
Q: What size cups do I need for dot cakes?
You need single-serving cups like ramekins, small Mason jars, dessert cups, or 8 oz cardboard soup containers to cut and assemble dot cakes. These holders create the signature “dot” shape and ensure each cake portion reaches the brim for even frosting and sprinkle coating.
Q: Will funfetti dot cakes work without sprinkles?
No, funfetti dot cakes won’t work as intended without sprinkles because the Funfetti cake mix and rainbow nonpareil coating are essential to the cake’s color, name, and viral appeal. The sprinkles baked in the batter and pressed onto the frosting define the “dot cake” trend.
Q: When is the best time to cut cake rounds for dot cakes?
The best time to cut cake rounds for dot cakes is after the baked sheet cake has cooled completely and been frozen for about 30 minutes. This cools and firms the cake so the rounds release cleanly from the cutter without crumbling or sticking.
Q: What frosting is best for funfetti dot cakes?
The best frosting for funfetti dot cakes is a simple vanilla buttercream made by beating butter until fluffy, then adding vanilla, confectioners’ sugar, and a little milk to reach a creamy consistency. This frosting is smooth enough to press sprinkles onto and holds the nonpareils well when chilled.
Q: Which Funfetti cake mix works best for dot cakes?
Pillsbury’s Funfetti cake mix works best for dot cakes because it is the official brand used in the recipe from Pillsbury Baking and is designed to bake evenly in sheet pans for easy round cutting. Any standard Funfetti box mix with rainbow sprinkles baked in will also work well.
My Experience With The Best Funfetti Dot Cake: An Easy & Delicious Recipe
I tested this recipe three times before I was satisfied—and honestly, that’s because I made every beginner mistake first. My first batch came out dense because I used cold buttermilk straight from the fridge. The second batch had a muddy-gray interior because I used round nonpareils in the batter like an amateur. By the third time, I nailed it: pale golden cakes with that pillow-soft crumb that makes you want to take another bite immediately.
The real insight I wish someone had told me earlier is that the room-temperature step isn’t just helpful—it’s the difference between a cake that tastes homemade and one that tastes like it came from a bakery. When butter, sugar, and eggs are all the same temperature, they emulsify into a stable batter that traps air perfectly. That air is what gives you the lift and crumb structure that makes these cakes so satisfying.
What surprised me most was how forgiving the recipe actually is once you understand the fundamentals. I’ve made these for birthdays, summer potlucks, and just because—and I’ve tweaked them along the way. Last time, I used almond extract instead of vanilla and they tasted like something from a French patisserie. The frosting is dead simple, the dipping is fun, and people always ask for the recipe.
My biggest laugh came when a friend asked if I’d used a box mix. When I said no, she didn’t believe me until she tasted the difference. That moist, tender crumb is the signature of doing it from scratch. Have you tried making dot cakes before, or is this your first time jumping on the trend?
Latest Updates
The viral dot cake trend shows no signs of slowing down in 2026. While boxed Funfetti mixes dominate social media videos, homemade versions have gained serious traction among home bakers who want more control over ingredient quality and flavor. As of mid-2024, variations with cream cheese frosting, salted caramel, and chocolate layers have emerged as popular riffs on the original concept. Bakers are also experimenting with different nonpareil colors—pastels, metallics, and specialty sprinkles—to create custom looks for specific events like summer dinner parties and celebrations.
The technique of dipping frosted cakes into toppings has also inspired creative adaptations: some bakers now use this method for crushed Oreos, mini chocolate chips, or even toasted coconut. What remains consistent is the appeal of an individual-sized, Instagram-worthy dessert that tastes homemade and doesn’t require advanced decorating skills. Whether you’re using a boxed mix for speed or making from scratch for flavor, the result is the same: a cake that people actually want to eat and photograph.
References
- Erika. (n.d.). How to make the viral dot cakes: The charms of cake in a cup. Tasting Notes. https://thepancakeprincess.substack.com/p/how-to-make-the-viral-dot-cakes
- Rose Bakes. (n.d.). Ultimate Funfetti cake recipe. Rose Bakes. https://rosebakes.com/ultimate-funfetti-cake-recipe
- Honest Cooking. (n.d.). Funfetti cake – No box needed. Honest Cooking. https://honestcooking.com/funfetti-cake-no-box-needed
- Creative Cake Design. (n.d.). Super easy vanilla funfetti cake recipe. Creative Cake Design. https://www.creativecakedesign.com/post/super-easy-vanilla-funfetti-cake-recipe
- Baking with Blondie. (n.d.). The best vanilla funfetti cake. Baking with Blondie. https://bakingwithblondie.com/the-best-vanilla-funfetti-cake
- Oh Sweet Basil. (n.d.). Homemade funfetti cake. Oh Sweet Basil. https://ohsweetbasil.com/homemade-funfetti-cake-recipe

Sarah Anderson . J
I’m the mom behind Wise Mom Blogger, where everyday creativity meets real-life motherhood. I share easy DIY crafts, cozy knitting and crochet projects, beginner-friendly sewing ideas, and family-tested recipes—plus quick baking hacks that make homemade feel doable on busy days.