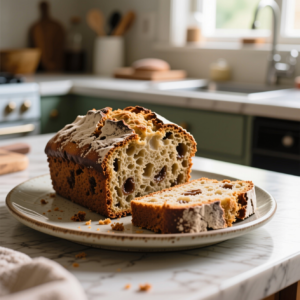
Cinnamon rolls are one of those treats that feel like a bakery is hiding in your kitchen. The good news? You can get fluffy, gooey cinnamon rolls right at home using a bread machine. Whether you’re a beginner or you’ve made bread before, a bread machine can simplify the process—especially mixing, kneading, and first rising.
In this guide, you’ll learn how to make cinnamon rolls using a bread machine step by step. We’ll cover dough, filling, assembly, baking, and icing. You’ll also get tips to avoid common mistakes (like rolls that don’t rise or filling that turns into a crumbly mess).
Let’s get to the warm, cinnamon-swirly goodness.
Key Takeaways
- Use your bread machine mainly for making and rising the dough, not for baking the final rolls (unless your machine has a special setting).
- A good cinnamon roll dough should be soft and slightly tacky, not dry.
- Let your rolls rise a second time before baking for the best fluffiness.
- Use the right ratio for filling (butter + cinnamon + sugar) so it stays thick and gooey.
- Make icing while rolls are warm so it melts and soaks in slightly.
Quick Answer
To make cinnamon rolls in a bread machine: make the dough in the machine using the “dough” or basic bread cycle, then roll it out, spread butter, cinnamon, and sugar, roll it up, cut into pieces, let rise again, bake in the oven, and finish with icing.
What You Need
Ingredients (Basic Cinnamon Rolls)
For the dough
- 1 cup warm milk (about 90–110°F / 32–43°C)
- 2 1/4 tsp active dry yeast (1 packet) or bread machine yeast
- 1/4 cup sugar
- 1/3 cup melted butter (or vegetable oil)
- 1 large egg
- 1 tsp salt
- 3 1/2 to 4 cups all-purpose flour (start with 3 1/2)
For the filling
- 1/3 cup softened butter
- 1/2 to 3/4 cup brown sugar (more for sweeter rolls)
- 2 to 3 tbsp ground cinnamon
- Optional: 1/4 cup chopped pecans or raisins
For the icing
- 1 cup powdered sugar
- 2 to 3 tbsp milk or cream
- 1/2 tsp vanilla (optional)
- Optional: pinch of salt
Equipment
- Bread machine
- Oven-safe baking pan (usually 9×13-inch)
- Rolling pin
- Mixing bowls
- Measuring cups/spoons
- Plastic wrap or a clean towel
- Serrated knife or dental floss for cutting rolls
- Spoon or spatula for spreading filling and icing
Bread Machine Settings You Might Use
- Dough cycle (best for cinnamon rolls)
- Or Basic/White Bread cycle (only up to the dough stage, if you can stop early)
- Do not bake in the machine unless your machine explicitly recommends it for sweet rolls
Step 1: Choose the Right Bread Machine Cycle

Most bread machines have a “Dough” cycle. Use that when possible because it handles:
- mixing
- kneading
- first rise
If you don’t have a dough cycle, you can still use your machine’s basic cycle, but you’ll likely need to stop it before baking begins. Check your manual for instructions. Cinnamon roll dough should be risen, not baked, before you shape the rolls.
Step 2: Proof the Yeast (Optional but Helpful)

You can mix yeast straight in, but proofing helps if your yeast is old or you’re unsure.
To proof:
- Warm the milk (not hot—warm like a comfortable bath).
- Add yeast and a small spoonful of sugar.
- Wait 5–10 minutes.
If it looks foamy, your yeast is active. If nothing happens, your yeast might be too old and the dough won’t rise well.
Step 3: Add Ingredients to the Bread Machine Correctly

Bread machine order matters. Most recipes want liquids first, then wet ingredients, then dry, and yeast last (unless your manual says otherwise).
A common simple method:
- Pour in warm milk
- Add melted butter and egg
- Add sugar and salt
- Add flour gradually
- Make a small indentation in the flour and add yeast at the end
Make sure you don’t let yeast touch salt directly before the cycle starts, especially if your manual suggests specific placement.
Step 4: Let the Machine Knead and Rise

Start the dough cycle. During mixing, check the dough about 5–10 minutes into kneading.
You’re aiming for:
- soft dough
- slightly tacky
- not sticky enough to glue to your fingers
If the dough looks dry and crumbly, add 1 tablespoon water at a time (up to 3 tablespoons). If it’s too sticky and wet, add 1 tablespoon flour at a time (up to 3–4 tablespoons).
When the cycle finishes, the dough should look puffy and doubled-ish in size.
Step 5: Prepare Your Filling and Pan
While the dough rises (or right after it finishes), prep so you’re not scrambling.
- Preheat your oven later (usually 350°F / 175°C).
- Grease a 9×13-inch baking pan lightly.
- Mix filling ingredients:
– soften butter – brown sugar – cinnamon You can stir it together into a thick paste-like mixture, or spread softened butter first and then sprinkle cinnamon sugar on top.
For best results, the filling should be thick enough to stay inside the swirl.
Step 6: Roll Out the Dough
Lightly flour your counter (but don’t overdo it—too much flour can make rolls tough).
- Place dough on your counter.
- Roll into a rectangle about 12×18 inches (rough sizes are fine).
- Try to keep it even thickness so the rolls cook at the same rate.
If the dough shrinks back, let it rest 5 minutes and try again. Dough needs a little patience.
Step 7: Spread Filling and Roll Tightly
Now it’s time for the swirl.
- Spread softened butter evenly over the dough.
- Sprinkle brown sugar and cinnamon mixture all across the surface.
- Leave a small border at one edge (about 1 inch) so the roll seals.
Roll it up:
- Start from the long edge.
- Roll tight like you’re making a log.
- Press the seam to seal.
A tight roll helps keep filling from leaking out.
Step 8: Cut the Rolls Cleanly
Cutting is where cinnamon rolls can become either beautiful—or messy.
Two easy methods:
- Serrated knife: use gentle sawing, not pressing.
- Dental floss: slide it under the roll, cross over the top, and pull to cut.
Cut into 10–12 rolls for a 9×13 pan.
Place rolls in the prepared pan with the cut side up.
Step 9: Second Rise for Fluffy Rolls
This is one of the biggest secrets to bakery-style cinnamon rolls.
- Cover the pan with plastic wrap or a clean towel.
- Let rise 20–40 minutes in a warm place.
– They should look puffy and almost touching.
If your kitchen is cool, give them more time. If they rise too much and get overly airy, they can collapse a bit during baking. It’s a balance, so watch them.
Step 10: Bake Until Golden
Preheat oven to 350°F (175°C).
Bake:
- 20–28 minutes for a standard pan
- until tops are lightly golden and the centers look set
If they brown too fast, loosely cover with foil for the last 5–8 minutes.
Let rolls cool about 10 minutes before icing. This helps the icing melt but not disappear.
Step 11: Make and Add Icing (The Fun Part)
Stir icing ingredients:
- powdered sugar + milk/cream + vanilla + pinch of salt
You want it thick but pourable.
For best taste:
- ice while warm (not scorching)
- drizzle or spread gently
If you prefer cream cheese icing, you can use:
- softened cream cheese + butter + powdered sugar + vanilla
(If you want, tell me your preference and I’ll share a cream cheese version that works well with bread machine dough.)
Tips
Tip 1: Don’t Over-Flour the Dough
Too much flour makes cinnamon rolls dry and less tender. Use flour only to manage stickiness while rolling.
Tip 2: Adjust Flour Like a Pro
Every flour brand absorbs differently. If dough is too sticky, add flour one tablespoon at a time. If it’s too stiff, add a teaspoon to a tablespoon of warm water.
Tip 3: Use Warm (Not Hot) Milk
Hot milk can hurt yeast and stop the rise. Warm is best.
Tip 4: Let Rolls Rise Before Baking
Skip the second rise and your rolls may taste more like cinnamon bread than true cinnamon rolls.
Tip 5: Watch for Filling Leaks
If your filling runs out, the rolls might have been overfilled or not sealed. Leave a border, roll tightly, and press the seam.
Tip 6: Store and Reheat
Store covered in the fridge up to 4 days. To reheat:
- microwave 10–20 seconds for soft rolls
- or warm in the oven at 300°F (150°C) for 5–8 minutes
FAQ
Can I bake cinnamon rolls in the bread machine?
Sometimes, but most bread machines are designed for loaf baking, not individual rolls. The dough cycle is ideal for mixing and rising. For best texture, bake in the oven. If you try machine baking, follow your manual and expect different results.
What if my dough doesn’t rise?
Common causes:
- yeast is old
- milk was too hot or too cold
- dough is too dry or too heavy (too much flour)
- the room is very cool
Check yeast freshness, warm your kitchen, and adjust dough texture next time.
Why are my rolls dense?
Dense rolls often happen when:
- second rise was too short
- dough was overworked or too dry
- rolls were cut too thick and underbaked
- filling wasn’t spread evenly (creating uneven rises)
How do I keep the swirl neat?
Rolling tightly and sealing the seam helps. Also, cut with gentle sawing motion or dental floss so the layers don’t squish.
Can I make the dough ahead of time?
Yes. You can refrigerate after shaping:
- Assemble rolls in the pan.
- Cover and refrigerate overnight.
- In the morning, let them sit at room temperature 30–60 minutes to finish rising, then bake.
What’s the best pan size?
A 9×13-inch pan is standard for 10–12 rolls. If you use a smaller pan, rolls may be taller and need a few extra minutes in the oven.
Can I freeze cinnamon rolls?
Absolutely. Freeze baked rolls:
- cool completely
- wrap tightly
- freeze up to 2 months
Thaw overnight in the fridge, then reheat gently.
Conclusion
Making cinnamon rolls in a bread machine is a sweet shortcut to soft, flavorful rolls without doing all the hard work by hand. Your bread machine does the busy part—mixing and rising—while you focus on the fun parts: rolling out the dough, spreading cinnamon filling, creating the swirl, and baking until golden.
Remember the biggest wins:
- use the dough cycle
- get the dough texture right
- don’t skip the second rise
- bake in the oven for the best results
- ice while warm
If you want, share your bread machine brand/model and whether you prefer classic or cream cheese icing, and I can help you fine-tune the settings and timing.

Sarah Anderson . J
I’m the mom behind Wise Mom Blogger, where everyday creativity meets real-life motherhood. I share easy DIY crafts, cozy knitting and crochet projects, beginner-friendly sewing ideas, and family-tested recipes—plus quick baking hacks that make homemade feel doable on busy days.