Ever wondered why your favorite mascara suddenly transforms from a smooth finish into a spider-leg mess during a busy workday or a special summer evening? Clumpy product happens to the best of us, but a few simple techniques can restore your look quickly. Whether you are prepping for a morning meeting or adding finishing touches to your makeup, the right approach keeps lashes defined, separated, and healthy. Understanding your tools and application timing makes all the difference for achieving that professional, smudge-free look. Let’s look at how to master your routine and keep your lashes looking their absolute best.
Quick Questions and Answers
Question: How do you make mascara less clumpy fast? Answer: The fastest fixes are to comb through the lashes with a clean spoolie while the mascara is still wet, or use a lash comb to separate the hairs. If the product has already dried, a spoolie lightly dipped in micellar water can help break up the clumps. This is a gentle way to rescue your look without rubbing your eyes.
Question: Why does my mascara clump every time I apply it? Answer: The main causes are applying too much product, using a brush that is too thick, and not spacing out coats long enough. Makeup.com and IPSY both point to lighter application, slimmer wands, and drying time between coats as the key prevention steps for a smooth finish.
Question: Can you fix clumpy mascara after it dries? Answer: Yes, but the method changes once it has dried. L’Oréal Paris recommends using a spoolie dipped in micellar water to gently soften the buildup. Alternatively, you can use a makeup remover wipe to clear the lashes entirely and reapply once they are clean and dry.
Key Takeaways
- Waiting 30 to 60 seconds between coats prevents formula buildup.
- Clean tools are your best defense against thick, uneven application.
- Avoid pumping the wand to keep air from drying out your tube.
- Replace your mascara every 3 to 4 months to ensure the formula stays fresh.
What You Need
| Item | Purpose | Notes |
|---|---|---|
| Clean Spoolie | Separation | Keeps lashes defined during application. |
| Paper Towel | Excess Removal | Better than tissues, which leave lint. |
| Micellar Water | Deep Cleaning | Loosens dried formula without scrubbing. |
| Lash Primer | Base Layer | Smooths lashes for even coating. |
| Saline Solution | Formula Revival | Use only 1–2 drops for thick mascara. |
Step 1: Remove Excess Product

Before you touch your eyes, look at your wand. It often holds way more product than you actually need. Wipe the wand gently along the edge of a paper towel. This removes the globs that typically sit at the tip. You will find that your application becomes much more controlled and thin. Using a paper towel is safer than using a tissue. Tissues leave behind tiny fibers that can irritate your eyes, a tip mentioned in a tutorial by Woman’s Day.
Step 2: Wiggle at the Base
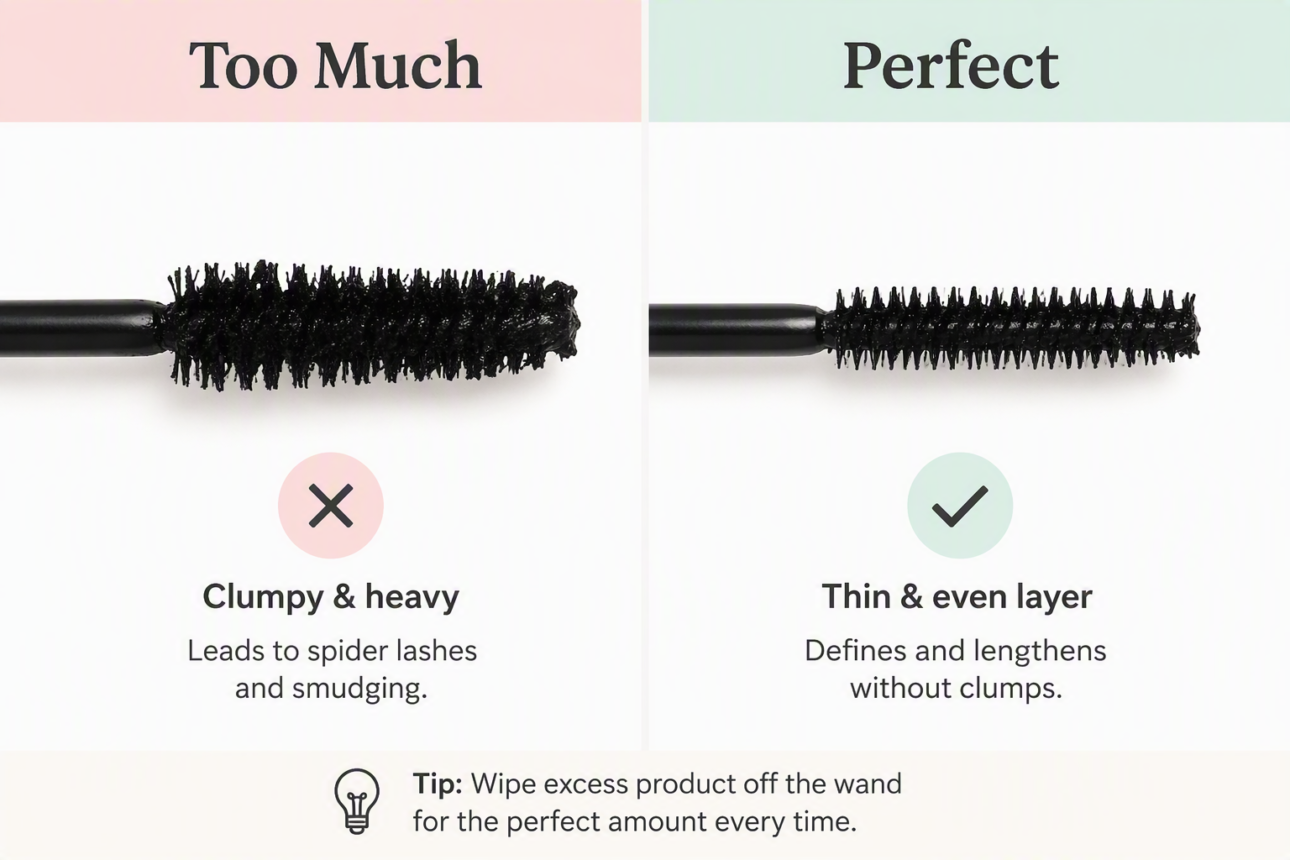
Start the wand at the very base of your lashes. Wiggle it back and forth as you pull it toward the tips. This technique ensures you get the most pigment right at the roots. It also helps separate the lashes early in the process. If you notice your lashes sticking together, the wiggle motion helps break up the tension before the formula sets. Don’t rush this part. A slow, steady hand results in better volume without the heavy clumps.
Step 3: Use a Spoolie for Instant Separation

Keep a clean, dry spoolie brush right next to you while you apply your makeup. If you spot a clump forming, reach for it immediately. Brush through your lashes while the mascara is still wet. This is the perfect time to fix any mistakes because the product is still flexible. According to Jones Road Beauty, this is the most effective way to manipulate the lashes before the mascara hardens and creates a permanent mess.
Step 4: Master the Timing Between Coats

Layering is fine, but you must respect the drying time. IPSY notes that waiting 30 to 60 seconds between coats is ideal for discouraging clumping. If you add a second layer too quickly, the wet wand will pull at the tacky, partially dried layer. This dragging motion is exactly what creates those annoying spider-leg clumps. Set a small timer or just count to 60. Your patience will pay off with a smooth, layered look.
Step 5: Fix Dried Clumps with Micellar Water
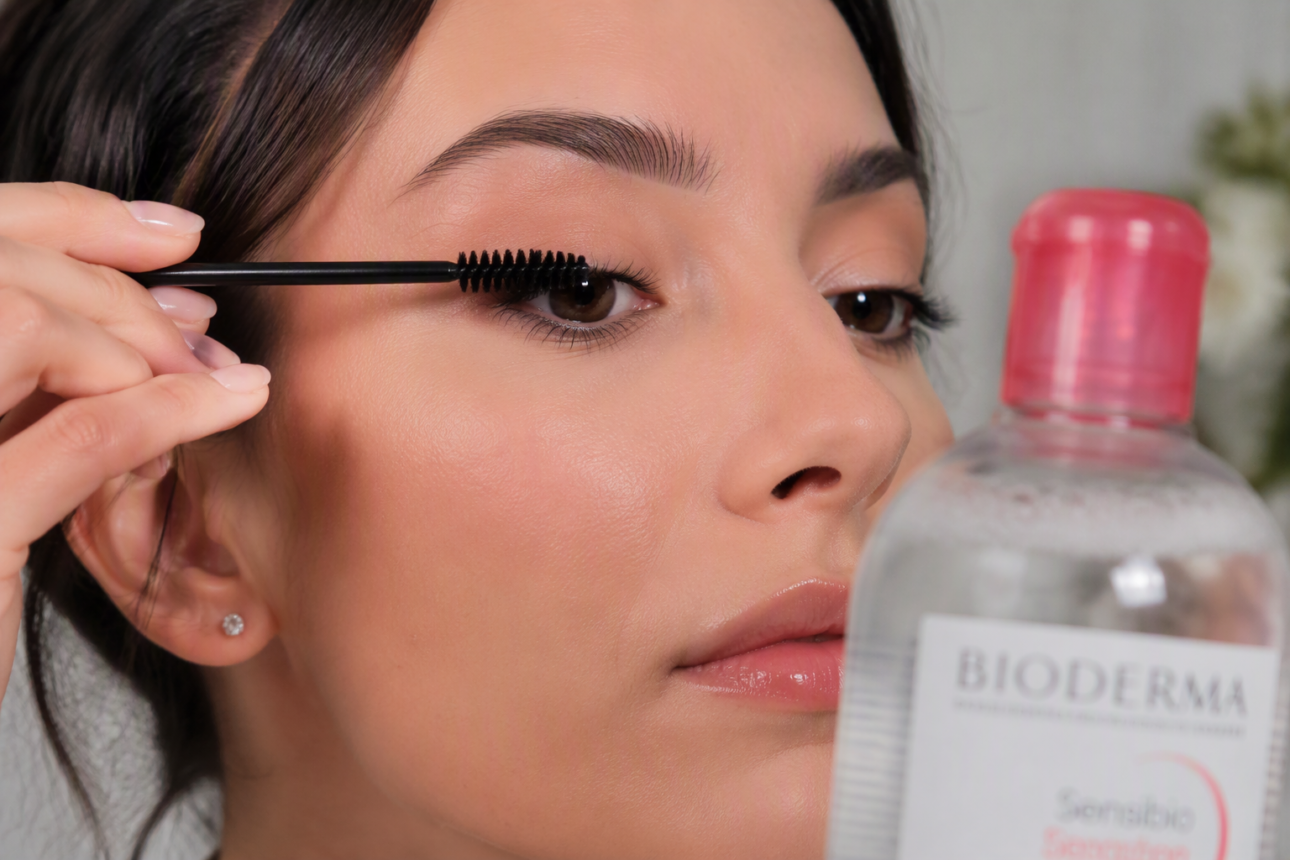
Sometimes you don’t notice a clump until it is already dry. Don’t panic. Dip a clean spoolie into a tiny amount of micellar water. Gently brush this over the clumps. The liquid will loosen the hardened mascara, making it easy to comb away. This is much kinder to your lashes than trying to pull or rub them with your fingers. Always use a light touch to avoid breaking the lashes themselves.
Step 6: Revive Thick Formula

If your mascara feels thick or gloopy right out of the tube, it might be drying out. Add exactly 1 or 2 drops of saline solution to the tube. Swirl the wand gently inside to mix it. Never add more than two drops, as this can change the texture too much. This simple trick is suggested by wikiHow for reviving old formulas. If it stays clumpy after this, the formula has likely reached the end of its life.
Tips
- Store your mascara in a cool, dry place to prevent it from getting too thick.
- Keeping an old, clean spoolie in your purse is a great way to fix clumps when you are away from home.
- Use a lash primer before your mascara to act as a buffer. It smooths out the lash surface and helps the mascara grab on more evenly.
- While you focus on your lashes, remember that keeping your accessories organized is just as important, similar to how you might use 12 Creative Handbag Storage Ideas for Small Closets to keep your closet clutter-free.
- Always check the wand for buildup before you start. A clean wand is the foundation of a clean look.
- If you love accessorizing, you might also enjoy learning about 10 Beautiful Tote Handbag Design Ideas for Every Style for your next shopping outing.
FAQ
Q: Can I use olive oil to fix clumps?
While some sources mention oil, use extreme caution. Olive oil can make your mascara smudge easily and may be difficult to remove at the end of the day. It also risks leaving a film on your lenses if you wear contacts. Micellar water is a much more reliable and safer choice for breaking up mascara.
Q: Should I use a lash primer?
Yes, a primer is a secret weapon for avoiding clumps. It creates a smooth, even base that allows your mascara to glide over the lashes without grabbing onto existing bumps. This helps you get more length and volume without needing to apply heavy, clumpy coats of regular mascara.
Q: What tool removes clumps from mascara best?
A clean spoolie is the gold standard for removing clumps. It acts like a comb to separate lashes and distribute product evenly. Some makeup artists also suggest using a plastic straw as a barrier behind your lashes. This catches any excess mascara that might otherwise transfer onto your skin or create messy buildup.
Q: How long should you wait between mascara coats?
Aim for a wait time of 30 to 60 seconds between each coat. This pause ensures the first layer has enough time to set properly. When the first layer is slightly tacky but not wet, the second coat can grip the lashes better without causing the bristles to snag or clump together.
Q: Should you use tissue to wipe mascara off the wand?
Avoid using tissues for this task. Tissues are designed to be soft and often shed tiny fibers. If these fibers get onto your mascara wand, they will transfer to your lashes and potentially into your eyes, which can cause significant irritation. A lint-free paper towel is a much safer alternative.
Q: How do you stop mascara from clumping in the tube?
Never pump your wand in and out of the tube, as this forces air into the container and dries out the formula. Keep the tube tightly closed when not in use. Some people also recommend rinsing the wand under warm water once a month to remove hardened product, letting it air dry completely before reinserting it.
Q: Is micellar water safe for fixing clumpy mascara?
Micellar water is considered very safe for this purpose. It is gentle on the delicate eye area and effective at dissolving makeup. Using just a small amount on a spoolie allows you to target specific clumps without removing your entire eye makeup look. It is a fantastic tool for quick mid-day touch-ups.
Q: What mascara formula clumps the least?
Formulas that focus on lengthening and defining tend to clump less than thick, volumizing formulas. Look for a tube that features a slim, tapered wand with shorter, spaced-out bristles. These designs give you more control over the application, allowing you to coat each lash individually rather than dumping a large amount of product at once.
Q: When should you throw out clumpy mascara?
Mascara should generally be replaced every three to four months. If your product is consistently clumpy despite proper application and cleaning, the formula has likely expired or degraded. Using expired makeup increases the risk of eye infections and skin irritation, so it is safer to simply replace the tube.
My Experience With How to Make Mascara Less Clumpy Like a Pro
I have spent years fighting the dreaded spider-lash look. There was a time I thought buying expensive mascara would solve all my problems, but the formula mattered less than the technique. One of the biggest lessons I learned is that the wand—and how you treat it—is everything. I used to pump my mascara like a pro, convinced I was getting more product, but that just turned my favorite tube into a dry, clumpy disaster in weeks. Learning to wipe the excess off on a paper towel changed my morning routine entirely. It feels counterintuitive to throw away product you paid for, but that tiny smear on a towel prevents so much frustration later. I also found that a simple clean spoolie is the most underrated tool in any makeup bag. Whether you are in a rush or trying a new, thicker formula, brushing through while the product is still wet acts like a reset button for your lashes. It’s an expert-level secret for achieving that fanned-out, natural look we all want. Have you ever tried using a spoolie to fix your lashes on the go?
Conclusion
Making your mascara less clumpy is all about patience and having the right tools. By following a consistent routine—wiping your wand, using a spoolie, and respecting the drying time—you can easily achieve the lash look you want. Remember to replace your product regularly and keep your tools clean to avoid frustration. Your lashes deserve a smooth, clump-free finish every single day.
References
- L’Oréal Paris. (2024, January 10). Why You Have Clumpy Mascara and How To Avoid It. L’Oréal Paris. https://www.lorealparisusa.com/beauty-magazine/makeup/eye-makeup/how-to-avoid-mascara-clumping
- IPSY. (2024, February 22). 10 Tips for Clump-Free Mascara Every Time. IPSY. https://www.ipsy.com/blog/clumpy-mascara
- Jones Road Beauty. (n.d.). How to Fix Your Mascara to Make It Less Clumpy. Jones Road Beauty. https://www.jonesroadbeauty.com/blogs/beauty/how-to-make-mascara-less-clumpy
- Makeup.com. (2024, March 05). How to Fix And Stop Clumpy Mascara With 3 Easy Tips. Makeup.com. https://www.makeup.com/product-and-reviews/mascara/reasons-for-mascara-clumping
- wikiHow. (2024, April 12). 3 Ways to Fix Clumpy Mascara. wikiHow. https://www.wikihow.com/Fix-Clumpy-Mascara
- TIP OF THE DAY. (2024, May 01). How to fix clumpy mascara on lashes. YouTube. https://www.youtube.com/watch?v=ikSb_CLB570
- Makeup Trick Monday. (2024, June 14). How to Fix Clumpy Mascara!. YouTube. https://www.youtube.com/watch?v=htU6IY1SiIo
- Woman’s Day Magazine. (2024, July 20). Beauty 911: Fix Clumpy Mascara. YouTube. https://www.youtube.com/watch?v=AUR3dOeqR8g

Sarah Anderson . J
I’m the mom behind Wise Mom Blogger, where everyday creativity meets real-life motherhood. I share easy DIY crafts, cozy knitting and crochet projects, beginner-friendly sewing ideas, and family-tested recipes—plus quick baking hacks that make homemade feel doable on busy days.