I’ll never forget the first time I attempted to make a honey glazed ham. It was for Easter dinner, and I was hosting my entire family for the first time. I was terrified. Would the ham be dry? Would the glaze burn? Would I accidentally poison everyone with undercooked meat? Spoiler alert: none of those things happened, and that ham became the star of the dinner table. Now, several years and many hams later, I’m here to share my tried-and-true method with you.
Why I Love Making Honey Glazed Ham
Before I dive into the recipe, let me tell you why honey glazed ham has become my go-to dish for special occasions. First, it’s surprisingly forgiving. Unlike a delicate soufflé or a temperamental roast beef, ham is already cooked when you buy it (in most cases), so you’re really just heating it up and making it delicious. Second, the honey glaze creates this beautiful, glossy coating that looks like you spent hours on it, when in reality, it’s one of the easiest things you can make. And third, leftovers! I’ll get to that later, but trust me, leftover honey glazed ham is a gift that keeps on giving.
What You’ll Need
Let me walk you through the ingredients and tools I use. I’ve learned over the years that having everything ready before you start makes the whole process so much smoother.
The Ham
I typically buy a 7-9 pound bone-in, spiral-cut ham. The spiral cut is key for me because it makes serving so much easier. Each slice is already partially cut, so when it’s time to serve, I just run my knife along the bone and the slices fall right off. You can find these at pretty much any grocery store, especially around holidays. I look for ones labeled “fully cooked” – this means I’m just reheating and glazing, not actually cooking raw meat.
The Glaze Ingredients
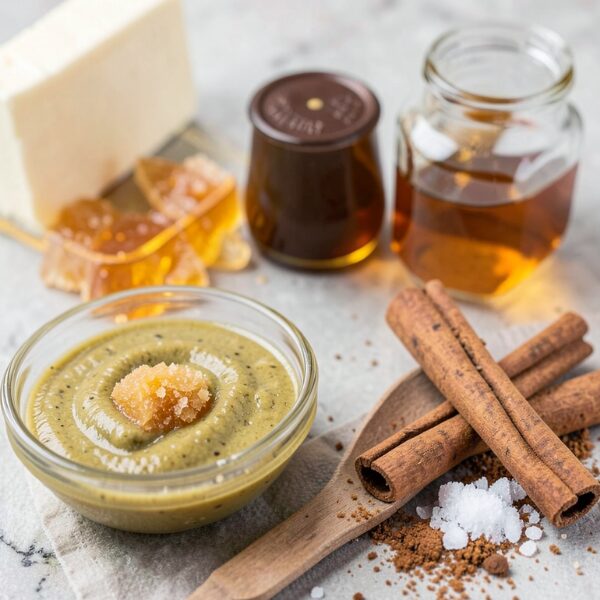
For the glaze, I keep it simple but flavorful. Here’s what I gather:
- 1 cup of honey (I prefer a mild variety like clover honey)
- ½ cup of brown sugar (light or dark works fine)
- ¼ cup of Dijon mustard (this adds a lovely tang)
- ¼ cup of unsalted butter
- 2 tablespoons of apple cider vinegar
- 1 teaspoon of ground cinnamon
- ½ teaspoon of ground cloves
- A pinch of salt
The Tools
I make sure I have these on hand:
- A roasting pan with a rack
- Aluminum foil
- A small saucepan for the glaze
- A basting brush
- A meat thermometer
- A sharp knife
My Step-by-Step Process
Now, let me take you through exactly how I make this ham, step by step. I promise it’s easier than you think.
Step 1: I Start the Night Before
I used to try to do everything on the day of the meal, and I’d end up stressed and rushed. Now, I take the ham out of the refrigerator the night before and let it come closer to room temperature. Okay, I don’t actually leave it out overnight (food safety, people!), but I do take it out about an hour before I plan to cook it. This helps it heat more evenly.
Step 2: I Prep the Ham
I preheat my oven to 325°F. While it’s heating, I remove the ham from its packaging and place it in my roasting pan on the rack, cut side down. If there’s a thick layer of skin or excessive fat, I trim it, but I leave about a quarter inch of fat because it adds flavor and moisture.
Here’s a trick I learned: I score the ham in a diamond pattern. Using a sharp knife, I make shallow cuts (about ¼ inch deep) in diagonal lines one way, then the opposite direction, creating a diamond pattern across the surface. This isn’t just for looks – it helps the glaze penetrate into the meat and creates those beautiful caramelized edges everyone loves.
Step 3: I Add Moisture
Before the glaze goes on, I pour about a cup of water or apple juice into the bottom of the roasting pan. This creates steam while the ham cooks and prevents it from drying out. Then, I cover the entire pan tightly with aluminum foil. This is crucial for the first part of cooking – it traps moisture and keeps the ham from getting tough on the outside before the inside is heated through.
Step 4: The Initial Baking
I place the covered ham in my preheated oven and let it bake for about 90 minutes. The general rule I follow is about 10 minutes per pound, but since we’re going to glaze it later, I don’t worry about it being perfect at this stage. I’m just getting it heated through. This is usually when I prep my side dishes or take a breather.
Step 5: I Make the Magic Glaze
About 30 minutes before I plan to remove the foil, I make the glaze. This timing is important – I want the glaze freshly made and warm when I brush it on. Here’s what I do:
I combine all the glaze ingredients in a small saucepan over medium heat. I start with the butter, letting it melt completely, then I add the honey, brown sugar, Dijon mustard, and apple cider vinegar. I stir constantly as the mixture comes to a gentle simmer. The sugar needs to dissolve completely, and the ingredients need to blend together into a smooth, glossy sauce.
Once it’s simmering, I add the cinnamon, cloves, and a tiny pinch of salt. The smell at this point is absolutely incredible – sweet, tangy, and spicy all at once. I let it simmer for about 3-4 minutes until it thickens slightly, then I remove it from the heat.
Step 6: The First Glazing
After that initial 90 minutes of covered baking, I carefully remove the ham from the oven. I take off the foil (watch out for the steam – I learned that the hard way!), and here’s where the fun begins.
Using my basting brush, I generously brush about half of the glaze all over the ham, making sure to get it into all those diamond cuts I made earlier. The ham should be glistening and beautiful at this point. I set the remaining glaze aside – I’ll use it in a minute.
Step 7: The Caramelization
I return the uncovered ham to the oven and increase the temperature to 375°F. Now I’m aiming for that gorgeous caramelization. I bake it for another 20 minutes, then I take it out and brush on another layer of glaze using about half of what’s remaining. Back in the oven it goes.
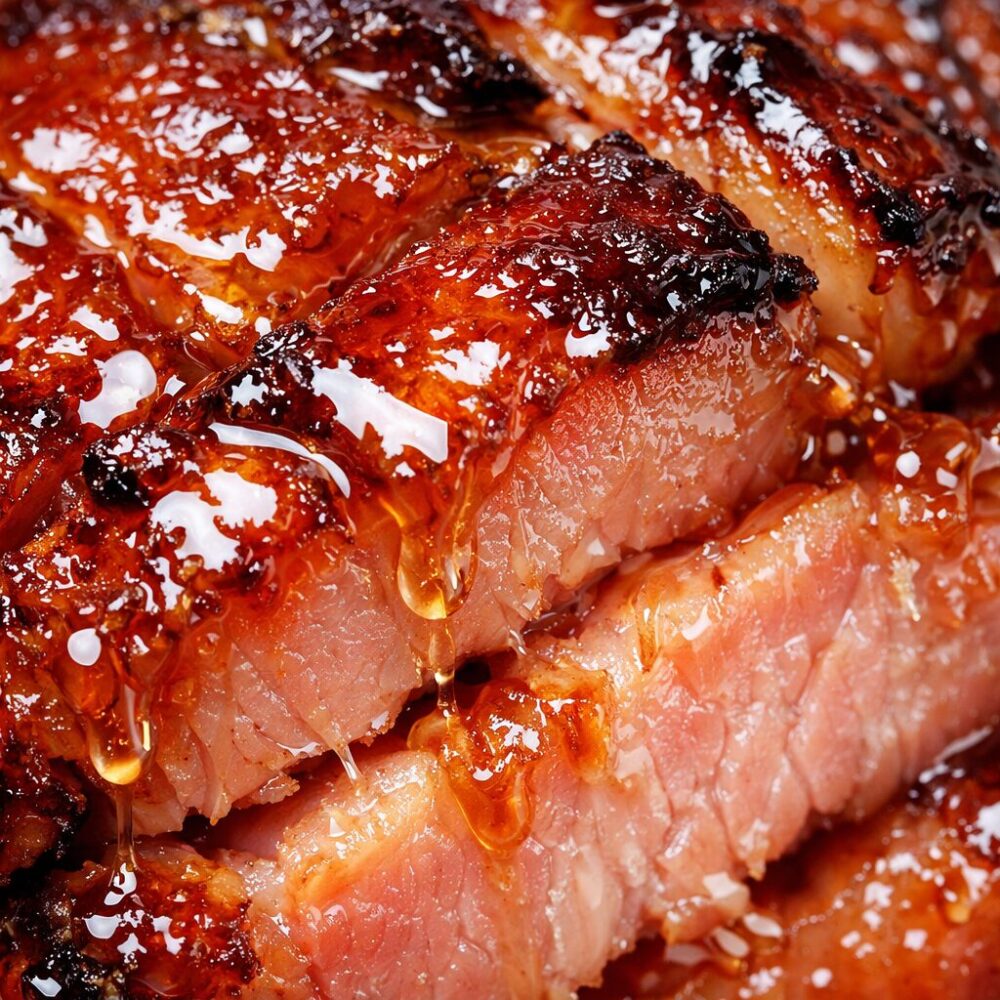
I repeat this process every 10-15 minutes for about 45 minutes to an hour total. Each time I glaze, I’m building up layers of that sweet, sticky coating. By the end, the ham has this deep, mahogany color with slightly charred edges on the scoring marks. That’s exactly what I’m looking for.
Step 8: The Temperature Check
Throughout this glazing process, I check the internal temperature with my meat thermometer. I’m looking for 140°F in the deepest part of the ham (but not touching the bone). Remember, the ham is already cooked, so I’m really just making sure it’s heated through properly.
Step 9: The Rest
Once the ham reaches temperature and looks beautifully caramelized, I remove it from the oven and tent it loosely with foil. I let it rest for 15-20 minutes. This resting period is important – it allows the juices to redistribute throughout the meat, making every slice moist and flavorful.
Step 10: The Grand Finale
When I’m ready to serve, I transfer the ham to a cutting board or serving platter. If there are any pan drippings, I pour them into a small saucepan with any remaining glaze, warm it up, and serve it on the side as an extra sauce.
I run a long knife along the bone, and those spiral-cut slices just fall away perfectly. I arrange them on the platter, and honestly, this is the moment when I feel like a culinary genius.
My Tips and Tricks
Over the years, I’ve learned a few things that make this recipe even better:
Don’t skip the scoring. I know it seems like an extra step, but it really does make a difference in both appearance and flavor.
Watch the glaze carefully. Honey can burn quickly at high temperatures. If I notice the edges getting too dark before the ham is ready, I’ll tent just those areas with small pieces of foil.
Save that bone! After everyone has eaten, I save the ham bone in the freezer. It’s perfect for making split pea soup or flavoring beans.
Extra video for honey glazed ham
What I Do With Leftovers
This might be my favorite part. Leftover honey glazed ham is incredibly versatile. I use it in omelets, on sandwiches, chopped up in fried rice, or cubed and added to mac and cheese. I’ve even diced it and added it to breakfast hash. It keeps in the refrigerator for about 5-7 days, or I freeze portions for up to three months.
Final Thoughts
Making honey glazed ham has become one of my signature dishes, and it still amazes me how something so impressive-looking can be so straightforward. The key is patience with the glazing process and not overthinking it. Every time I serve this ham, I get compliments, and I love sharing that it’s actually quite simple to make.
Whether you’re making this for Easter, Christmas, Thanksgiving, or just because you’re craving something special, I hope you’ll give my method a try.
Sarah Anderson . J
I’m the mom behind Wise Mom Blogger, where everyday creativity meets real-life motherhood. I share easy DIY crafts, cozy knitting and crochet projects, beginner-friendly sewing ideas, and family-tested recipes—plus quick baking hacks that make homemade feel doable on busy days.
