
Have you ever bitten into a warm, fluffy buttermilk biscuit and thought, “I wish I could make these myself”? Well, guess what? You totally can! I’m going to share my favorite buttermilk biscuit recipe with you today. I learned how to make these by watching videos and practicing in my kitchen, and now they turn out perfect every time. The best part? You only need seven simple ingredients and about 35 minutes from start to finish.
Why Buttermilk Makes the Best Biscuits
Before we dive into the recipe, let me tell you why buttermilk is so special for biscuits. Buttermilk is a tangy, thick milk that reacts with baking soda to create amazing fluffy biscuits. It makes them tender, moist, and gives them a gentle tangy flavor that’s absolutely delicious. Regular milk just doesn’t give you the same results!
When I first started making biscuits, I tried using regular milk, and they were okay. But when I switched to buttermilk? Game changer! The biscuits rose higher, tasted better, and had that perfect texture everyone loves.
What You’ll Need
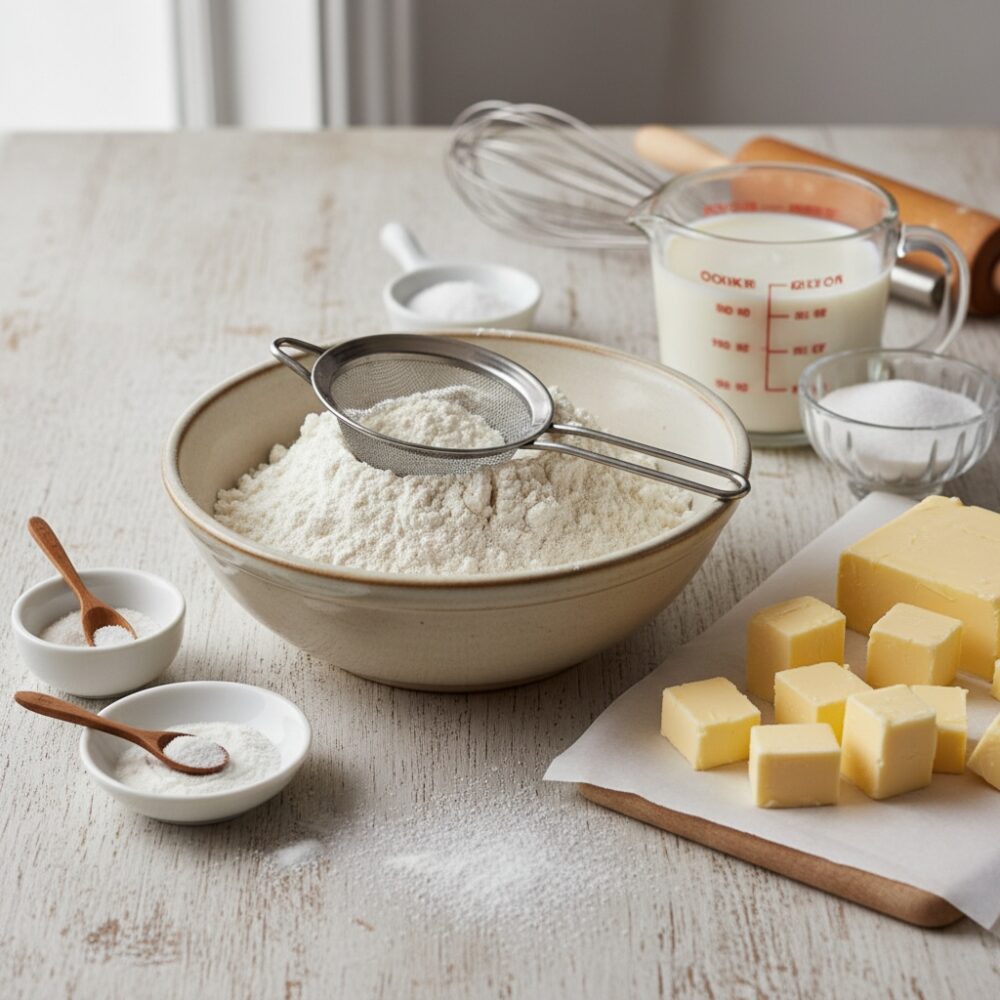
Your Ingredient List
| Ingredient | Amount | Temperature | What It Does |
|---|---|---|---|
| All-purpose flour | 2½ cups | Room temp | The base structure |
| Baking powder | 1 tablespoon | Room temp | Makes them rise |
| Baking soda | ¼ teaspoon | Room temp | Reacts with buttermilk for fluffiness |
| Sugar | 2 teaspoons | Room temp | Adds sweetness and tenderness |
| Salt | ¾ teaspoon | Room temp | Brings out flavor |
| Unsalted butter | ½ cup (1 stick) | FROZEN | Creates flaky layers |
| Cold buttermilk | ¾ to 1 cup | ICE COLD | Makes them tender and moist |
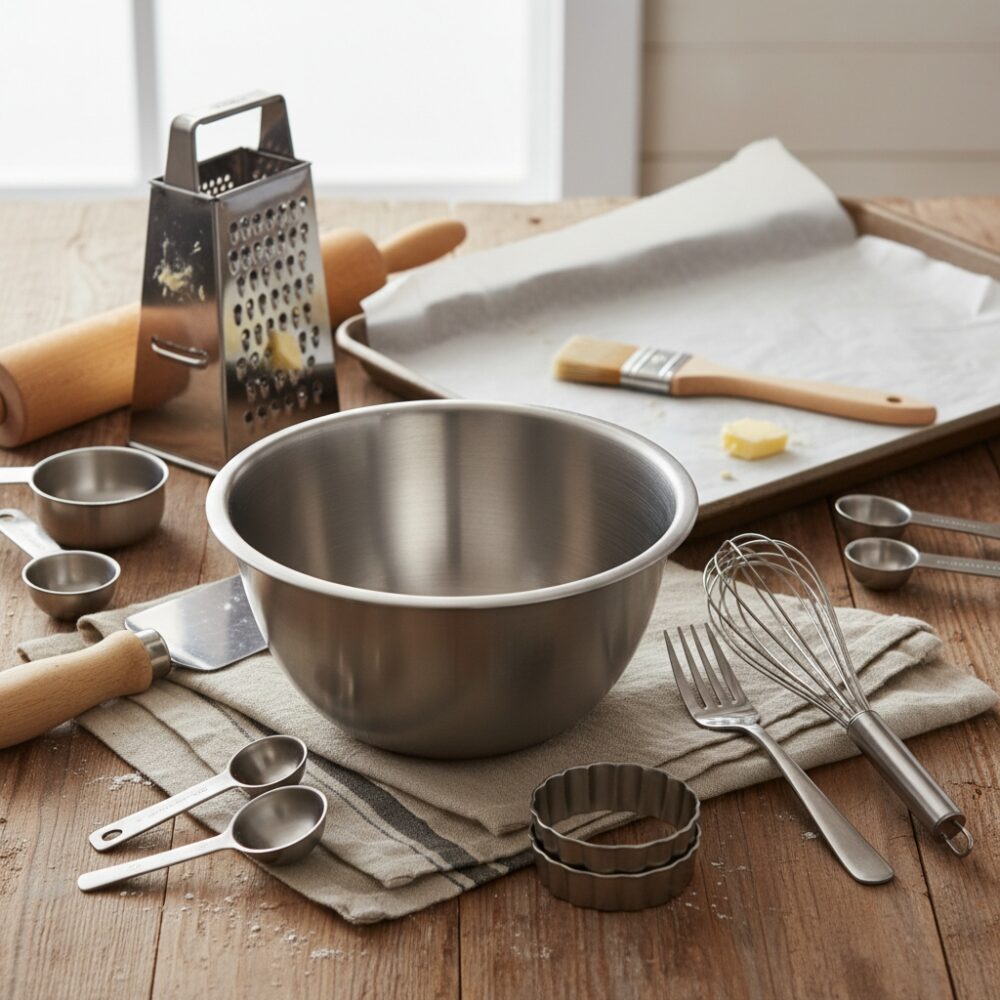
Kitchen Tools You’ll Need
- Large mixing bowl
- Whisk or fork
- Box grater (for the butter)
- Rolling pin
- Bench scraper (optional but helpful)
- 2½-inch round biscuit cutter
- Baking sheet
- Parchment paper
- Measuring cups and spoons
- Pastry brush
Step-by-Step Instructions
Step 1: Preheat Your Oven
Turn your oven to 425 degrees Fahrenheit right away. These biscuits need a hot oven to puff up and get golden brown. If your oven isn’t hot enough, your biscuits won’t rise properly. this step is super important!
Step 2: Freeze Your Butter
Here’s my number one secret: put your stick of butter in the freezer for at least 30 minutes before you start. Some people even freeze it overnight! Why? Because cold butter creates those amazing flaky layers that make biscuits so special. When cold butter hits the hot oven, it melts and creates steam pockets, which makes the layers separate and puff up.
Step 3: Measure Your Flour the Right Way
I learned this trick from watching baking videos, and it changed everything! Don’t just scoop your measuring cup into the flour bag. That packs it down too much, and you’ll end up with dry, tough biscuits.
The correct way to measure flour:
- Fluff up the flour in your bag or container with a spoon
- Sprinkle flour into your measuring cup without packing it down
- Level off the top with a knife
This simple trick will make your biscuits turn out perfect every time!
Step 4: Mix All the Dry Ingredients
In your large mixing bowl, combine:
- 2½ cups of flour (measured correctly!)
- 1 tablespoon of baking powder
- ¼ teaspoon of baking soda
- 2 teaspoons of sugar
- ¾ teaspoon of salt
Use a whisk to mix everything together really well. This makes sure the baking powder and baking soda are spread evenly throughout the flour. Nobody wants a biscuit that rises unevenly!
Step 5: Grate the Frozen Butter
This is where the magic happens! Take your frozen butter out of the freezer. Using the large holes on your box grater, grate the butter into shreds. I learned this technique from Southern Living, and it’s brilliant!
Why grate it? Because grated butter spreads more evenly through the flour than chunks do. This means more flaky layers throughout your entire biscuit. Pretty cool, right?
Once you’ve grated all your butter, sprinkle it into the flour mixture. Use your fingers to gently toss it together. Don’t squeeze or mash it – just toss it lightly. Here’s a pro tip: if you have warm hands, you can put the bowl in the freezer for 5-10 minutes. We want everything to stay super cold!
Step 6: Add the Cold Buttermilk
Make a little well (like a bowl shape) in the center of your flour mixture. Pour in ¾ cup of ice-cold buttermilk. Some people like to start with ¾ cup and add more if needed, while others use a full cup right away.
Now here’s the important part: stir gently! Count your stirs – you want to stir about 15 times, just until the dough starts to come together. It will look messy and shaggy, and that’s perfect! Don’t try to make it smooth. The more you stir, the tougher your biscuits will be.
Why can’t we stir too much?
When you stir flour with liquid, it creates something called gluten. A little gluten is good (it holds the biscuit together), but too much gluten makes biscuits tough and chewy instead of tender and flaky.
Step 7: Turn Out the Dough
Sprinkle a little flour on your clean counter or cutting board. Dump your shaggy dough out onto the surface. Don’t panic if it looks like a mess – that’s exactly how it should look!
Flour your hands lightly and pat the dough into a rectangle shape. It should be about 10 inches by 8 inches (roughly the size of a tablet or small laptop).
Step 8: Fold and Create Layers
This is the fun part that creates all those beautiful flaky layers! Here’s what you do:
- Fold the dough into thirds, like you’re folding a letter
- Turn it 90 degrees (a quarter turn)
- Pat it out into a rectangle again
- Fold it in thirds again
- Turn it 90 degrees
- Repeat this process 5 times total
Each time you fold, you’re creating layers of butter and dough. These layers will separate when baking and make your biscuits super flaky. It’s like making edible origami!
Step 9: Roll to the Right Thickness
After your final fold, roll the dough out one more time. This time, make it about ¾ inch thick. Don’t make it too thin! If your dough is too thin, your biscuits won’t be tall and fluffy.
I like to use a rolling pin, but you can also just pat it out with your hands if you don’t have one.
Step 10: Cut Out Your Biscuits
Dip your biscuit cutter in flour. This stops it from sticking to the dough. Press straight down through the dough – don’t twist! Twisting seals the edges and prevents the biscuits from rising properly.
Lift straight up and place each biscuit on a baking sheet lined with parchment paper. Here’s a cool trick: place them so they’re almost touching each other. When they touch, they help each other rise up tall instead of spreading out wide.
You should get about 8-10 biscuits depending on the size of your cutter.
What about the scraps?
Don’t throw them away! Gently press the scraps together (don’t knead them), pat them out, and cut a few more biscuits. These “scrap biscuits” might not look as pretty, but they’ll still taste amazing!
Step 11: Brush with Buttermilk
Using a pastry brush, gently brush the tops of your biscuits with a little buttermilk. Don’t brush the sides – just the tops! This gives them a beautiful golden color and adds extra flavor.
Step 12: Bake to Golden Perfection
Pop your biscuits into the hot oven. Bake at 425 degrees for 12-15 minutes. Watch them carefully! They’re done when the tops are golden brown. Don’t overbake them, or they’ll be dry.
Step 13: The Finishing Touch
As soon as they come out of the oven, brush the tops with melted butter. This makes them shiny, golden, and extra delicious!
HELPFUL VIDEO TO WATCH
Common Mistakes and How to Avoid Them
Problem-Solving Chart:
| Problem | Cause | Solution |
|---|---|---|
| Biscuits are flat | Butter too warm, oven not hot enough | Use frozen butter, preheat oven fully |
| Biscuits are tough | Mixed too much, too much flour | Stir gently, measure flour correctly |
| Biscuits don’t rise | Twisted the cutter, old baking powder | Press straight down, check expiration dates |
| Biscuits are dry | Too much flour, overbaked | Measure properly, watch baking time |
| Biscuits spread out | Not touching each other | Place biscuits close together on pan |
Making Honey Butter (Optional but Amazing!)
While your biscuits bake, whip up this simple honey butter:
Ingredients:
- 3 tablespoons softened butter (salted is best!)
- 1-2 tablespoons honey
- Optional: ¼ teaspoon vanilla extract or cinnamon
Instructions:
Mix everything together with a fork until smooth and creamy. Spread on warm biscuits and watch everyone’s eyes light up!
Ways to Enjoy Your Buttermilk Biscuits
These biscuits are so versatile! Here are my favorite ways to eat them:
- For Breakfast: With butter and jam, or as a base for eggs Benedict
- For Lunch: Make biscuit sandwiches with ham and cheese
- For Dinner: Serve alongside soup, stew, or fried chicken
- For Dessert: Top with strawberries and whipped cream (shortcake style!)
- Anytime Snack: Just butter and honey – simple and perfect
Storage Tips
If you have leftovers (which is rare at my house!):
- Store in an airtight container at room temperature for 1-2 days
- Reheat in the oven at 350°F for 5 minutes
- You can freeze unbaked cut biscuits for up to a month
- Bake frozen biscuits directly from the freezer (add 2 extra minutes)
Why This Recipe Works So Well
Let me explain the science behind perfect biscuits so you understand what you’re doing:
Cold butter = Steam pockets = Flaky layers
Buttermilk + baking soda = Chemical reaction = Fluffy rise
Gentle handling = Less gluten = Tender texture
High heat = Quick rise = Tall biscuits
Folding technique = Multiple layers = Professional results
When you understand why each step matters, you’ll remember it better and can even troubleshoot problems on your own!
My Final Tips for Success
After making these buttermilk biscuits dozens of times, here’s what I’ve learned:
- Keep everything cold – This is the most important tip
- Work quickly – Don’t let the butter warm up
- Be gentle – Overworking is the enemy
- Don’t skip the folding – That’s where the magic happens
- Use a hot oven – Temperature matters!
- Practice makes perfect – Your third batch will be better than your first
Conclusion
Making buttermilk biscuits from scratch is easier than you think! With just seven simple ingredients and a little practice, you can make biscuits that taste better than any restaurant. The smell of fresh biscuits baking in your oven is worth the effort alone.
I encourage you to try this recipe this weekend. Get your family involved – kids love the folding process! There’s something really special about serving food you made with your own hands. Plus, once people taste your homemade buttermilk biscuits, they’ll be begging you to make them again and again.
So grab that butter, put it in the freezer, and let’s make some biscuits! You’ve got this!
Video Resources Used:
- EASY Buttermilk Biscuits Recipe | Preppy Kitchen
- How To Perfect Your Buttermilk Biscuit Recipe | Southern Living
Sarah Anderson . J
I’m the mom behind Wise Mom Blogger, where everyday creativity meets real-life motherhood. I share easy DIY crafts, cozy knitting and crochet projects, beginner-friendly sewing ideas, and family-tested recipes—plus quick baking hacks that make homemade feel doable on busy days.

