Forget soggy spring rolls or fussy potstickers. You want crunchy, chewy, flavor-packed bites that practically scream ‘chef-level deliciousness’ with minimal fuss? Get ready to master rice paper chicken dumplings. These aren’t just snacks; they’re a culinary revelation, surprisingly easy to whip up, and ridiculously addictive. Let’s dive in and make some magic.
The Great Chicken Filling Adventure
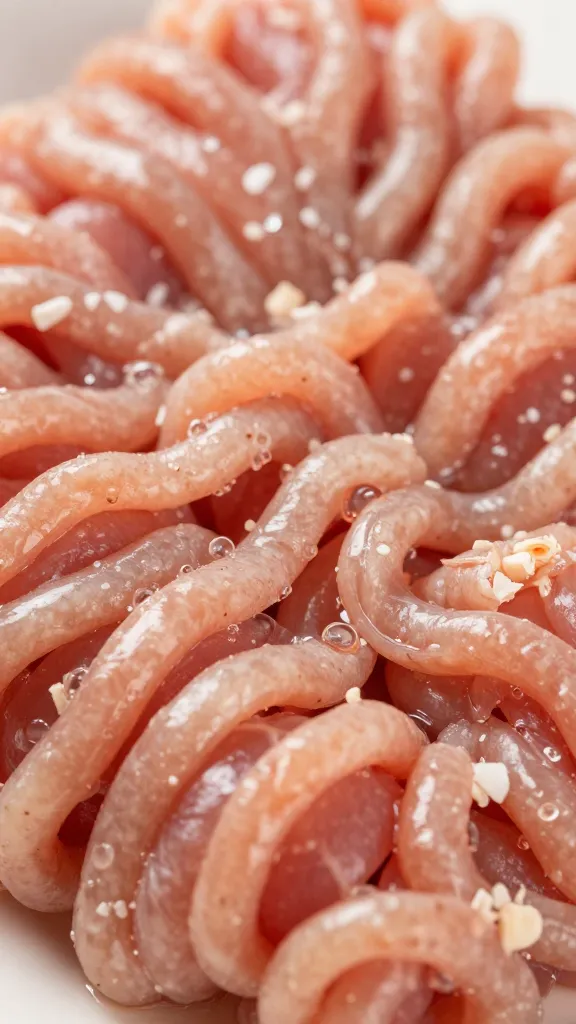
First things first, let’s talk about the heart of your dumpling: the chicken filling. This is where you inject all that glorious flavor, so don’t hold back. You’re aiming for a mixture that’s moist, savory, and holds together nicely.
I always start with ground chicken. It’s lean, cooks quickly, and absorbs flavors like a sponge. You can use ground chicken breast or thigh, whatever your preference. I usually go for thigh meat for a bit more richness, but breast works perfectly fine if you’re watching fat content.
Flavor Boosters: Don’t Be Shy!
Now, for the good stuff. This isn’t just plain chicken; we’re building a flavor profile that will make your taste buds sing. Here’s my go-to list for a killer filling:
- Finely minced garlic and ginger: These are non-negotiable. They provide that essential aromatic kick. I’m talking a tablespoon of each, at least.
- Soy sauce: For umami and saltiness. Start with a tablespoon or two, then taste.
- Sesame oil: A little goes a long way to add a nutty depth. About a teaspoon is usually perfect.
- Rice vinegar: A splash brightens everything up.
- A touch of sugar: Balances the savory notes. A teaspoon is often enough.
- Chili garlic sauce or sriracha: If you like a kick, add it here! Adjust to your spice tolerance.
- Finely chopped green onions or chives: Freshness and a mild oniony bite.
- Shredded carrots or cabbage: Adds texture, nutrients, and a touch of sweetness. Squeeze out excess moisture if using cabbage.
- An egg yolk or a tablespoon of cornstarch: This is your binder. It helps the filling hold its shape during cooking. I prefer a yolk for richness.
Mix everything thoroughly in a bowl. Use your hands; it’s the best tool for the job, IMO. You want to ensure all those amazing flavors distribute evenly. Fry a tiny bit of the mixture in a pan to taste and adjust seasonings. This step is crucial – don’t skip it! You want your filling to be perfectly seasoned *before* it goes into the wrappers.
Rice Paper Redemption: Your Dipping Saga
Ah, rice paper. The hero, and sometimes the villain, of this dish. It’s delicate, translucent, and incredibly versatile. But handling it can feel like a high-stakes origami challenge if you’re not prepared.
You’ll find round rice paper wrappers in the Asian aisle of most grocery stores. They come in various sizes; I usually opt for the medium ones, about 8.5 inches in diameter. They’re big enough to hold a decent amount of filling but not so huge that they become unwieldy.
The Water Bath Whisperer
This is the make-or-break moment for your rice paper. Too little time in the water, and it’s brittle. Too much, and it’s a sticky, tearing mess. You’re aiming for that sweet spot: pliable, soft, but still with some structure.
Here’s the trick:
- Grab a large, shallow dish or pie plate – something wider than your rice paper.
- Fill it with warm water. Not hot, not cold, just pleasantly warm.
- Take one rice paper wrapper at a time. Dip it into the warm water, fully submerging it.
- Count to 10-15 seconds. Seriously, count. You’ll feel it start to soften.
- Carefully lift it out and lay it flat on a clean, damp surface. A damp cutting board or a silicone mat works wonders. Don’t use a dry surface, or it will stick like glue!
The wrapper will continue to soften on your work surface. By the time you’ve placed your filling, it should be perfectly pliable. If it feels too stiff, next time dip for a few more seconds. If it’s tearing, you dipped it too long. You’ll get the hang of it quickly, I promise!
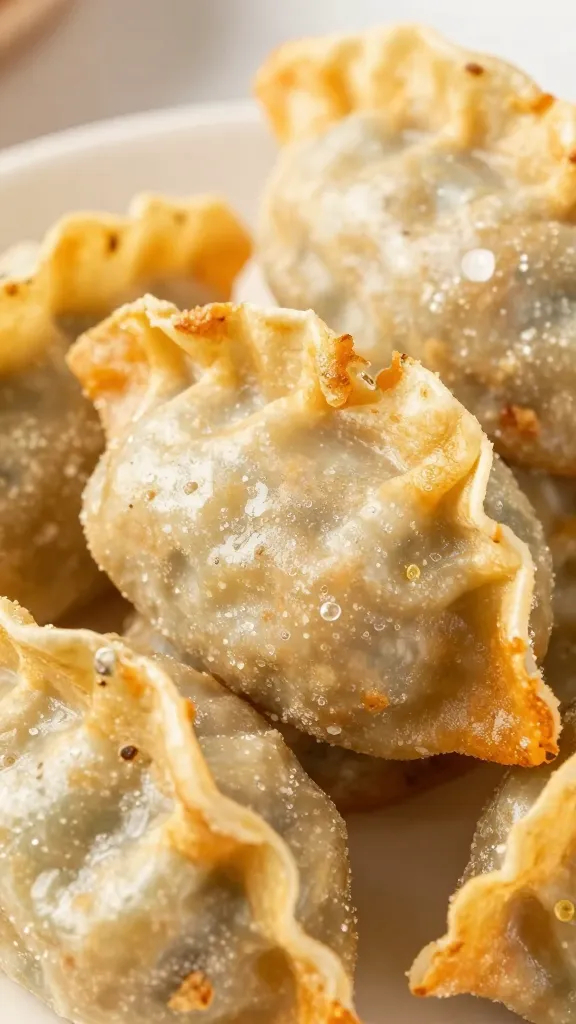
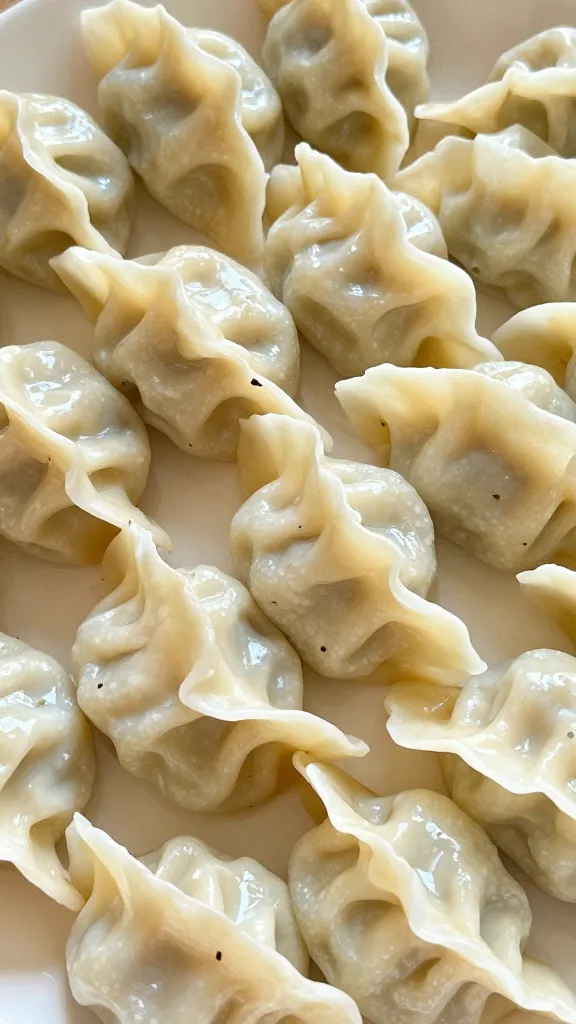
The Art of the Fold: From Novice to Ninja
Now for the fun part: wrapping your little bundles of joy. Think of this as a mini art project. Don’t stress about perfection; even ugly dumplings taste amazing.
Place about 1-2 tablespoons of your chicken filling in the center of the bottom third of the softened rice paper wrapper. Don’t overfill, or you’ll have blowouts. Trust me, I’ve been there.
Shape Shifters: Get Creative!
You have a few options for folding, depending on your preferred aesthetic:
* The Spring Roll Fold (My Go-To):
- Fold the bottom edge of the rice paper over the filling, tucking it in snugly.
- Fold in the left and right sides towards the center.
- Roll the entire thing up tightly from the bottom to the top, creating a neat cylinder.
* The Square Fold:
- Place the filling in the center.
- Fold the top corner down over the filling.
- Fold the bottom corner up.
- Fold the left and right corners in, creating a square or rectangular parcel.
As you finish each dumpling, place it on a parchment-lined plate or tray, making sure they don’t touch. They will stick to each other if they do, and nobody wants that kind of drama.
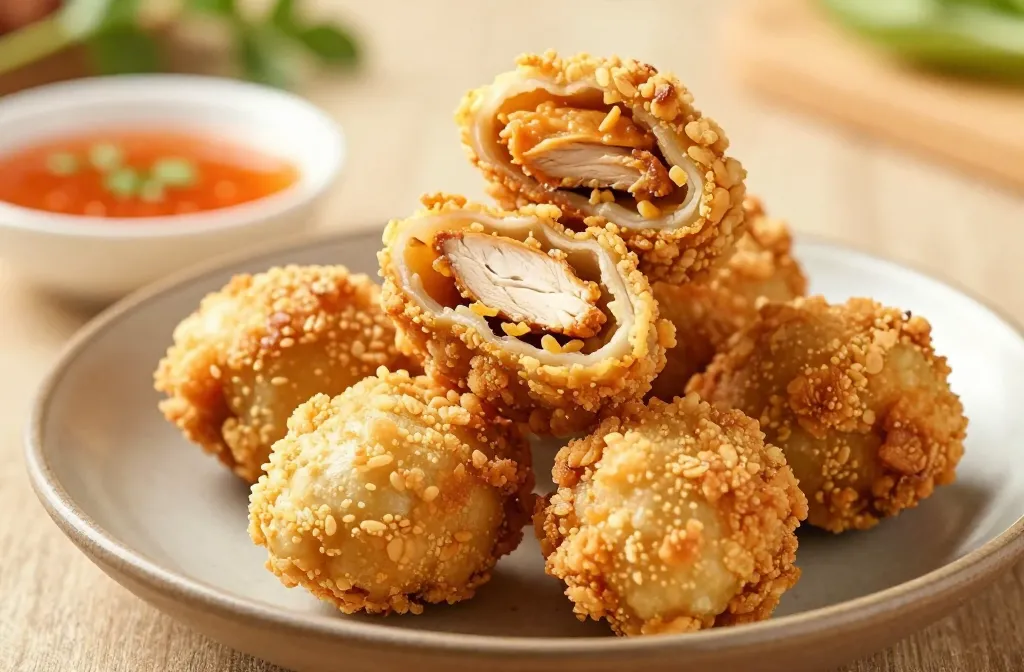
Crispy, Chewy, or Somewhere In Between? Cooking Your Creation

You’ve done the hard work, now let’s cook these beauties! The beauty of rice paper dumplings is their versatility. You can pan-fry them for ultimate crispiness, air-fry them for a lighter crunch, or even steam them for a chewier texture.
The Pan-Fry Perfection
This is my absolute favorite method for that golden-brown, crispy exterior.
- Heat a non-stick skillet over medium-high heat with a tablespoon or two of neutral oil (like canola, vegetable, or avocado oil).
- Once the oil shimmers, carefully place your dumplings in the pan, leaving a little space between each. Don’t overcrowd the pan, or they won’t crisp up properly. Work in batches if necessary.
- Cook for about 3-5 minutes per side, or until they are beautifully golden brown and crispy. The chicken filling cooks quickly, but you want to ensure it’s cooked through.
- Remove from the pan and place on a wire rack to drain any excess oil. This helps maintain crispness.
Air Fryer Alchemy
If you’re looking for a slightly healthier, less oily crunch, the air fryer is your best friend.
- Lightly spray your dumplings with cooking oil spray.
- Arrange them in a single layer in your air fryer basket. Again, no overcrowding!
- Air fry at 375°F (190°C) for 8-12 minutes, flipping halfway through, until they are golden brown and crispy. Keep an eye on them, as air fryer times can vary.
You can also steam them for a softer, chewier texture, but honestly, the crispy versions are where the magic truly happens for these.
Dipping Sauce Drama (The Good Kind)
A dumpling isn’t complete without its dipping sauce. This is your chance to add another layer of flavor and customize your experience. You can go simple or get fancy.
My ultimate go-to sauce is a mix of:
- Soy sauce
- Rice vinegar
- A touch of sesame oil
- Minced garlic and ginger
- A pinch of sugar
- Chili flakes or chili garlic sauce (optional, but highly recommended)
- A squeeze of lime juice (for brightness)
Whisk it all together, taste, and adjust. You want a balance of salty, sweet, sour, and spicy. You can also use a store-bought sweet chili sauce, peanut sauce, or even just plain sriracha if you’re feeling lazy. No judgment here!
FAQ Section
Why do my rice paper wrappers keep tearing?
You’re probably over-soaking them! Remember, a quick 10-15 second dip in warm water is usually all it takes. They continue to soften on your work surface. If they’re too wet, they become incredibly fragile. Also, make sure your work surface is slightly damp, not sticky-dry.
Can I make these ahead of time?
Yes, to an extent. You can prepare the chicken filling a day in advance and store it in the fridge. Once you’ve wrapped the dumplings, you can place them on a parchment-lined tray, cover loosely with plastic wrap, and refrigerate for a few hours before cooking. However, for the best texture, especially if you’re frying them, cook them soon after wrapping. The rice paper can get a bit gummy if it sits too long.
How do I prevent the dumplings from sticking to each other?
Always place your wrapped, uncooked dumplings on a parchment-lined tray or plate, ensuring they don’t touch each other. Once cooked, if you’re stacking them, use parchment paper between layers. The rice paper is naturally quite sticky when wet or warm.
Can I use different fillings?
Absolutely! This recipe is a fantastic template. Feel free to experiment with ground pork, shrimp, or even a vegetarian filling with tofu and lots of veggies. Just make sure your filling is finely chopped and well-seasoned.
What’s the best way to reheat leftovers?
Reheat them in an air fryer or a hot skillet for a few minutes until crispy again. Microwaving them will make them soft and chewy, which isn’t ideal for that satisfying crunch we’re aiming for.
The Final Bite
There you have it: your comprehensive guide to making irresistible rice paper chicken dumplings. These little flavor bombs are a testament to how simple ingredients, handled with a bit of care, can create something truly spectacular. They’re perfect for an appetizer, a light lunch, or even a fun dinner party activity. So go forth, get dipping, get wrapping, and get cooking! Your taste buds (and your friends) will thank you.
Sarah Anderson . J
I’m the mom behind Wise Mom Blogger, where everyday creativity meets real-life motherhood. I share easy DIY crafts, cozy knitting and crochet projects, beginner-friendly sewing ideas, and family-tested recipes—plus quick baking hacks that make homemade feel doable on busy days.
