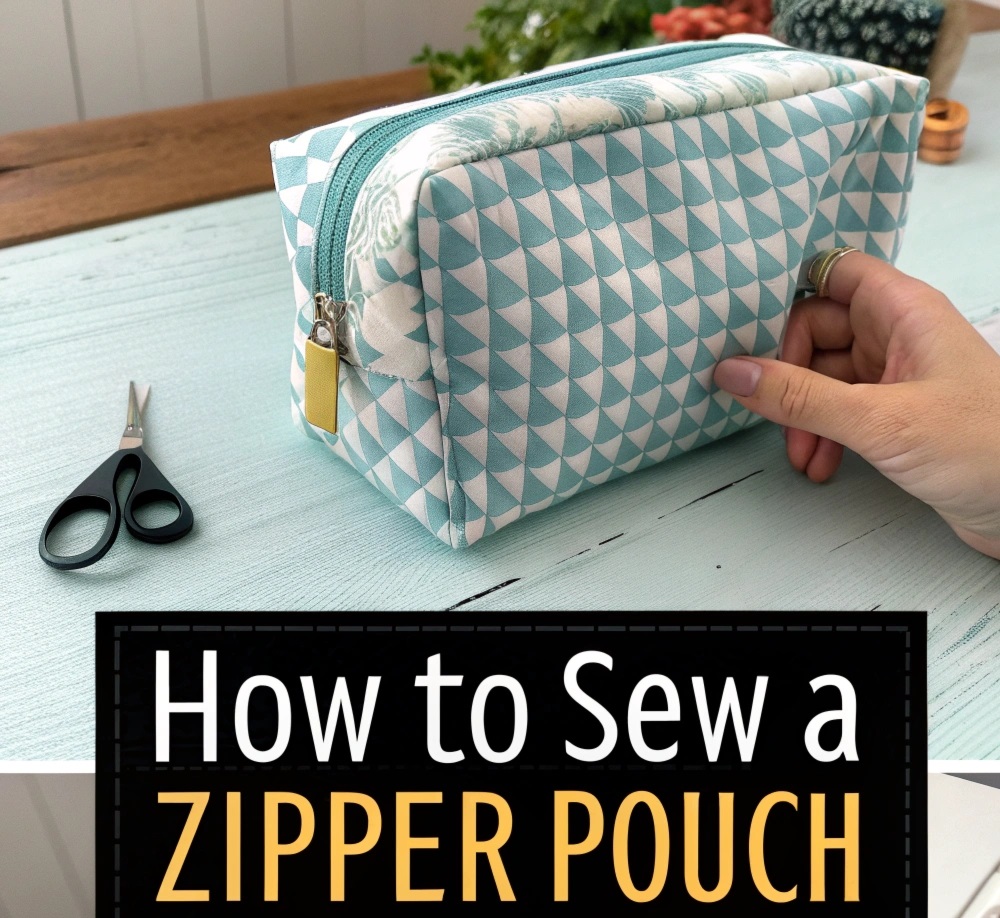
Okay, I’m just going to say it — zippers used to terrify me. Every time I sat down at my sewing machine and thought about putting one in, I’d suddenly find a hundred other things to do. Reorganize my thread drawer. Re-iron fabric I’d already ironed. Make a cup of tea. Anything to avoid that zipper.
Then one afternoon I finally decided enough was enough. I sat down, watched a few tutorials, and made my first zipper pouch. And honestly? I wanted to kick myself for waiting so long. It was so much simpler than I thought. So today I’m walking you through exactly what I did — step by step — because if I can do this, you absolutely can too.
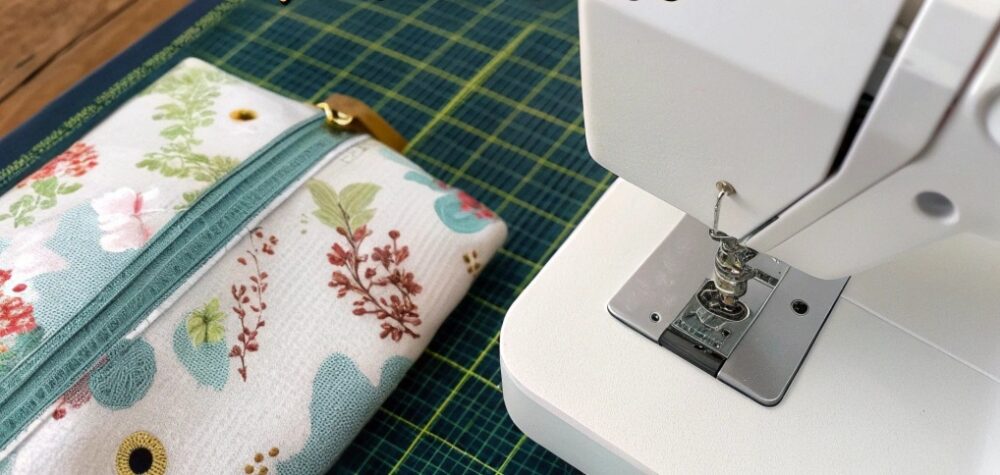
What You’ll Need Before You Start
One of the things I love about this project is how short the supply list is. You probably already have most of this at home. Here’s what I gathered before I started:
Fabric: You’ll need two pieces of outer fabric and two pieces of lining fabric. For a nice standard-sized pouch, I cut all four pieces to 10.5 inches by 6.5 inches. That gives you a pouch that’s practical without being too bulky. If you want something smaller or larger, you can absolutely adjust — just keep both outer pieces the same size and both lining pieces the same size.
Zipper: I used a 9-inch zipper, which measured about 10.5 inches from end to end (including the fabric tails). The golden rule here is that your zipper should be at least one inch shorter than the width of your pouch. So for a 9-inch wide pouch, use an 8-inch zipper. I’ll explain why in a minute.
Everything else: A sewing machine, a zipper foot (this is non-negotiable — more on this shortly), thread, an iron, some clips or pins, scissors, and here’s a little pro tip I picked up — a glue stick or transparent tape. That one little trick completely changed the game for me.
Optional but lovely: a small piece of fusible fleece to iron onto the wrong side of your outer fabric. It gives your pouch a little structure and makes it feel more polished.
Let’s Talk About the Zipper Foot (Just For a Moment)
Before I dive into the steps, I have to talk about the zipper foot because it genuinely made everything click for me. A zipper foot is a narrow presser foot that lets you sew right next to the zipper teeth without the foot getting in the way. Most sewing machines come with one, and if you’ve never used it before, this is your moment.
Here’s the thing about that zipper pull — that little metal slider — it will get in your way when you’re sewing. The trick is simple: sew a little bit past the pull to start, leave your needle in the down position, raise your presser foot, and slide the pull out of the way. Then lower the presser foot and continue sewing. The first time I did this, it felt like I’d discovered a secret. Now it feels like second nature.
Also — and this is something I can’t stress enough — check that your needle won’t hit the zipper foot when you first install it. Just lower the needle slowly by hand to make sure it clears the foot. Sounds obvious, but I almost broke a needle my first time by skipping this step.
Step 1: Cut Your Fabric and Iron It
Cut your four fabric pieces (two outer, two lining), all the same size. Press everything with your iron so you’re working with nice flat pieces. If you’re using fusible fleece, now’s the time to iron it to the wrong side of your outer pieces, bumpy/glue side down.
Step 2: The Zipper Sandwich (This Is Where the Magic Happens)
Here’s the part that sounds confusing but is actually really intuitive once you see it. You’re going to make what’s called a “zipper sandwich.”
Take one lining piece and lay it face up on your table. Now lay your zipper face up on top, lining up the zipper’s long edge with the top edge of the fabric. Then take one outer fabric piece and lay it face down right on top of everything. You should have three layers now: lining (face up), zipper, outer fabric (face down). The two fabric pieces are essentially hugging the zipper between them, right sides together.
Clip it all in place — this is where those wonder clips or binder clips come in handy. Before I discovered the tape trick, I always used clips, and they work great. But running a thin strip of transparent tape or a thin line of washable glue stick along the zipper edge? Honestly even better. It holds everything flat and doesn’t shift while you sew.
Now stitch along the top edge using your zipper foot. Use a 1/2-inch seam allowance, which keeps you safely away from the metal zipper stops (sewing over those is the quickest way to break a needle — learned that the hard way!). Backstitch at the beginning and end.
Step 3: Repeat on the Other Side
Flip everything over and repeat the exact same process on the other side of the zipper with your second outer piece and second lining piece. Same technique: lining face up, zipper face up on top, outer fabric face down — clip, tape, stitch.
Step 4: Press and Topstitch
Open everything up, press the seams away from the zipper with your iron, and then do a row of topstitching on each side close to the zipper fold. This flattens everything out and gives your pouch that clean, professional look. I like to increase my stitch length slightly for topstitching — somewhere around a 4 — so the stitches really show up as a nice design detail.
Step 5: Sew the Body (Don’t Forget to Unzip!)
Okay, this is the step that trips up almost every beginner, and I’ll be honest — I fell right into this trap my first time. Before you sew the body of the pouch, open your zipper at least halfway. If you don’t, you will finish sewing, go to turn the pouch right side out, and realize you have no way to get inside. It’s genuinely deflating. So: open that zipper.
Now arrange your pieces so the two outer fabric pieces are right sides together, and the two lining pieces are right sides together. You want the zipper to be snuggled in the middle, and press the zipper teeth toward the lining side.
Pin or clip all the way around. Leave a 3 to 4 inch opening along the bottom of the lining — this is your turning gap, and you need it to flip the whole thing right side out.
Sew around all the edges with a 1/2-inch seam allowance, pivoting at the corners. When you get to the area near the zipper, go slowly. Hand-crank your machine a stitch or two if the bulk is too much — it helps to have control in those tricky spots.
Step 6: Clip, Turn, and Finish
Clip the corners (snip diagonally, close to — but not through — the stitching). This removes the bulk so your corners poke out sharp and neat.
Now reach into that opening in the lining and pull the whole pouch through. Use a blunt turning stick, pencil, or even a chopstick to really push the corners out from the inside.
Close the lining opening by folding the raw edges inward and either hand-stitching it closed with a ladder stitch, or simply topstitching right across it on your machine. Tuck the lining back inside, poke all the corners into place, give it a good press, and zip it up.
That’s it. You made a zipper pouch.
A Few Bonus Tips That Made a Big Difference for Me
One thing I started doing that instantly improved my pouches: making zipper tabs at each end of the zipper. You just fold a small rectangle of fabric (about 1.5 inches by 2 inches), press it, and sew it over each end of the zipper before you assemble the pouch. It gives the ends a finished, tidy look and keeps the zipper teeth from poking through at the edges.
Also, if your zipper is too long, don’t panic — you can shorten it! Mark where you want the new stop to be, sew a wide zigzag with a very short stitch length right over that spot, then trim off the excess. If you’re using a nylon coil zipper, you can cut right through it. Metal zippers need a bit more care — cut between the teeth rather than through them.
Your First Pouch Won’t Be Perfect — and That’s the Point
I want to be honest with you: my first zipper pouch had some wobbly topstitching and one slightly puckered corner. But I zipped it and unzipped it about thirty times just because I made it. It worked. There was a zipper in there, and it zipped. After all that avoidance, I’d done the thing.
Now I make these pouches for gifts, for craft fairs, for holding all the little things at the bottom of my bag that I can never find. Once you get the hang of it — and it won’t take long — you’ll wonder what you were ever worried about.
📺 Watch These Videos to See It in Action
These tutorials are what I leaned on when I was learning, and they’re genuinely excellent:
🎬 How To Make a Simple Zipper Pouch — Jan Howell
Over 1.3 million views for a reason. Jan walks through everything at a calm, beginner-friendly pace with great tips on zipper tabs, glue sticks, and boxed corners.
🎬 How to Sew a Lined Zipper Pouch — MADE Everyday
Over 3.3 million views! This one breaks down the “zipper sandwich” method with super clear explanations and great pressing tips.
🎬 How to Sew a Zipper Pouch — Melly Sews
Over 1.6 million views and a fantastic tip on using transparent tape instead of pins to keep your zipper flat. Game-changer.
Now go find some fabric you love, pull out that zipper, and make something wonderful. You’ve got this. 🧵
Sarah Anderson . J
I’m the mom behind Wise Mom Blogger, where everyday creativity meets real-life motherhood. I share easy DIY crafts, cozy knitting and crochet projects, beginner-friendly sewing ideas, and family-tested recipes—plus quick baking hacks that make homemade feel doable on busy days.