Your trash can is holding more than trash. Toilet paper rolls, egg cartons, old newspapers and empty bottles all have a second life waiting inside them. These twelve waste material craft ideas turn everyday scraps into pencil holders, planters, jewelry and decor pieces you would actually want on a shelf. Every project uses items that are already sitting in your recycling bin or kitchen drawer, so there is nothing new to buy. Kids, teens and adults can all find something here, whether the goal is a rainy afternoon activity, a school project, or a quiet weekend craft session at home.
Quick Answer
The best waste material craft ideas use toilet paper rolls, egg cartons, plastic bottles, newspaper and bottle caps to make pencil holders, planters, flowers, jewelry and wall art. Most projects cost nothing beyond paint or glue and take under an hour.
| Craft | Waste Material | Skill Level |
| Pencil Holder | Toilet paper rolls | Easy |
| Egg Carton Flowers | Egg cartons | Easy |
| Seed Pots | Newspaper | Easy |
| Bird Feeder | Plastic bottle | Medium |
| Cardboard City | Cardboard box | Medium |
| Bottle Cap Magnets | Bottle caps | Easy |
| Paper Bead Jewelry | Old magazines | Medium |
| Herb Planters | Tin cans | Easy |
| Jellyfish | Paper plate | Easy |
| Sock Puppets | Old socks | Easy |
| Spoon Flower Art | Plastic spoons | Medium |
| Sweater Mittens | Old sweater | Involved |
| CD Coasters | Old CDs | Easy |
| Desk Organizer | Cereal boxes | Medium |
Why Craft With Waste Materials?
Before jumping into the list, it helps to know why these projects work so well for both kids and adults. Waste material crafts cost close to nothing since the main ingredient is already sitting in your home. They teach children to look at packaging differently, noticing shapes and textures instead of tossing everything straight into the trash. For adults, the same habit turns into a relaxing, low pressure hobby that does not require a trip to the craft store. None of the ideas below need anything beyond basic supplies like scissors, glue and paint, so a full afternoon of crafting rarely costs more than a couple of dollars. Start by setting aside a box in the kitchen or laundry room for clean packaging as it comes in, so you always have a stash ready when the mood strikes. Rinse anything that held food before storing it, and let it dry fully so glue and paint stick properly later.
1. Toilet Paper Roll Pencil Holder
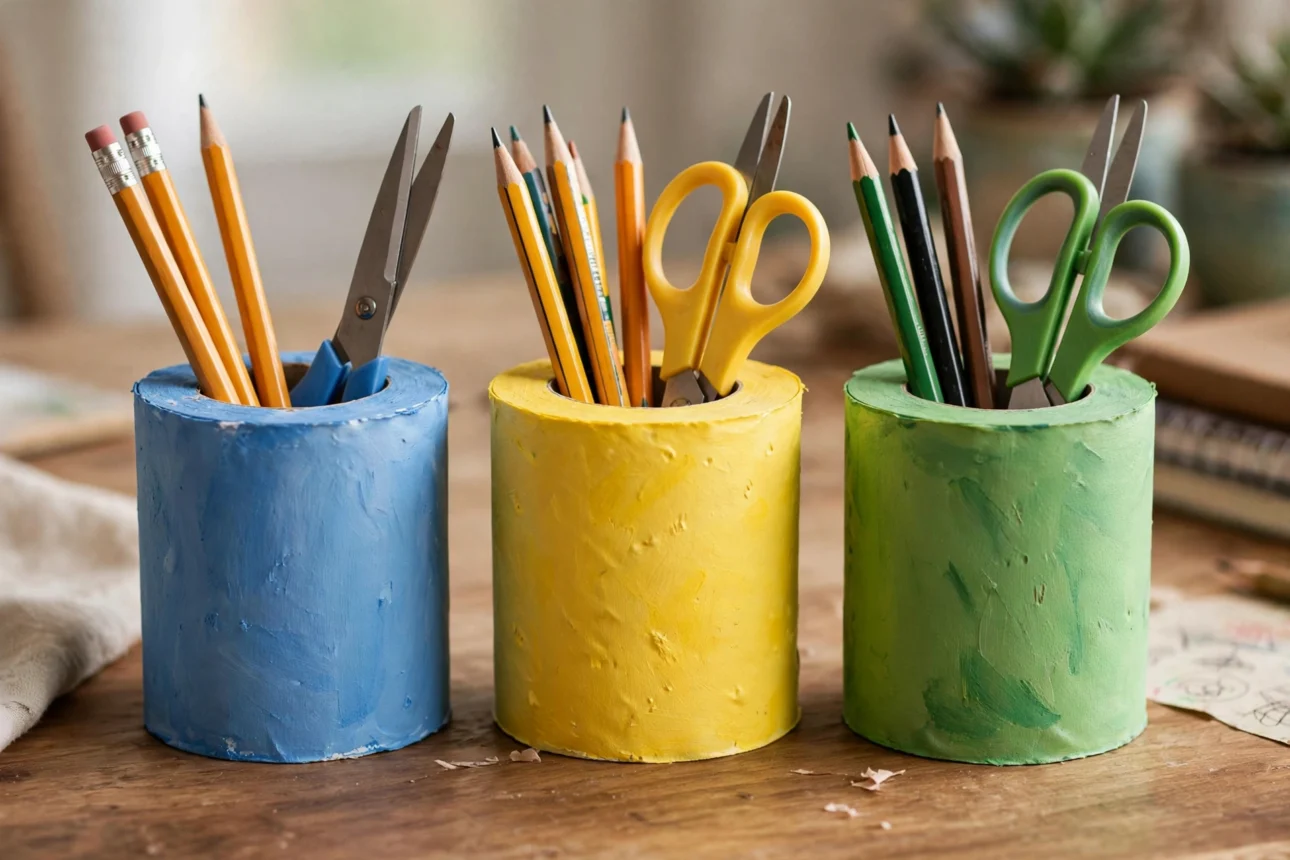
Save a handful of empty toilet paper rolls and stand them upright inside a shoebox lid or a taped ring to hold them together. Paint each roll a different color, or wrap them in scraps of leftover wrapping paper for a quicker finish. Let the paint dry fully before gluing the rolls side by side so they do not stick to each other. This one turns clutter into a working desk organizer in under twenty minutes, and it holds pens, markers and scissors just as well as a store bought one.
2. Egg Carton Flowers
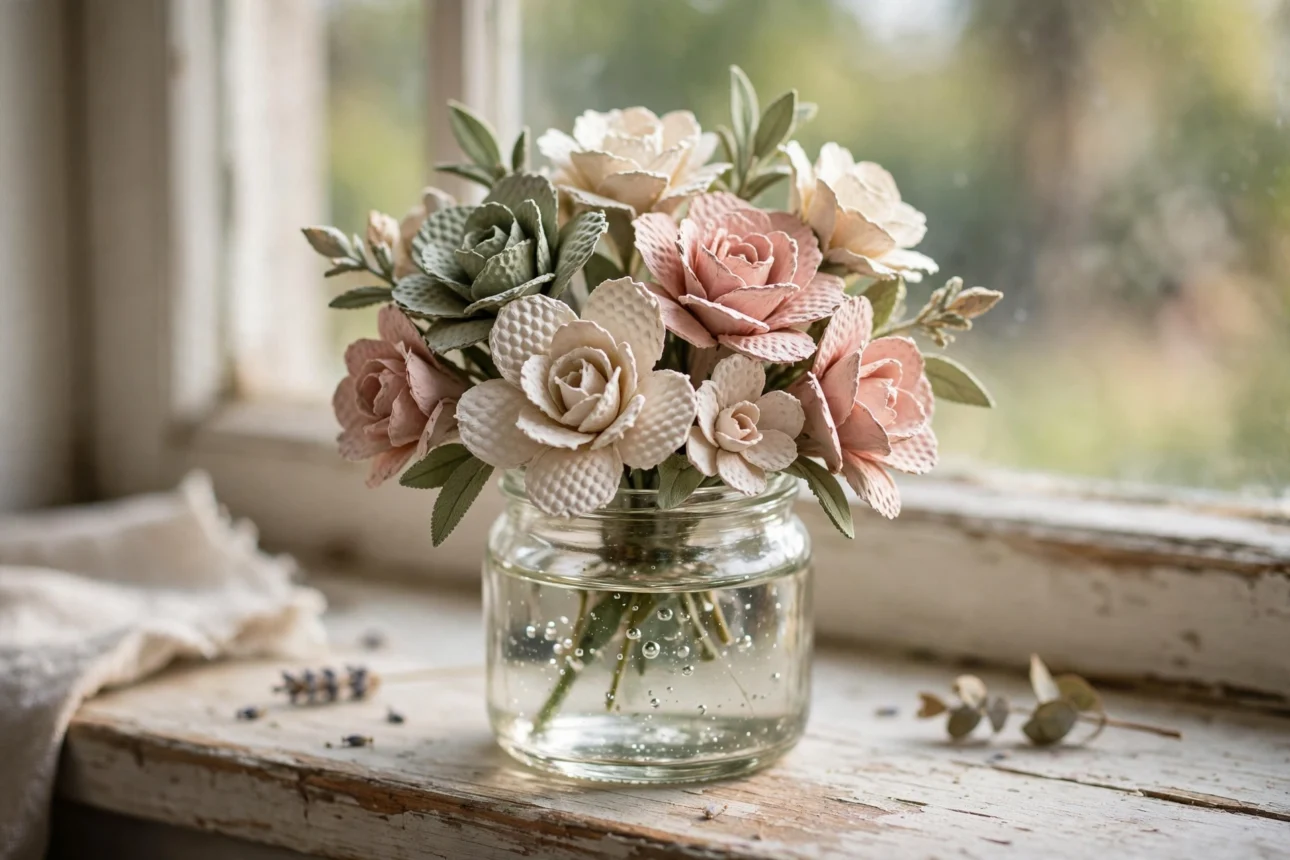
Cut the cups out of a cardboard egg carton, then trim the edges of each cup into rounded or pointed petals. Paint them in soft pastel shades and let them dry, then glue a button or a bead in the center of each flower. Attach a pipe cleaner or a skewer as a stem and group several together in a jar. A dozen egg cups makes a full bouquet, and none of it wilts.
3. Newspaper Seed Pots
Wrap a strip of newspaper around a small glass or can, folding the bottom in like a gift wrap fold, then slide the paper pot off the mold. Fill it with soil and a few seeds. Because the paper is thin and untreated, the whole pot goes straight into the ground when the seedling is ready to transplant, so there is no plastic tray to throw away later. It costs nothing and works for tomatoes, herbs or flower seedlings alike.
4. Plastic Bottle Bird Feeder
Wash out an empty plastic bottle and let it dry. Cut two small holes near the base, just big enough to slide a wooden spoon or a chopstick through as a perch, then poke a slightly larger hole above each perch for the birdseed to spill out slowly. Punch two holes near the neck, thread string through them, and hang the feeder from a tree branch. Fill it with birdseed and watch who stops by. This project keeps a bottle out of the recycling bin and puts it to work outside instead.

5. Cardboard Box City for Kids
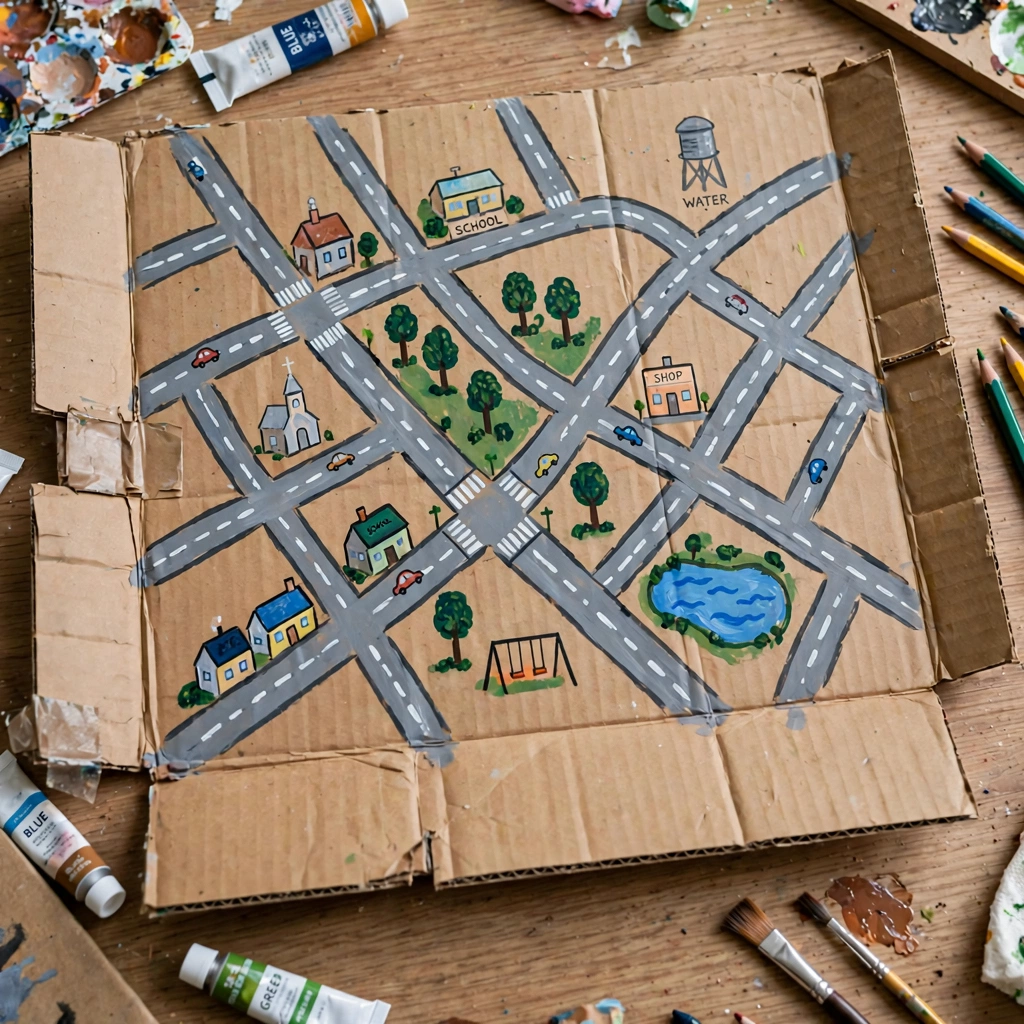
Flatten a large cardboard box and draw roads, a river, and building outlines across it with a marker. Smaller boxes and toilet paper rolls stand in as houses, shops and towers once they are painted and glued into place. Let kids decide what goes where, whether it is their own street or a made up town. The whole board rolls up flat for storage between play sessions, so it does not take over a room the way plastic toy sets do.
6. Bottle Cap Magnets
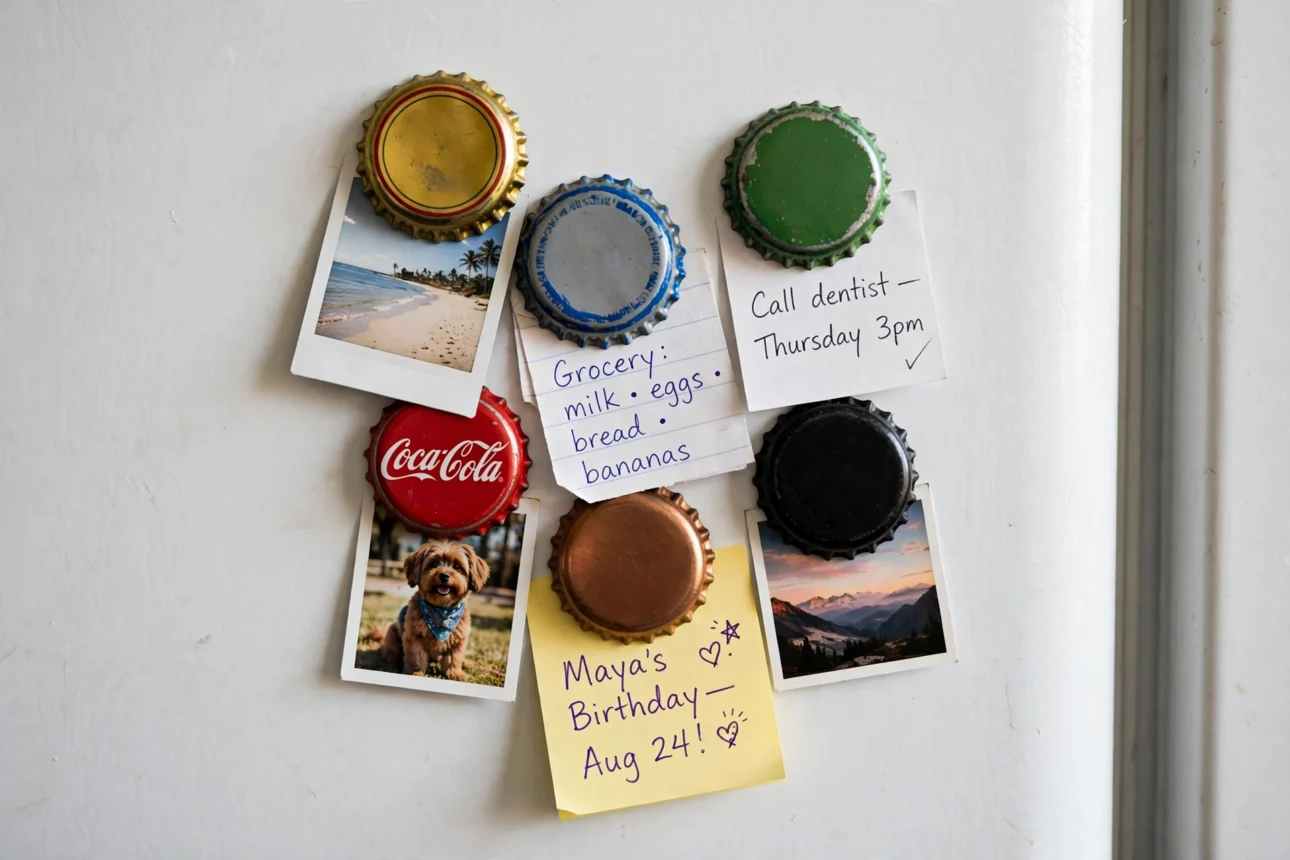
Rinse a collection of metal or plastic bottle caps and let them dry completely. Paint the inside of each cap, or glue in a small photo, sticker or pressed flower cut to size. Once the decoration is dry, glue a small round magnet to the back of each cap. A row of these on the fridge holds notes and photos, and each one takes only a few minutes to finish once you have a stack of caps saved up.
7. Magazine Paper Bead Jewelry
Cut long triangle strips from old magazine pages, wide at one end and pointed at the other. Starting at the wide end, roll each strip tightly around a toothpick, adding a dab of glue near the pointed tip to hold it closed. Slide the finished bead off the toothpick once it is dry. A coat of clear nail polish or Mod Podge keeps the colors from fading. String a dozen or so beads onto elastic cord for a bracelet, or use a longer cord for a necklace.

8. Tin Can Herb Planters
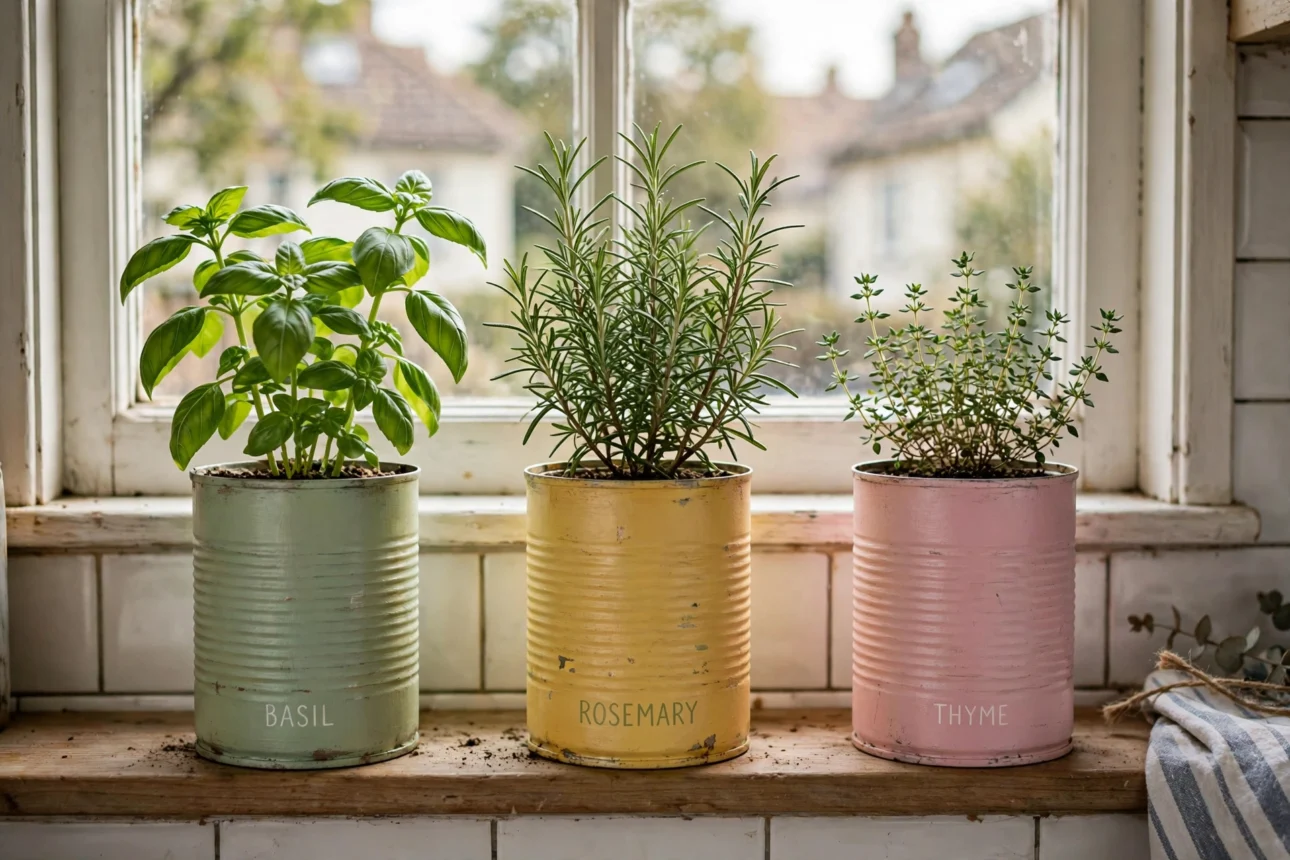
Remove the label from a clean, empty food can and check that the inside edge is not sharp before using it. Paint the outside in a solid color, or wrap it in twine or scrap fabric for texture. Punch a small drainage hole in the bottom with a hammer and nail, then fill with potting soil and a basil, mint or parsley seedling. A row of these on a windowsill gives you fresh herbs without a single plastic pot bought new.
9. Paper Plate Jellyfish
Cut a paper plate in half and trim the flat edge into a wavy line to look like tentacles. Paint the rounded top in bright colors and add googly eyes near the center. Glue on a few paper streamers or torn tissue paper strips below the wavy edge for extra tentacles that flutter when the jellyfish moves. Hang a few from the ceiling with string and they sway gently, almost like they are floating.
10. Sock Puppets
Pull an odd sock over your hand with the heel facing up to form the puppet’s mouth. Sew or glue two buttons above the heel for eyes, and add a strip of red felt inside the toe for a tongue if you want extra detail. Yarn scraps glued along the top make hair, and a few stitches at the sides secure a scarf or bowtie made from fabric remnants. This uses up socks that have lost their match and turns story time into a small production.
11. Plastic Spoon Flower Wall Art
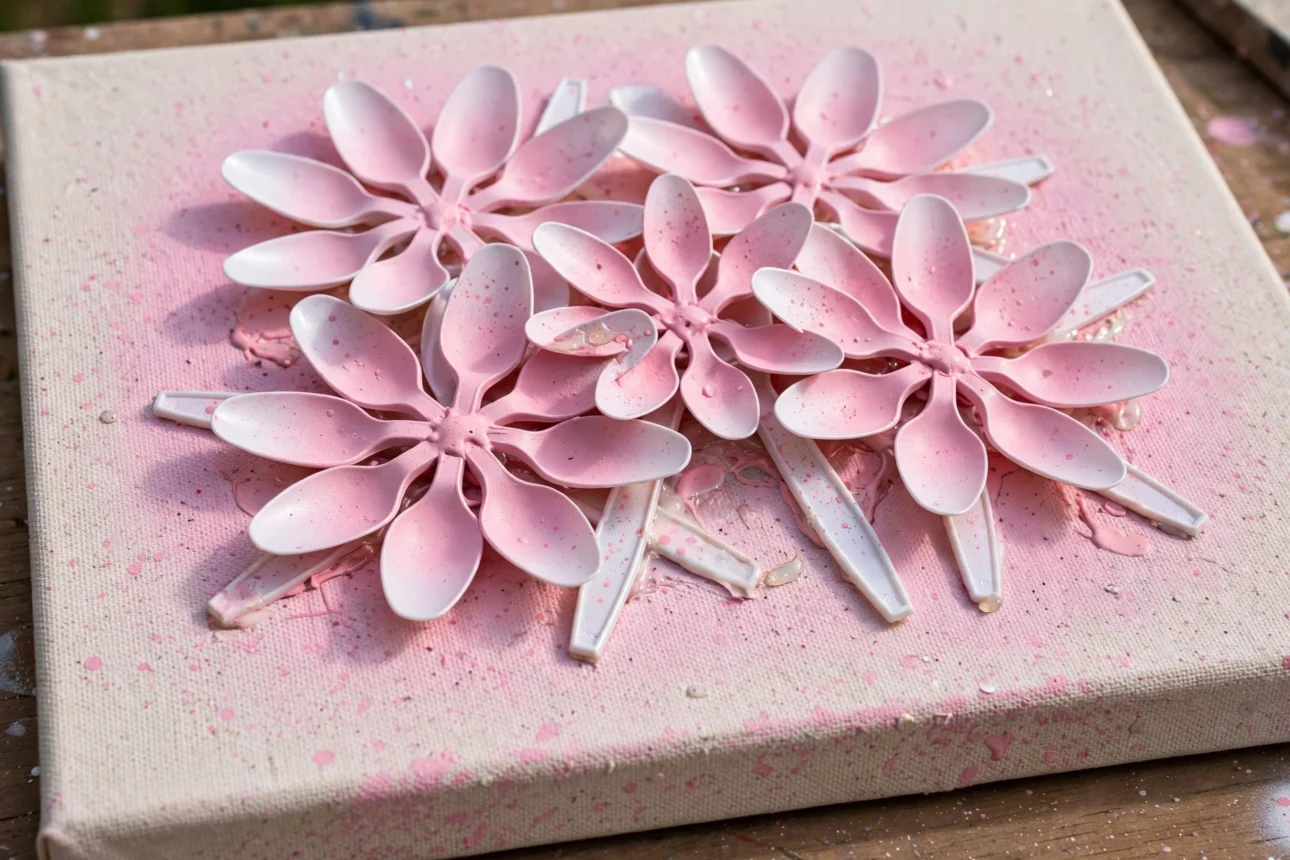
Cut the handles off a bag of disposable plastic spoons, keeping just the rounded bowl of each one. Arrange the spoon heads in a circle on a piece of cardboard or canvas, overlapping slightly like petals, then glue them in place. Once the glue sets, spray paint the whole flower in one solid color so the seams between spoons disappear. A cluster of three or four flowers in different sizes makes a textured piece of wall decor that costs almost nothing.
12. Old Sweater Mittens
Lay a worn out sweater flat and trace a mitten shape onto the fabric twice, using an existing pair of gloves as a guide for size. Cut out four pieces total, two for each hand, and pin the front and back of each mitten together with the right sides facing in. Sew around the edge, leaving the wrist open, then turn each mitten right side out. Add a button or a scrap of ribbon at the wrist for a finished look. A single old sweater is usually enough for one full pair, and the ribbed cuff of the original sleeve often becomes the wrist opening, which saves a sewing step.
13. CD Coasters
Old CDs that no longer play still catch the light beautifully once they are cleaned. Trace the CD onto felt or thick fabric and cut two circles per coaster, slightly smaller than the disc itself. Glue one fabric circle to each side of the CD, covering the center hole, and press under a heavy book while the glue dries flat. Stack four or five together and they make a useful, shiny set for a coffee table. Old jewel cases work the same way if you want matching drink coasters and a display stand.
14. Cereal Box Desk Organizer
Empty cereal boxes are sturdier than most people give them credit for. Cut one at an angle, tall in the back and short in the front, to make a slanted magazine holder, or leave a second box uncut and simply trim the top edge into a wavy line for a pen and paper caddy. Cover the outside with leftover wrapping paper, fabric, or a solid coat of paint so the original printing does not show through. Glue two or three of these side by side and label each one for mail, bills, or homework. It is a fast way to bring order to a cluttered desk without buying a single plastic tray.
FAQ
What is the easiest waste material craft for a beginner?
Bottle cap magnets are the easiest starting point. They need no sewing or cutting skill, just paint and a magnet, and each one finishes in under ten minutes.
Which waste materials are safest for young children to use?
Paper plates, egg cartons, newspaper and toilet paper rolls are the safest choices, since they need only scissors and glue. Tin cans and glass need an adult to smooth sharp edges first.
Can these crafts be sold or given as gifts?
Yes, herb planters, paper bead jewelry and spoon flower wall art all look finished enough to give away or sell at a school fair, especially once painted in a consistent color palette.
Do I need special tools for these projects?
Most need only scissors, glue and paint. A hammer and nail are useful for punching drainage holes in tin cans, and a needle and thread help with the sweater mittens.
How long do most of these crafts take to finish?
Simple projects like magnets, jellyfish and seed pots take fifteen to twenty minutes. The bird feeder, paper beads and mittens take closer to forty five minutes to an hour, mostly because of drying time between steps.
What should I avoid using in kids’ waste material crafts?
Skip anything with sharp metal edges, broken glass, or chemical residue such as old batteries or cleaning product containers. Stick to food packaging, paper, and softened cardboard for anyone under age eight.
Where should I store waste materials before crafting with them?
A labeled bin near the recycling area works well. Sort roughly by type, paper and cardboard in one section, plastic and caps in another, so you are not digging through everything to find what a project needs.
References
- MomJunction, “26 Creative Out-Of-Waste Material Crafts For Kids” (2025)
- DailyMom, “Best Out of Waste: Easy and Amazing Waste Material Craft Ideas” (2026)
- ParentCircle, “Handmade Waste Material Art and Craft for Kids” (2022)
- FirstCry Parenting, “30 Easy To Do Waste Material Craft Ideas for Children” (2025)
- EuroKids, “30+ Fun and Creative Out of Waste Craft Ideas for Kids” (2026)

Sarah Anderson . J
I’m the mom behind Wise Mom Blogger, where everyday creativity meets real-life motherhood. I share easy DIY crafts, cozy knitting and crochet projects, beginner-friendly sewing ideas, and family-tested recipes—plus quick baking hacks that make homemade feel doable on busy days.